Table of Contents
Advertisement
Quick Links
Advertisement
Table of Contents

Related Manuals for Sony ST18i


Summary of Contents for Sony ST18i
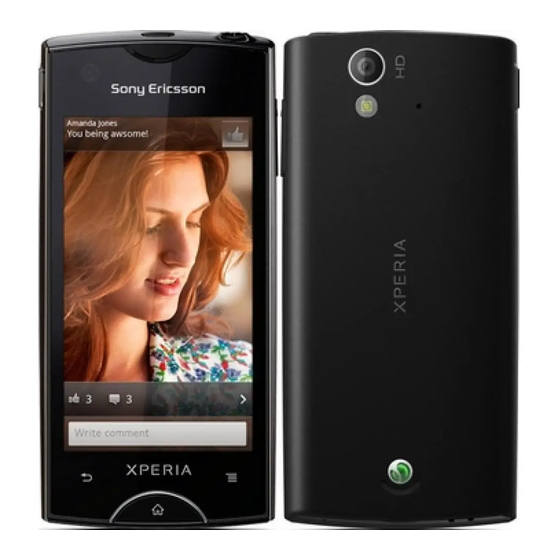
- Page 1 Xperia ray ST18i User guide...
-
Page 2: Table Of Contents
Contents Important information..............6 Android™ – what and why?............7 Applications..................7 Getting started................8 Assembly....................8 Turning the phone on and off .............9 Screen lock..................9 Setup guide..................10 Accounts and services..............10 Getting to know your phone............11 Phone overview.................11 Using the keys..................12 Battery....................12 Using the touchscreen..............14 Home screen..................16 Accessing and using applications............18 Status and notifications..............20... - Page 3 Communicating with your contacts...........40 Sharing your contacts...............40 Backing up contacts.................40 Messaging...................42 Using text and multimedia messaging..........42 Text and multimedia message options..........43 Email....................44 Using email..................44 Using email accounts................47 Timescape™................48 Using Timescape™................48 Timescape™ settings................49 PlayNow™ service..............50 Before you download content............50 PlayNow™..................50 Getting organised...............51 Calendar...................51 Alarm clock..................51 Synchronising data on your phone...........54...
- Page 4 Switching between the speaker and the handsfree......67 Identifying radio tracks using TrackID™..........67 Taking photos and recording videos........68 Camera controls overview..............68 Using the still camera................68 Using the video camera..............74 3D camera...................78 3D Camera overview.................78 Viewing photos and videos in Gallery........80 BRAVIA® ENGINE................80 Working with albums.................81 Working with photos in Gallery............82 Viewing photos in 3D Album.............85...
- Page 5 Troubleshooting...............104 My phone is not working as expected..........104 Resetting the phone................104 I cannot charge the phone..............104 No battery charging icon appears when phone starts charging..104 The battery performance is low............104 I cannot transfer content between my phone and the computer, when using a USB cable..............105 I cannot use Internet-based services..........105 Error messages................105...
-
Page 6: Important Information
Important information Please read the Important information leaflet before you use your mobile phone. Some of the services and features described in this User guide are not supported in all countries/regions or by all networks and/or service providers in all areas. Without limitation, this applies to the GSM International Emergency Number, 112. -
Page 7: Android™ - What And Why
Android™ – what and why? An Android™ phone can perform many of the same functions as a computer. But you can also adjust it to better suit your needs, to receive the information you want, and have fun at the same time. You can add and delete applications, or enhance them to improve functionality. -
Page 8: Getting Started
Getting started Assembly To remove the battery cover • Insert the tip of your finger firmly into the opening on the bottom side of the phone, between the phone and the battery cover. Then lift up the cover slowly but firmly. Do not use sharp objects that may damage parts of the phone. -
Page 9: Turning The Phone On And Off
To attach the battery cover Place the cover over the back of the phone so that the camera lens hole in the cover fits over the camera lens. Press down firmly on all edges of the battery cover to make sure it gets attached tightly. -
Page 10: Setup Guide
To pause an audio track from the lockscreen To activate the screen, press the home key or briefly press the power key When the music player controls appear, tap To change the currently playing audio track from the lockscreen To activate the screen, press the home key or briefly press the power key When the music player controls appear, tap To unlock the screen... -
Page 11: Getting To Know Your Phone
Getting to know your phone Phone overview 1. Front camera lens 11. Back key 2. Ear speaker 12. Camera LED light 3. Power key 13. Main camera lens 4. Headset connector 14. Second microphone 5. Light sensor 15. Connector for charger/USB cable 6. -
Page 12: Using The Keys
Using the keys Back • Go back to the previous screen • Close the on-screen keypad, a dialog box, an options menu, or the Notification panel Home • Go to the Home screen • Activate the screen if the screen goes dark •... -
Page 13: Notes On Usb Cable Usage And Battery Charging
340 hours in UMTS network (the test results are based on GSMA battery life test technology). Use only Sony Ericsson branded original batteries intended for use with your mobile phone. If you use other batteries you may not be able to charge your phone. -
Page 14: Using The Touchscreen
Your phone screen is made from glass. Do not touch the screen if the glass is cracked or shattered. Avoid trying to repair a damaged screen yourself. Glass screens are sensitive to drops and mechanical shocks. Cases of negligent care are not covered by the Sony Ericsson warranty service. - Page 15 To zoom • When available, tap to zoom in or out. You may have to drag the screen (in any direction) to make the zoom icons appear. To zoom with two fingers • Place two fingers on the screen at once and pinch them together (to zoom out) or spread them apart (to zoom in).
-
Page 16: Home Screen
To flick • To scroll more quickly, flick your finger in the direction you want to go on the screen. You can wait for the scrolling movement to stop by itself, or you can stop it immediately by tapping the screen. Sensors Your phone includes a light sensor and a proximity sensor. -
Page 17: Rearranging Your Home Screen
The items in the bar at the bottom of the screen are always available for quick access. To go to the Home screen • Press To browse the Home screen • Flick right or left. To share an item from your Home screen Press to open your Home screen. -
Page 18: Accessing And Using Applications
To add a folder to the Home screen From your Home screen, press Tap Add > Folder. Enter a name for the folder and tap Done. Drag and drop an item on top of another item on your Home screen to create a folder automatically. -
Page 19: Opening And Closing Applications
To open the Application screen From your Home screen, tap • To browse the Application screen • Open the Application screen, then flick right or left. To create a shortcut to an application on the Home screen From your Home screen, tap Touch and hold an application until it appears on your Home screen, then drag it to the desired location. -
Page 20: Status And Notifications
To open a menu in an application • While using the application, press A menu is not available in all applications. Rearranging your Application screen Move the applications around on the Application screen according to your preferences. To arrange applications on the Application screen From your Home screen, tap to go to the Application screen. - Page 21 To open the Notification panel • Drag the status bar downwards. To close the Notification panel • Drag the tab at the bottom of the Notification panel upwards. To open a running application from the Notification panel • Tap the icon for the running application to open it. To open the phone settings menu from the Notification panel •...
-
Page 22: Phone Settings Menu
Phone settings menu View and change your phone settings from the Settings menu. To access the phone settings From the Home screen, tap Tap Settings. Typing text Use either the Phonepad or the on-screen keyboard to enter letters, numbers and other characters. - Page 23 To enter text using the Phonepad When using the Phonepad, you can choose from two input options: • When appears in the Phonepad, tap each character key only once, even if the letter you want is not the first letter on the key. Tap the word that appears or tap to view more word suggestions and select a word from the list.
-
Page 24: Chinese Input
Paste text only appears when you have text stored on the clipboard. To edit text in landscape orientation When you enter text, touch and hold the text field until Edit... appears. Select the text you want to work with, then tap Edit... and select an option. To paste text from the clipboard, you can also hold the text field until Paste appears, then tap Paste. -
Page 25: Adjusting The Volume
character candidates that started with that stroke are displayed in the candidate row. Using components is a fast method for entering complex characters. Pinyin input Select the required Pinyin letters, and the phone will make various proposals on the screen, according to the pronunciation rules of Mandarin. Adjusting the volume You can adjust the ringtone volume for phone calls and notifications as well as for music and video playback. -
Page 26: Ringtone Settings
To set the time zone From your Home screen, tap Find and tap Settings > Date & time. Unmark the Automatic time zone checkbox, if it is marked. Tap Select time zone. Select an option. To set the date format From your Home screen, tap Find and tap Settings >... -
Page 27: Memory
To adjust the idle time before the screen turns off From your Home screen, tap Find and tap Settings > Display > Sleep. Select an option. To turn off the screen quickly, briefly press the power key To keep the screen active while the phone is charging From the Home screen, tap Find and tap Settings >... -
Page 28: Stereo Portable Handsfree
Your phone supports a microSD™ memory card, which is used for media content. This type of card can also be used as a portable memory card with other compatible devices. Without a memory card you cannot use the camera, nor can you play or download music files and video clips. -
Page 29: Turning Off Data Traffic
To download Internet and messaging settings From your Home screen, tap Find and tap Settings > Xperia™ > Internet settings. To view the current Access Point Name (APN) From the Home screen, tap Find and tap Settings > More… > Mobile networks. Tap Access Point Names. -
Page 30: Network Settings
Network settings Your phone automatically switches between networks depending on available networks over different locations. Initially, your phone is configured to use the fastest mobile network mode available for data. But you can configure your phone manually to use only a slower 2G network mode for data, to extend the life of your battery between charges. -
Page 31: Calling
Calling Emergency calls Your phone supports international emergency numbers, for example, 112 or 911. You can normally use these numbers to make emergency calls in any country, with or without the SIM card inserted, if you are within range of a network. To make an emergency call From your Home screen, tap Find and Tap Phone. -
Page 32: Voicemail
To change the ear speaker volume during a call • Press the volume key up or down. To turn on the loudspeaker during a call • To mute the microphone during a call • To activate the screen during a call •... -
Page 33: Multiple Calls
To call your voicemail service From your Home screen, tap Find and tap Phone. Touch and hold 1. Multiple calls If you have activated call waiting, you can handle multiple calls at the same time. When it is activated, you will be notified by a beep if you receive another call. To activate or deactivate call waiting From the Home screen, tap Find and tap Settings >... -
Page 34: Call Settings
To release a participant from a conference call During an ongoing conference call, tap the button showing the number of participants. For example, tap 3 participants if there are three participants. next to the participant you want to release. To end a conference call •... - Page 35 To access the list of accepted call recipients From your Home screen, tap Find and tap Settings > Call settings > Fixed Dialing Numbers > Fixed Dialing Numbers. This is an Internet version of this publication. © Print only for private use.
-
Page 36: Contacts
Contacts Use the Contacts application to store and manage all your numbers, email addresses, and other contact data in one place. Just tap on a contact to see all communications with that contact in one easy overview. You can add new contacts in your phone and synchronise them with contacts saved in ®... -
Page 37: Transferring Contacts Using Synchronisation Accounts
To transfer contacts to your new phone using PC Companion Make sure that PC Companion is installed on your PC. Open the PC Companion program on the PC, then click Contacts Setup and follow the instructions to transfer your contacts. Transferring contacts using an Apple®... -
Page 38: Contacts Screen Overview
Contacts screen overview Tap here to create a contact Contact search field Touch a contact to view its details Icon shows contact's status on instant messaging services Alphabetical index for browsing contacts Tap a contact thumbnail to access the Quick Contact menu Shortcut tabs Managing your contacts You can create, edit and synchronise your contacts in a few simple steps. -
Page 39: Avoiding Duplicate Entries In The Contacts Application
To edit a contact From the Home screen, tap , then tap Touch and hold the contact you want to edit, then tap Edit contact. Edit the desired information. When you are finished, tap Done. To associate a picture with a contact From your Home screen, tap , then tap Touch and hold the contact you want to edit, then tap Edit contact. -
Page 40: Communicating With Your Contacts
To mark or unmark a contact as a favourite From the Home screen, tap , then tap Tap the contact you want to add to or remove from your favourites. Communicating with your contacts To search for a contact From your Home screen, tap , then tap Enter the first few letters of the contact name in the Search field. - Page 41 To export contacts to a SIM card From your Home screen, tap , then tap Press , then tap Back up contacts > SIM card. Mark the contacts you want to export, or tap Mark all if you want to export all your contacts.
-
Page 42: Messaging
Messaging Using text and multimedia messaging You can send and receive text messages from your phone using SMS (Short Message Service). If your subscription includes MMS (Multimedia Messaging Service), you can also send and receive messages that contain media files, for example, pictures and videos. The number of characters you can send in a single text message varies depending on the operator and the language you use. -
Page 43: Text And Multimedia Message Options
To delete a message From your Home screen, tap , then tap Messaging. Tap the desired conversation. Touch and hold the message you want to delete, then tap Delete message > Yes. To delete conversations From your Home screen, tap , then tap Messaging. -
Page 44: Email
Email Use the Email application in your phone to send and receive emails through your regular email account or through your corporate account. Or you can do both. Your phone can handle several email accounts at the same time. You can set up these accounts to run through one combined inbox, or through separate inboxes. - Page 45 To read your email messages From your Home screen, tap Find and tap . The inbox of your default email account appears. If you want to check another email account that you have set up on your phone, tap the bar containing , and select the account you want to check.
- Page 46 To search for emails From your Home screen, tap . Then find and tap . The inbox of your default email account appears. If you want to check another email account that you have set up on your phone, tap the bar containing , then select the account you want to check.
-
Page 47: Using Email Accounts
Using email accounts To add an extra email account in your phone From your Home screen, tap Find and tap Press , then tap Settings. Tap Add account. Enter the email address and password, then tap Next. If the settings for the email account cannot be downloaded automatically, complete the setup manually. -
Page 48: Timescape
Timescape™ Timescape™ collects all your communications into one integrated view. Events updates appear as tiles in a chronological flow on the screen. Browse the files to get a snack-size preview of events before choosing to open them and view the full content. Timescape™ also features an infinite button that gives you access to a range of content about the item you are currently viewing. -
Page 49: Timescape™ Settings
To view all communication with a contact in Timescape™ From your Home screen, tap Find and tap Timescape™. Tap a tile for an event related to a contact. . All communication with the contact appears. Tap or flick the filter items at the bottom of the screen to view communication with the contact through other media. -
Page 50: Playnow™ Service
PlayNow™ service You can use the PlayNow™ service to browse, purchase and download applications and games. The PlayNow™ service is not available in all countries. Before you download content Before you download, make sure that you have an Internet connection. Also, you may need to have a memory card inserted in your phone to download content. -
Page 51: Getting Organised
Getting organised Calendar Your phone has a calendar for managing your time schedule. To set the calendar view From your Home screen, tap , then find and tap Calendar. Press and select an option. To view multiple calendars From your Home screen, tap , then find and tap Calendar. - Page 52 To edit an existing alarm From your Home screen, tap Find and tap Alarms. Tap the alarm you want to edit. Tap Time. Scroll up or down to adjust the time. Tap Set. If desired, edit other alarm settings. Tap Done. The alarm time format displayed is the same as the format you select for your general time settings, for example, 12-hour or 24-hour.
- Page 53 To set alarms to sound when the phone is in silent mode From your Home screen, tap Find and tap Alarms, then press Tap Settings. Mark the Alarm in silent mode checkbox. To snooze an alarm when it sounds • When the alarm sounds, tap Snooze.
-
Page 54: Synchronising Data On Your Phone
Synchronising data on your phone You can sync contacts, email, calendar events, and other information with your phone from multiple email accounts, synchronisation services and other kinds of accounts, depending on the applications installed on your phone. Synchronising your phone with other information sources is an easy and practical way to stay up to date. -
Page 55: Synchronising Using Syncml
Synchronising using SyncML™ Synchronise your phone with an Internet server using SyncML™. View and manage contacts, calendar and bookmarks from your phone just as easily as you would from a computer. To set up a SyncML™ account in your phone From your Home screen, tap Find and tap Settings >... -
Page 56: Wlan
WLAN Using WLAN you can access the Internet wirelessly with your phone. Before using WLAN To be able to browse the Internet using a WLAN connection you need to search for and connect to an available WLAN network and then open the Internet browser. The signal strength of the WLAN network may differ depending on your phone's location. -
Page 57: Web Browser
Web browser Use your web browser to view and navigate web pages, add pages as bookmarks, and save pages for offline viewing. You can open up to 16 windows at the same time and switch among them easily. You can also request the desktop version of a web page if you don't want to view the mobile version. -
Page 58: Managing Bookmarks
To zoom in or out on a web page Use one of the following methods to zoom in or out on a web page: • Double-tap to zoom in on the web page, or double-tap again to zoom out. • Touch an area of the page with two fingers at once and spread them apart to zoom in, or pinch them together to zoom out. -
Page 59: Managing Text And Images
To bookmark a web page While you are viewing the web page, press Tap Save to bookmarks. If desired, enter a short name for the web page and select where you want to save the bookmark. When you're done, tap OK. To open a bookmark When the browser is open, flick downwards on the screen to make the search and address bar appear. -
Page 60: Multiple Windows
To copy text from a web page Touch and hold the text you want to copy until your phone vibrates. Tap , then tap Copy. To paste text into an email, text message or multimedia message, touch and hold the text field in the relevant application and tap Paste in the menu that appears. If the text to be copied is a link to another web page, a menu appears after your phone vibrates. -
Page 61: Browser Settings
To cancel an ongoing download When your phone starts downloading a file, drag down the status bar and tap the file you are downloading. Mark the checkbox beside the downloading file that you want to cancel. Browser settings You can change the browser settings and customise your browser view. For example, you can change the size of the text displayed to suit your needs, or you can clear cache, cookies, browser history, and other data linked to the websites you visit. - Page 62 To create text for auto-filling When the browser is open, press Tap Settings > General. Mark the Form auto-fill checkbox, if it is not already marked. Tap Auto-fill text, then enter text that you want to use for auto-filling on web forms, for example, your name and address.
-
Page 63: Music
Music Get the most out of your music player. Listen to and organise music, audio books and podcasts you have transferred to your memory card from a computer, or purchased and downloaded from online stores. Install the Media Go™ application on your computer and transfer content to and from the memory card in your phone. -
Page 64: Trackid™ Technology
TrackID™ technology Use the TrackID™ music recognition service to identify a music track you hear playing in your surroundings. Just record a short sample of the song and you’ll get artist, title and album info within seconds. For best results, use TrackID™ technology in a quiet area. If you have problems using this application, see I cannot use Internet-based services on page 105. - Page 65 To identify a track on the FM radio using TrackID™ Connect a wired handsfree or a set of headphones to your phone. From your Home screen, tap Find and tap FM radio . The available channels appear as you scroll through the frequency band.
-
Page 66: Fm Radio
FM radio You can browse and listen to FM radio stations, and save them as favourites. You can listen to the radio either through a portable handsfree or headphones, or through the speaker in the phone. You have to connect a portable handsfree or headphones, as they work as the antenna for the FM radio. -
Page 67: Using Your Favourite Radio Channels
Using your favourite radio channels You can save the radio channels you most frequently listen to as favourites. By using favourites you can quickly return to a radio channel. To save a channel as a favourite When the radio is open, navigate to the channel that you want to save as a favourite. -
Page 68: Taking Photos And Recording Videos
Taking photos and recording videos Your phone camera is equipped with the highly sensitive Exmor R sensor, which enables sharp photos and videos even in low lighting conditions. Send your photos and videos to friends as multimedia messages, or upload them to a web service. Your phone also has a front camera, which is useful for self-portraits. -
Page 69: Face Detection
To take a photo by tapping the on-screen button Activate the camera. If the still camera is not selected, drag To display all settings, press Tap Capturing method and select On-screen button if it is not already selected. Point the camera towards the subject. Tap the on-screen button . -
Page 70: Using Still Camera Settings
To turn on smile detection Activate the camera. If the still camera is not selected, drag To display all settings, press Tap Smile detection and select a smile level. To take a photo using smile detection When the camera is open and Smile detection is turned on, point the camera at your subject. - Page 71 The camera automatically detects up to five human faces, indicated by frames on the camera screen. The camera automatically focuses on the nearest face. You can also select which face to focus on by tapping it on the screen. Touch and hold the camera screen, the white focus frame turns green when the focus is set.
- Page 72 Take a photo with the stabiliser turned off. This setting is only available in Normal capturing mode and Front camera capturing mode. Scenes Use the Scenes feature to quickly set up the camera for common situations using pre-programmed scenes. The camera determines a number of settings for you to fit the selected scene, ensuring the best possible photo.
-
Page 73: Tips On Using The Camera
2 megapixel picture size with 16:9 aspect ratio. Suitable for photos you want to view on widescreen displays. Self-timer With the self-timer you can take a photo without holding the phone. Use this function to take self-portraits, or group photos where everyone can be in the photo. You can also use the self-timer to avoid shaking the camera when taking photos On (10 s.) Set a 10-second delay from when you tap the camera screen until the photo is taken. -
Page 74: Using The Video Camera
Use a plain background A plain background helps highlight your subject. Keep your lens clean Mobile phones are used in all kinds of weather and places, and carried in pockets and bags. This results in the camera lens becoming dirty and covered with fingerprints. Use a soft cloth to clean the lens. - Page 75 To customise the video camera settings panel When the video camera is open, press to display all settings. Touch and hold the setting you want to move and drag it to the desired position. If you drag the setting outside of the settings panel, the change is cancelled. Video camera settings overview Scenes The Scenes feature helps you to quickly set up the camera for common situations using pre-programmed...
- Page 76 Infinity Use when recording videos from a distance. Focus is set on subjects far away. Subjects close to the camera may be blurred. Video size Adjust the video size for different formats HD 720p HD (High Definition) format with 16:9 aspect ratio. 1280×720 pixels. Full Wide VGA Full Wide VGA format with 16:9 aspect ratio.
- Page 77 Microphone Select whether to pick up the surrounding sound when recording videos. Shutter sound Choose to turn on or turn off the sound when you record a video. This is an Internet version of this publication. © Print only for private use.
-
Page 78: 3D Camera
3D camera The 3D camera helps you take wide-angle, panoramic photos that capture more of the scene and add depth to the subject. 3D Sweep Panorama™ photos can be played back on a TV that supports 3D. To activate the 3D Camera •... - Page 79 To take a photo in Sweep Panorama™ mode Activate the 3D camera. Tap the icon on the top left of the screen, then select Sweep Panorama. and select the direction in which to pan. Tap the screen to lock the focus and exposure. Pan the camera steadily in the direction of the moving arrow.
-
Page 80: Viewing Photos And Videos In Gallery
Connecting your phone to a computer on page 89. BRAVIA® ENGINE Sony's Mobile BRAVIA® ENGINE technology improves the viewing quality of photos and videos after you take them, giving you clearer, sharper and more natural images. BRAVIA® ENGINE is turned on by default, but you can turn it off if you want to reduce battery consumption. -
Page 81: Working With Albums
Working with albums You can rearrange your photos and videos within albums as well as move content between albums. To open an album in Gallery From your Home screen, tap Find and tap Gallery. Tap the album you want to view. The album opens displaying its photo and video content in a chronologically ordered grid. -
Page 82: Working With Photos In Gallery
To work with batches of photos or videos in Gallery From your Home screen, tap Find and tap Gallery. Open the album containing the content that you want to work with. To activate selection mode, touch and hold one of the items that you want to work with. -
Page 83: Viewing Your Photos On A Map
To crop a photo When you are viewing a photo in the photo viewer, press In the toolbar, tap More > Crop. To adjust the crop frame, touch and hold the edge of the crop frame. When crop arrows appear, drag inward or outward to resize the frame. To resize all sides of the crop frame at the same time, touch and hold one of the four corners to make the arrows appear, then drag the corner accordingly. - Page 84 To adjust the volume of a video • Press the volume key. To share a video Open a Gallery album containing a video. To activate selection mode, touch and hold an item that you want to work with. Check the video or videos that you want to share. Press Tap Share.
-
Page 85: Viewing Photos In 3D Album
Viewing photos in 3D Album In 3D Album you can view and play all photos taken with your 3D camera. To view your 3D photos in 3D Album From your Home screen, tap Find and tap 3D Album. Tap a 3D photo. Flick left to view the next 3D photo in 3D Album. -
Page 86: Bluetooth™ Wireless Technology
Bluetooth™ wireless technology Use the Bluetooth™ function to send files to other Bluetooth™ compatible devices, or to connect to handsfree accessories. Turn on the Bluetooth™ function in your phone and create wireless connections to other Bluetooth™ compatible devices such as computers, handsfree accessories, and phones. -
Page 87: Sending And Receiving Items Using Bluetooth™ Technology
To pair your phone with another Bluetooth™ device Make sure that the device you want to pair your phone with has the Bluetooth™ function activated and is visible to other Bluetooth™ devices. From the Home screen, tap Find and tap Settings > Bluetooth. All available Bluetooth™ devices appear in a list. - Page 88 To receive items using Bluetooth™ Make sure there is a memory card in your phone. If you don't have a memory card inserted, you cannot send or receive items using Bluetooth wireless technology. From your Home screen, tap Make sure that the Bluetooth™ function is on and is visible to other Bluetooth™ devices.
-
Page 89: Connecting Your Phone To A Computer
Connecting your phone to a computer Connect your phone to a computer and start transferring pictures, music and other file types. The easiest ways to connect are using a USB cable or Bluetooth wireless technology. When you connect your phone to the computer using a USB cable, you are prompted to install the PC Companion application on your computer. -
Page 90: Pc Companion
Computer: Use the Safely Remove Hardware feature to disable the USB cable connection. Phone: Drag the status bar downwards, then tap Phone memory card connected. Disconnect the USB cable from both devices. Computer instructions may vary depending on your operating system. Refer to the documentation for your computer's operating system for more information. - Page 91 To transfer content using the Media Go™ application Connect your phone to a computer using a USB cable. Phone: Connected in Media transf. mode appears in the status bar. Computer: The PC Companion application launches automatically. In PC Companion, click Media Go to start the Media Go™ application. In some cases, you may have to wait for Media Go™...
-
Page 92: Using Location Services To Find Your Position
GPS option. In situations where the wireless network connection is weak, you should enable both options to ensure that your location is found. Sony Ericsson does not warrant the accuracy of any location services including but not limited to navigational services. -
Page 93: Backing Up And Restoring
Backing up and restoring Use the Backup and restore application to make backups of phone content to your memory card or online storage account. Such backups can be used to restore your content and some phone settings in cases where your data gets lost or deleted. Types of content you can back up Use the Backup and restore application to back up the following types of data: Bookmarks... -
Page 94: Locking And Protecting Your Phone
Locking and protecting your phone IMEI number Every phone has a unique IMEI (International Mobile Equipment Identity) number. To view your IMEI number Turn off your phone, then remove the battery cover and battery. Look for the 15- to 17-digit number on the label. The first 15 digits represent the IMEI number. -
Page 95: Setting A Screen Lock
It is very important that you remember your screen unlock pattern, PIN or password. If you forget this information, it may not be possible to restore important data such as contacts and messages. Refer to Sony Ericsson Customer support for more information. To create a screen unlock pattern From the Home screen, tap Find and tap Settings >... - Page 96 To create a screen lock password From your Home screen, tap > Settings > Security > Screen lock > Password. Enter a password. If necessary, tap to minimise the keyboard. Tap Continue. Re-enter and confirm your password. If necessary, tap to minimise the keyboard.
-
Page 97: Updating Your Phone
Updating your phone Update your phone to the most recent software version to get optimal performance and the latest enhancements. You can use the Update center application on your phone to run a wireless update or you can use the PC Companion application on a computer to run an update using a USB cable connection. - Page 98 To download the PC Companion application from your phone Connect your phone to a computer using a USB cable. When prompted, follow the instructions in the phone to launch the installation of PC Companion on the computer. PC Companion can also be downloaded from www.sonymobile.com. To download software updates using a USB cable connection Install the PC Companion application on the computer you are using, if it is not already installed.
-
Page 99: Phone Settings Overview
Phone settings overview Get to know the settings in your phone so that you can personalise them to your own requirements. More… Manage your wireless connections and connection settings. Call settings Configure settings for listening to and managing your voicemail, for example. -
Page 100: Status And Notification Icons Overview
Status and notification icons overview Status icons The following status icons may appear on your screen: Signal strength No signal Roaming GPRS is available EDGE is available 3G is available Sending and downloading GPRS data Sending and downloading EDGE data Sending and downloading 3G data Battery status The battery is charging... - Page 101 Problem with text message/multimedia message delivery New voicemail An upcoming calendar event A song is playing Problem with sign-in/sync The storage card is full The WLAN connection is enabled and wireless networks are available The phone is connected to a computer with a USB cable Error message Missed call Call on hold...
-
Page 102: Application Overview
Application overview Set an alarm Alarm Browser Browse the web and download new programs and files Perform basic calculations Calculator Calendar Keep track of your appointments Take photos and record video clips Camera Contacts Keep track of your friends and colleagues Send and receive emails Email FM radio... -
Page 103: User Support
Access user support directly in your phone through the Support application. For example, you can open a User guide with instructions on how to use your phone. You can also get troubleshooting and other help from the Sony Ericsson support zone, and from our Customer support service. -
Page 104: Troubleshooting
Troubleshooting My phone is not working as expected If you experience problems with your phone, check these tips before you try anything else: • Restart your phone. • Remove and re-insert the battery and SIM card. Then restart your phone. Update your phone. -
Page 105: I Cannot Transfer Content Between My Phone And The Computer, When Using A Usb Cable
• works, it is probably your phone that is causing the problem. In this case, contact the nearest Sony Ericsson service center. Emergency calls only You are within range of a network, but you are not allowed to use it. However, in an emergency, some network operators allow you to call the international emergency number 112. -
Page 106: Recycle Your Phone
Recycle your phone Sony Ericsson recognizes the importance of recycling so that components and materials are reused. For information on how to recycle in your location, please visit www.sonyericsson.com/recycle/. This is an Internet version of this publication. © Print only for private use. -
Page 107: Legal Information
Sony Ericsson does not guarantee the accuracy, integrity or quality of any additional content or any other third party content. Under no circumstances will Sony Ericsson be liable in any way for your improper use of additional content or other third party content. -
Page 108: Index
Index taking photos ........68, 69, 70 3D Camera video ..............74 overview ............78 viewing photos ..........69 screen ..............78 viewing videos ..........74 3D photos ..............85 zoom ..............69 deleting ............85 caps lock ..............22 playing .............85 charging ..............12 sharing .............85 conference calls ............33 viewing ............85 contacts ..............36 zooming ............85 back up ............40... - Page 109 HD (High Definition) video ........75 deleting ............82 Home screen ............16 viewing ............80 customising .............17 photos ...............82, 83 associating with a contact ......39 copying to/from a computer ......63 icons ..............100 cropping ............83 in the camera ...........75 deleting ............83 importing SIM contacts ...........37 photo viewer ............81 Improving photos with BRAVIA®...
- Page 110 MMS ..............28 video player still camera ............70 pausing a video ..........83 Timescape™ ...........49 videos ..............83 video camera ...........74 adjusting volume ..........84 setup guide ..............10 copying to/from a computer ......63 sharing deleting ............84 3D photos ............85 fast forwarding and rewinding ......83 music ...............64 pausing ............83 photos .............83...
Need help?
Do you have a question about the ST18i and is the answer not in the manual?
Questions and answers