
Related Manuals for V-Zon TFDVD9109E

Summary of Contents for V-Zon TFDVD9109E
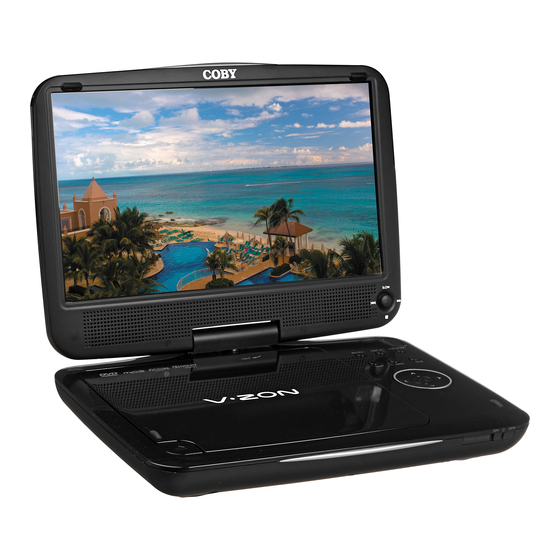
- Page 1 TFDVD9109E 9″ Widescreen TFT Portable DVD Player with CD/MP3 playback, USB port and SD slot Instruction Manual Please read this manual carefully before operation.
-
Page 2: Precautions
Retain this information for future DO NOT OPEN reference. CAUTION: TO REDUCE THE RISK OF FIRE AND ELEC- Model No. TFDVD9109E TRIC SHOCK, DO NOT REMOVE THE COVER (OR BACK) Serial No. OF THE UNIT. REFER SERVICING ONLY TO QUALIFIED SERVICE PERSONNEL. - Page 3 PRECAUTIONS Do not make any changes or modifications to the equipment unless otherwise specified in the manual. If such changes or modifications should be made you could be required to stop operation of the equipment. CPRM Content Protection for Removable Media (CPRM) is a hardware-based technology designed to enforce copy protection restrictions through built-...
-
Page 4: Important Safety Instructions
IMPORTANT SAFETY INSTRUCTIONS Read Instructions: All the safety and operating instructions should be read before the product is operated. Retain Instructions: The safety and operating instructions should be retained for future refer- ence. Heed Warnings: All warnings on the product and in the operating instructions should be adhered to. - Page 5 IMPORTANT SAFETY INSTRUCTIONS If at any time in the future you should need to dispose of this product please note that Waste electrical products should not be disposed of with household waste. Please recycle where facilities exist. Check with your Local Authority or retailer for recycling advice.(Waste Electrical and Electronic Equipment Directive) Overloading: Do not overload wall outlets, extension cords, or integral convenience receptacles as this can result in a risk of fire or electric shock.
- Page 6 IMPORTANT SAFETY INSTRUCTIONS In accordance with DIRECTIVE 2006/66/EC OF THE EUROPEAN PARLIAMENT AND OF THE COUNCIL of 6 September 2006 on batteries and accumulators and waste batteries and accumulators Disposal of waste batteries(applicable in the European Union and other European countries with separate collection systems) This symbol on the battery or on the packaging indicates that the battery provided with this product shall not be treated as household waste.
-
Page 7: Table Of Contents
TABLE OF CONTENTS PRECAUTIONS ..........................2 IMPORTANT SAFETY INSTRUCTIONS ..................4 TABLE OF CONTENTS ........................7 PACKAGE CONTENTS ........................9 ABOUT OPTICAL DISCS ......................10 Disc Requirements.........................10 Disc Care and Maintenance ....................10 Handling a Disc ......................10 Cleaning a Disc ......................10 LOCATION OF CONTROLS ......................11 Front View .......................... - Page 8 TABLE OF CONTENTS Angle ..........................19 Menu/Title ..........................19 Menu ..........................19 Title ..........................19 Repeat A-B Mode ........................19 Repeat Playback Of Chapter/Title/All of a Disc..............20 LCD Mode Menu ........................20 To access the USB/SD mode ....................20 SETUP ............................21 Language Setup ........................21 Video Setup ...........................21 Audio Setup ..........................22 Rating .............................22 Misc ............................22...
-
Page 9: Package Contents
Please make sure the following items are included in the package. If any items are missing, please contact your local dealer. Menu Title TFDVD9109E W des re n FT Por ab e DVD P ayer wi h CD/MP3 p a back USB por and SD s ot Ins ruc ion Manual... -
Page 10: About Optical Discs
ABOUT OPTICAL DISCS Disc Requirements This DVD player supports playback of the following discs. Type Disc Mark Content Type Disc Size Max. Playback Time 133 min (SS-SL) 242 min (SS-DL) Audio + Video DVD-Video Discs 12 cm (moving picture) 266 min (DS-SL) 484 min (DS-DL) Audio Compact Discs (CDs) Audio... -
Page 11: Location Of Controls
LOCATION OF CONTROLS Front View TFT LCD PLAY/PAUSE BUTTON SLOW NEXT/FAST FORWARD STOP PREVIOUS/FAST REVERSE DVD/USB/SD DISPLAY LCD MODE TITLE MENU SETUP OK BUTTON DIRECTION BUTTON OPEN BUTTON POWER ON INDICATOR POWER ON/OFF REMOTE CONTROL & CHARGING SWITCH BATTERY CHARGE INDICATOR RIGHT View BACK View SD SLOT... -
Page 12: Remote Control
LOCATION OF CONTROLS Remote Control Display/Setup Zoom Subtitle Power Direction Buttons Next Repeat A-B Previous Enter Fast Forward Fast Reverse Repeat All Play/Pause Menu Menu Audio Angle Numeric Buttons LCD Mode/USB/SD Title Title... -
Page 13: Connections
CONNECTIONS Audio & Video Connections External Monitor wth AV input AV Out - Output the AV Signal a). Connect the player to TV or the moniter by the RCA cable. b). Set the AV-IN / DVD switch to DVD. To VIDEO AV IN - Input the AV Signal To AUDIO/ a). -
Page 14: Power Connection
CONNECTIONS Power Connections • Connecting to the wall outlet To DC 9V in Jack Caution: • Do not connect the power plug to a power outlet other than that which AC adapter: is indicated here and on the label This AC adapter operates on as this may result in the risk of fire 100-240V~~50/60Hz 0.3A MAX DC OUT: 9V... -
Page 15: Headphone Connection
CONNECTIONS Headphone Connection Be sure that your unit is at low volume level before connecting the headphones. Increase the volume gradually for your comfortable listening. CAUTION: Hearing experts advise against the constant use of personal stereos played at high volume. Constant high To Headphone Jack volume use can lead to hearing loss. -
Page 16: Getting Started
GETTING STARTED Using the Remote Control To load a battery in the remote: Pull in the direction of the arrow. Slide the compartment out. Place the battery in the compartment with the positive side ( + ) facing up. Push the compartment in to close. •... -
Page 17: Power Supply
BASIC OPERATIONS Prepare the connections and power supply. Load a disc. Press the Open button to open the disc compartment lid. Load a disc with the label-side facing up. Close the lid manually. If a single-sided disc is loaded upside-down, the player will display “BAD DISC”. Start playback. -
Page 18: Numeric Keypad
BASIC OPERATIONS Adjusting the Volume • Turn the Volume Control dial to adjust the volume level up or down. Disc Error Messages The following messages will be displayed on-screen if there is a problem with the format of the loaded disc. •... -
Page 19: Functions Buttons
FUNCTIONS BUTTONS Display/Setup • Press the DISPLAY button once to show playback information. • Press it twice to enter the player’s setup menu. Enter the Setup menu to adjust the player’s internal settings, please see the SETUP section for more details. Zoom Press ZOOM to change the magnification level of the picture. -
Page 20: Lcd Mode Menu
FUNCTIONS BUTTONS LCD Mode/USB Menu Press this button to display the LCD menu. Press up/down direction button to select the desired item and then make adjustment by left/ right direction button. Press up/down direction button to select Flip and then press Enter button to flip the picture. Press up/down direction button to select Mode and then press the Enter button to toggle the screen ratio between 16:9 and 4:3. -
Page 21: Setup
SETUP Various features of the player can be adjusted in the SETUP menu. 1. Press twice to enter the player’s setup menu. 2. Press the direction buttons to select the desired item. 3. Press ENTER to confirm. English English English Language Setup Video Auto... -
Page 22: Audio Setup
SETUP Set the digital output mode(off,PCM,RAW) Digital Out Channel Output Rating Sets the maturity rating level of the player. Levels 1 to 8. The player will not play any discs rated higher Parental Control ADULT than this setting. default) This setting is password protected (the initial password is: 8888). -
Page 23: Specifications
SPECIFICATIONS 1.5A 9.8W /PAL 8.9x1.6x6.3inch Pixel Statement: A 9” LCD panel contains 336,960 pixels. Larger screens have considerably more. Pixels can fail during normal product life. One pixel failure = 0.00003% failure rate or better. One pixel failure during each year of operation is considered normal and not a cause for concern or a Warranty issue. Warranty Statement: products come with a Return to Base Warranty. -
Page 24: Contact Details / Troubleshooting
TROUBLESHOOTING If you have a problem with this unit, please read the troubleshooting guide below and check our website at www. for Frequently Asked Questions (FAQs) and firmware updates. If these resources do not resolve cobyusa.com the problem, please contact Technical Support. Technical Support Unit B, Caerphilly Business Park, Van Road, Caerphilly, CF83 3ED... - Page 25 TROUBLESHOOTING • Check the player using a known good DVD for sound • Try a different Audio track of the DVD by pressing AUDIO. • Reset the SETUP to defaults, in case incorrect adjustments have been made. The player has malfunctioned. •...
- Page 26 SMASHED SCREEN IDENTIFCATION A Liquid Crystal Display (LCD) Screen is a multilayer component. Under the tougher outer plastic layer, the glass sandwich beneath holds the LCD crystals in place, which are themselves suspended in fluid. In the unfortunate event of an accident, particularly a sharp localized impact, the glass will break. the tough plastic outer sheet on the surface of the glass keeps all the glass intact underneath preventing the shards from falling out.
- Page 27 Specifications and manual are subject to change without prior notice. VZ-CBDVD9109E-IM-ENG-Rev1...
Need help?
Do you have a question about the TFDVD9109E and is the answer not in the manual?
Questions and answers
Charging the battery for TF-DVD8503
To charge the battery for the V-Zon TFDVD9109E, ensure the AC adapter cord is securely connected to the player and plugged into a proper wall outlet.
This answer is automatically generated
I can't find the manul and can't see the answer on line
Turn off sub titles Each time I restart the player the sub titles show up again. I want them off permanently. Real nescience Thank you for your help with this