Keurig Vue Use & Care Manual
Keurig vue brewer use & care guide
Hide thumbs
Also See for Vue:
- Use & care manual (15 pages) ,
- Quick start manual (2 pages) ,
- Quick start manual (2 pages)
Table of Contents
Advertisement
Advertisement
Table of Contents

Related Manuals for Keurig Vue


Summary of Contents for Keurig Vue
- Page 1 ™ ® Keurig Brewer Use & Care Guide...
-
Page 2: Important Safeguards
22. Do not use the appliance for in any manner. Contact Keurig other than its intended use. Customer Service to report any malfunction of or damage to the Brewer. -
Page 3: Save These Instructions
Cup Holder during the brew process. To avoid risk of injury, do not lift the Handle or remove the Brew Head during the brewing process. Do not remove or puncture the lid of the Vue ™ Cup prior to brewing. After brewing, use caution when removing the Vue ™... -
Page 5: Table Of Contents
Section 2 Preparing Your Brewer Section 3 Using Your Brewer Section 4 Setting the Time & Temperature Section 5 Caring For Your Brewer ™ Section 6 Recycling Vue Cup Portion Packs Section 7 Troubleshooting Section 8 Warranty Record Your Brewer Serial Number Above... -
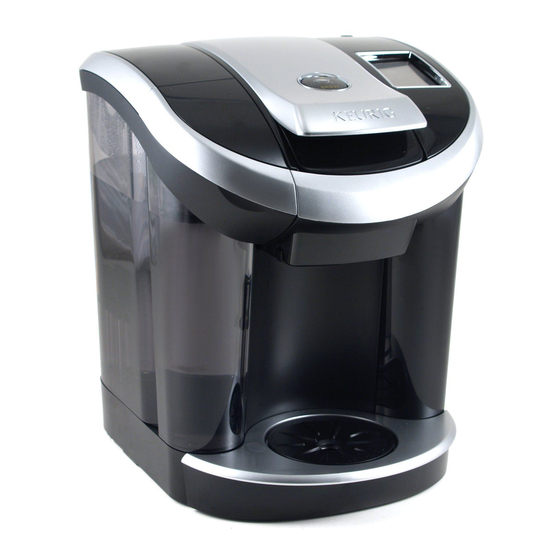
Page 7: Section 1 Brewer Overview
C Touchscreen D Handle E Brew Head F Power Cord G Drip Tray H Adjustable Drip Tray Plate I Water Reservoir J Water Reservoir Flip Top Lid The Keurig ® ™ Brewer is not for use with K-Cup ® portion packs. -
Page 8: Section 2 Preparing Your Brewer
SECTION 2 Preparing Your Brewer Step 1 Remove all adhesive tape from Brewer and label from Touchscreen. Behind the Brewer is a convenient compartment to hold the Power Cord for storage. Plug cord into grounded outlet. If Brewer has been exposed to temperatures below freezing, allow Step 1 Brewer at least two hours to reach room temperature before brewing. -
Page 9: Section 3 Using Your Brewer
Enjoying a perfect cup of coffee has never been easier. So what are you in the mood for today? How to Use the Vue ™ Brewer Touchscreen Beverage Category Coffee &... - Page 10 Hot Cocoa Strength Selection 8 8 oz The “Strong” setting gives you a more robust brew by slowly pulsing water through the Vue ™ Cup. To brew a stronger cup, simply select “Strong.” (Available only for coffee.) For Café Escapes ®...
- Page 11 SECTION 3 Using Your Brewer For Smaller Mugs Lift the Adjustable Drip Tray Plate and rotate a third of a turn until it drops into place. Make sure it is seated securely in the elevated position before placing your cup on it. For Travel Mugs If you have an extra large travel mug, remove the Drip Tray to allow your mug to fit.
- Page 12 Brewing Café Beverages Requires 2 portion packs Step 1 Choose Café 1 Portion Pack Lift the Brewer Handle, insert the Vue ™ Cup into the Holder and lower the Brewer Handle. Select “Café” After you select “Café,” the Touchscreen will display as pictured.
- Page 13 Lift the Brewer Handle, insert the Vue ™ Cup into the Holder and lower the Brewer Handle. Select Beverage Type & Size After you insert the second Vue ™ Cup and lower the Brewer Handle, the Touchscreen will continue Coffee & Tea Café...
- Page 14 Fill a 16 oz. plastic cup with ice. Do not use glass. Remove the Drip Tray if necessary and place cup under the Brew Head. Choose Vue ™ Portion Pack Make sure your Vue ™ features the Brew Over Ice Icon. Lift the Brewer Handle, insert ™ the Vue Cup into the Holder and lower the Brewer Handle.
-
Page 15: Dispensing Hot Water
Brew Head. Place your cup or bowl as far back as possible. Lift and lower the Handle WITHOUT inserting a Vue™ Cup. Select “Coffee” (do not select “Strong”) and press “BREW.” The... - Page 16 SECTION 3 Using Your Brewer Adding Water Please Add Please Add Water When the water supply is low, the Touchscreen will display Water as pictured and the Water Reservoir light will flash. Bottled or filtered water is recommended. When brewing at sizes larger than 12 oz., if the Brewer senses the water level is low, the brewing process will stop until the Water Reservoir is refilled.
-
Page 17: Section 4 Setting The Time & Temperature
SECTION 4 Setting the Time & Temperature Setting the Clock Lift to Brew When the Brewer is first turned on, the clock will appear on the Touchscreen. Follow the steps below to set the time. You must set the clock if you will be using the Auto On/Off feature. - Page 18 SECTION 4 Setting the Time & Temperature Programming the On/Off Lift to Brew Feature By programming your Brewer to turn on each morning, you will never have to wait for the Brewer to warm up to brew your first cup. It takes the Brewer approximately four minutes to warm up from room temperature.
- Page 19 SECTION 4 Setting the Time & Temperature Energy Saver Mode Lift to Brew Energy Saver mode turns the Brewer off after a selected period of time. Here is how to set it: Step 1 Select the settings icon on the Touchscreen, then select “Time”...
- Page 20 SECTION 4 Setting the Time & Temperature Setting the Brew Temperature Lift to Brew The Brewer has a preset temperature of 192° F. You can adjust the temperature up or down in 1 degree increments within the Brewer range (187° - 197° F). Once set, your beverages will be brewed at the selected temperature.
-
Page 21: Section 5 Caring For Your Brewer
SECTION 5 Caring For Your Brewer Cleaning & Maintenance CLEANING EXTERNAL PARTS Cleaning of the Brewer’s external parts is recommended one to two times per month. Never immerse the Brewer in water or other liquids. The Housing and other external parts may be cleaned with a soapy, damp, non-abrasive cloth. - Page 22 Step 3 Repeat the process until “Please Add Water” is indicated. Step 4 Let the Brewer stand for at least 4 hours while still on. Step 5 Discard the remaining vinegar from the Water Reservoir and rinse the Reservoir thoroughly. Remove the empty Vue ™ Cup from the Brewer.
-
Page 23: Section 6 Recycling Vue Cup Portion Packs
#5 plastics may not be recyclable in your community today, so please check locally. Simply follow these simple steps: Step 1 Once brewing is complete, lift the Brewer Handle and carefully remove the Vue ™ Cup by holding the outer rim. ™ The Vue Cup will be HOT after brewing. -
Page 24: Section 7 Troubleshooting
Brewer brews only • The Water Reservoir may have been removed during brewing. a partial cup Replace the Water Reservoir and perform cleansing brews (refer to page 15) without a Vue ™ Cup. • De-scale the Brewer (refer to page 22). -
Page 25: Section 8 Warranty
Brewer so that your purchase information will be stored in our system. Keurig will, at its option, repair or replace the Brewer without charge upon its receipt of proof of the date of purchase. If a replacement Brewer is necessary to service this warranty, the replacement Brewer may be new or reconditioned. - Page 26 Notes...
- Page 28 Keurig, Incorporated 55 Walkers Brook Drive Reading, MA 01867 Keurig, Incorporated is a wholly-owned subsidiary of Green Mountain Coffee Roasters, Inc. For Household Use Only Made and printed in China © 2011 Keurig, Incorporated All rights reserved www.keurig.com | 1.866.901.BREW...
Need help?
Do you have a question about the Vue and is the answer not in the manual?
Questions and answers