GE DBVH512 Technical Service Manual
Hide thumbs
Also See for DBVH512:
- Owner's manual (28 pages) ,
- Technical service manual (50 pages) ,
- Owner's manual (30 pages)

Related Manuals for GE DBVH512


Summary of Contents for GE DBVH512
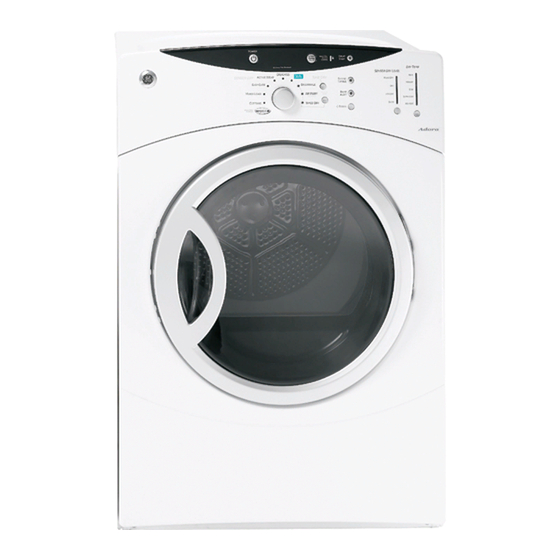
- Page 1 GE Consumer & Industrial Technical Service Guide DECEMBER 2005 GE Dryer DBVH512 DCVH515 DHDVH52 31-9136 GE Appliances General Electric Company Louisville, Kentucky 40225...
- Page 2 IMPORTANT SAFETY NOTICE T h e i n f o r m a t i o n i n t h i s s e r v i c e g u i d e i s i n t e n d e d f o r u s e b y i n d i v i d u a l s p o s s e s s i n g a d e q u a t e b a c k g r o u n d s o f e l e c t r i c a l , electronic, and mechanical experience.
-
Page 3: Table Of Contents
Table of Contents Airfl ow ....................................23 Air Duct Assembly ................................42 Belt Switch ................................... 34 Blower Housing .................................. 34 Component Locator Views ............................24 Control Board Assembly ............................... 44 Control Panel ..................................28 Control Features ................................6 Cycle Options ..................................9 Door Switch .................................. -
Page 4: Nomenclature
Nomenclature Model Number D C V H 5 1 5 E F 0 W W Color Control Brand WW - White Features D = General Electric GG - Granite Feature Packages Engineering Revision B = Base Alpha or Numeric C = Contract/HPS HD = Brand Feature Pack Model Year F - 2005... -
Page 5: Introduction
Introduction The new GE dryer has the following features: • Large 7.0-cubic foot dryer drum • Drying Rack - Available on some models, for drying delicate items such as washable sweaters. • Drum Lamp • My Cycle selection saves a favorite cycle for future use. •... -
Page 6: Control Features
Control Features Model DBVH512 OWER DRYING DAMP COOL DOWN TART ELAY TART AUSE ONTROL DELAY CLEAN LINT FILTER STIMATED EMAINING ENSOR EVEL PEED NTI- ACTERIAL ENSOR ELICATES XTEND UMBLE CTIVE EWRINKLE EDIUM ADJUST LUFF TIME LERT (NO HEAT) IXED IMED... - Page 7 Power Press to “wake up” the display. If the display is active, press to put the dryer in the standby mode. NOTE: Pressing POWER does not disconnect the appliance from the power supply. Dry Cycles The dry cycle controls the length and tumble speed of the drying process. The chart below will help you match the dry setting with the loads.
- Page 8 Dry Temp You can change the temperature of your dry cycle. ANTI-BACTERIAL This option may only be used with COTTONS or MIXED LOAD cycles. This option reduces certain types of bacteria by 99.9%, including: Staphylococcus aureus, Pseudomonas aeruginosa and Klebsiella pneumoniae*.
-
Page 9: Cycle Options
Cycle Options Extend Tumble XTEND Minimizes wrinkles by adding UMBLE approximately 60 minutes of no-heat tumbling after clothes are dry. The beeper will sound every 2 minutes to remind you to remove the clothes. The ESTIMATED TIME REMAINING display will show 00. Damp Alert This option causes the dryer to beep when Removing clothes and hanging them when... - Page 10 Lock You can lock the controls to prevent any To lock the dryer, press and hold the lock selections from being made. Or you can icon for 3 seconds. To unlock the dryer, lock the controls after you have started press and hold the lock icon for 3 seconds.
-
Page 11: Dryer Features
Dryer Features Drum Lamp Before replacing the light bulb, be sure to unplug the dryer power cord or disconnect the dryer at the household distribution panel by removing the fuse or switching off the circuit breaker. Reach above dryer opening from inside the drum. -
Page 12: Reversing The Door Swing
Reversing the Door Swing To reverse the door swing: When viewed from the front, the dryer is shipped so the door opens from the left. Due to utility Unplug the dryer from its electrical outlet. confi gurations or customer preferences, the door can be set up to open from the right by reversing Open the door to approximately 90 degrees. - Page 13 Remove the 6 large tapping screws (#10) located IMPORTANT: Note the location of the hinge (left or right) before removing. around the perimeter of the door outlining the gasket and the 4 machine screws (#8). Note: The hinge cover is located at the opposite side of the hinge assembly.
- Page 14 Insert the hinge assembly in the opening on the Place the door fl at and insert the window opposite side of the door. retainer. Align the window retainer holes with the holes in the door frame. Push the hinge assembly into place until the hinge holes align with the door frame holes.
- Page 15 IMPORTANT: Make sure there is no dirt or any other Using a putty knife or fl at tool, remove the foreign material in between the window panes. 5 plastic screw caps located near the strike bracket on the front panel. Install the caps on Place the door cover onto the door frame.
-
Page 16: Pedestal Installation (Washer And Dryer)
Pedestal Installation (Washer and Dryer) Optional 12-inch high storage drawer pedestals with WARNING: Due to the size and weight of the dividers are available to provide convenience and washer or dryer, and to reduce the risk of personal extra storage space for detergent, dryer sheets and injury or damage, 2 people are required for proper other cleaning supplies. - Page 17 Place the pedestal against the bottom of the Pull the drawer out to its stop position. washer or dryer. Ensure that the drawer front is Remove the screws from the drawer slides. at the front of the washer or dryer. Slide the drawer out of the base and set it aside.
- Page 18 Screw locknuts onto the supplied leveling legs. Ensure that the slides are closed, then slide the Turn the nuts toward the bottom and against drawer into the opening. the rubber part of the leg. Align the drawer supports to the slides on each Install the leveling legs, with locknuts, in each side.
-
Page 19: Stacking Instructions
Stacking Instructions The GE dryer is designed to allow placement • Minimum vertical space from fl oor to overhead (stacking) on top of certain GE front load washers. cabinets, ceiling, etc. is 43 inches without Washer models that currently qualify are: pedestal, 55 inches with pedestal, and 84 inches stacked. - Page 20 To stack the dryer: Remove the adhesive backing and fi rmly place the 4 rubber pads over the leg brackets. Caution: Do not lay dryer on its back. Use the packing material or a protective surface when laying dryer on its side. Carefully lay the dryer on its side.
- Page 21 Set the dryer upright using packing material or a WARNING! protective surface that ensures the brackets do not damage the fl oor. Do not push on the dryer after it is stacked on the washer. Pushing on the dryer may result in pinched Place and level the washer in the approximate fi...
-
Page 22: Operation Overview
Operation Overview Air enters the dryer cabinet, passing thru the heating elements and into the drum. The hot air heats the wet clothes, gradually removing their moisture in the form of water vapor. The moist air is vented through the dryer exhaust. Overall heater temperature is regulated by means of two temperature sensors, an inlet sensor, located near the heating elements, and an outlet sensor, located at the blower. -
Page 23: Airfl Ow
Airfl ow Gas Dryer Gas Dryer Electric Dryer Electric Dryer – 23 –... -
Page 24: Blower Housing
Component Locator Views Electric Model Power Board Inlet Control Thermistor Inlet Safety Thermostat High Limit Thermostat Idler Pulley Motor Blower Housing Outlet Control Backup Thermostat Blower Outlet Control Thermistor (behind baseplate) (Continued Next Page) – 24 –... - Page 25 Gas Model Power Board Inlet Safety Thermostat Inlet Control Thermistor Idler Pulley Motor Blower Housing Gas Valve Outlet Control Backup Thermostat Blower Outlet Control Thermistor (behind baseplate) (Continued Next Page) – 25 –...
- Page 26 Power Board-Electric Models CN100 CN110 CN111 CN 101 TB103 TB102 TB101 TB100 Power Board-Gas Models CN100 CN110 CN111 CN 101 TB101 TB100 (Continued Next Page) – 26 –...
-
Page 27: Control Board Assembly
Control Board Assembly (Electric and Gas Models) Rear View Ribbon to CN110 Front View Ribbon to CN110 – 27 –... -
Page 28: Dryer Components
Dryer Components Top Panel Top Panel WARNING: Sharp edges may be exposed when servicing the dryer. Use caution to avoid injury. Wear Kevlar gloves or equivalent protection. Note: Combined Phillips-head/square-drive recess screws are utilized throughout this appliance. Either Phillips or square-drive screwdrivers can be used to extract or install these screws. -
Page 29: Drive Belt
Front Panel Drive Belt Removal of the front panel provides access to the WARNING: Sharp edges may be exposed when drum and drive belt. The front panel is held in place servicing the dryer. Use caution to avoid injury and by 4 screws. -
Page 30: Drum
Remove 1 Phillips-head screw from each side of Drum the cabinet, then gently spread the sides apart to provide clearance for the drum. The drum is made of 304 stainless steel and has three replaceable baffl es. The drum rotates counterclockwise, as viewed from the front, at a speed of 47 to 51 RPM. -
Page 31: Drum Shaft Bearing
Drum Shaft Bearing Idler Assembly The drum shaft bearing is mounted on the drum The idler assembly maintains proper tension on the shaft at the rear of the drum. The bearing fi ts into belt to minimize belt slippage. The idler assembly the bearing retainer in the center of the heater consists of an idler pulley that rotates on an idler arm. -
Page 32: Front Panel
Disconnect the 2 blue wires from the outlet Motor and Blower Wheel Assembly control thermistor. The motor is a single speed, 120 VAC, ¼-hp, 5.2 Remove the single Phillips-head screw that amp rated motor with an automatic reset overload attaches the outlet control backup thermostat protector. - Page 33 Remove the 2 Phillips-head screws that hold To replace the blower wheel: the top of the motor base plate to the blower Loosen the -in. hex-head screw that secures the housing. blower wheel clamp to the motor shaft. Pull the blower wheel off the shaft.
-
Page 34: Belt Switch
Remove the 2 hex-head screws that hold the Blower Housing front motor strap to the motor. The blower housing is attached to the dryer with 7 Compress then remove the rear motor strap screws and 3 tabs. from the motor base plate. To remove the blower housing: Motor Straps Remove the top, control, and front panels. -
Page 35: Gas Valve
Heater Assembly Gas Valve The heater assembly is located behind the drum. The gas valve is attached to a bracket located in the It consists of 2 open coils fastened to a single bottom, right, front corner of the dryer cabinet. housing. -
Page 36: Gas Valve Coil Assembly
Remove the 2 Phillips-head screws that attach Gas Valve Coil Assembly the coil bracket to the valve body. The gas valve coil assembly is located on top of the gas valve in front of the combustion chamber opening. The assembly consists of a double coil (saftey and booster coils combined) and a single main coil. -
Page 37: Ignitor
Rotate the base of the ignitor clockwise. Remove Ignitor the ignitor. The ignitor is located at the end of the gas valve Note: The ignitor is very fragile. Care must be taken assembly in the combustion chamber opening and to avoid breaking the ignitor when reinstalling the has a maximum rating of 4 amps. -
Page 38: Ignitor Circuit Operation
Ignitor Circuit Operation The glo-bar ignitor circuit is made up of the following components: a gas valve with safety and main valves, ignitor, and a fl ame detector. The safety valve is actuated by a double coil that comprises a safety coil (resistance approximately 1350 ohms) and a booster coil (resistance approximately 550 ohms). -
Page 39: Inlet Control Thermistor
Inlet Safety Thermostat Inlet Control Thermistor The inlet safety thermostat is located on the top The inlet control thermistor is located on the left area of the heater housing. It is left of the top left area of the heater housing. It is right inlet control thermistor. -
Page 40: Outlet Control Backup Thermostat
High Limit Thermostat Outlet Control Thermistor The high limit thermostat is located on the top The outlet control thermistor is located on the lower right area of the heater housing. The high limit rear area of the blower housing. It is below the thermostat monitors incoming air temperature. -
Page 41: Drum Slide Assembly
Outlet Control Backup Thermostat Drum Slide Assembly The outlet control backup thermostat is located The drum slide assembly is located on the back on the upper rear area of the blower housing. It side of the front panel and utilizes 4 drum slides. is above the outlet control thermistor. -
Page 42: Air Duct Assembly
Air Duct Assembly Door Switch The air duct assembly houses the lint fi lter, drum The door switch is fastened to the front panel seal, and the 2 sensor rods. It is located on the back by 2 locking tabs and is common to all dryer side of the front panel. -
Page 43: Power Board
Moisture Sensor Power Board The moisture-sensing circuit consists of 2 sensor The power board is mounted in a plastic housing rods. They are mounted beneath the lint fi lter on the that is attached to a bracket located under the top drum side of the air duct. - Page 44 Note: Each cycle selection button assembly is held Control Board Assembly to the plastic housing with a locking tab(s) and strut(s) system. The control board assembly is mounted in a plastic housing that is attached to the inside of the control Press the locking tab(s) then carefully lift each panel.
-
Page 45: Service Test Mode
Service Test Mode The dryer control has a service test mode that can be utilized by the service technician in order to test critical components and to access error codes. This test mode will help the service technician to quickly identify failed or improperly operating dryer components. - Page 46 T e s t Press Displays Exit Mode Start/ Displays UI model number (01-16) that corresponds to the UI model Press Power Pause the control is currently confi gured for. Always displays"---" when no Returns to t01 model is set in the control board. Proper model must be set when control board replaced.
-
Page 47: Error Codes
Error Codes Component, Critical Error Code Description System, or Test Failure No error EEPROM EEPROM failure Inlet thermistor Inlet thermistor short circuit Outlet thermistor Outlet thermistor short circuit Inlet thermistor Open circuit Outlet thermistor Open circuit Door switch Door switch malfunction Control board L2 and N incorrectly wired (ac input too high) Control board... -
Page 48: Schematics And Wiring Diagrams
Schematics and Wiring Diagrams Electric Model WARNING: Disconnect electrical power before servicing. Caution: Label all wires prior to disconnection. Wiring errors can cause improper and dangerous operation. Verify operation after servicing. (Continued Next Page) – 48 –... - Page 49 Gas Model WARNING: Disconnect electrical power before servicing. Caution: Label all wires prior to disconnection. Wiring errors can cause improper and dangerous operation. Verify operation after servicing. – 49 –...
-
Page 50: Warranty
Warranty All warranty service provided by our Factory Service Centers, Staple your receipt here. or an authorized Customer Care ® technician. To schedule service, Proof of the original purchase on-line, 24 hours a day, visit us at ge.com, or call 800.GE.CARES date is needed to obtain service (800.432.2737).
Need help?
Do you have a question about the DBVH512 and is the answer not in the manual?
Questions and answers
Is the drum felt supposed to to go all the way around the drum?