Table of Contents
Advertisement
Operator's Manual
LAWN TRACTOR
*
17.5 HP ,
Electric Start
Automatic Transmission
Model No.
917.98633
This product has a low emission engine which operates
differently from previously built engines. Before you start the
engine, read and understand this Operator's Manual.
IMPORTANT:
Read and follow all Safety
Rules and Instructions before
operating this equipment.
Gasoline containing up to 10% ethanol (E10) is acceptable for use in this machine.
The use of any gasoline exceeding 10% ethanol (E10) will void the product warranty.
Sears Brands Management Corporation, Hoffman Estates, IL 60179 U.S.A.
Visit our Craftsman website:www.sears.com/craftsman
585801140
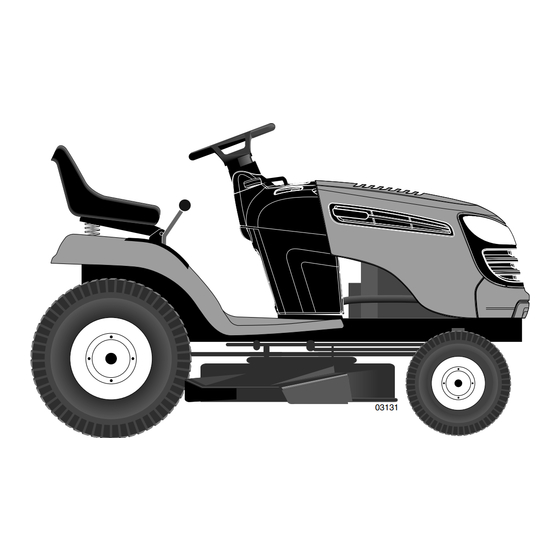
30" Mower
03131
For answers to your questions
about this product, Call:
1-800-659-5917
SEARS Craftsman Help Line
5 am - 5 pm, Mon - Sat
*As rated by the engine manufacturer
Advertisement
Table of Contents

Related Manuals for Craftsman 917.98633


Summary of Contents for Craftsman 917.98633
- Page 1 Call: Read and follow all Safety 1-800-659-5917 Rules and Instructions before SEARS Craftsman Help Line operating this equipment. 5 am - 5 pm, Mon - Sat Gasoline containing up to 10% ethanol (E10) is acceptable for use in this machine.
-
Page 2: Table Of Contents
Operation ..........11 Troubleshooting ........31 WARRANTY CRAFTSMAN FULL WARRANTY TWO YEARS ON RIDING EQUIPMENT When operated and maintained according to all supplied instructions, Warranty will also cover defects in material and workmanship of the Frame and Front Axle for five years from the date of purchase This warranty covers ONLY defects in material and workmanship. -
Page 3: Safety Rules
SAFETY RULES DANGER: This cutting machine is capable of amputating hands and feet and throwing objects. Failure to observe the following safety instructions could result in serious injury or death. • Never direct discharged material toward WARNING: In order to prevent acciden- anyone. - Page 4 SAFETY RULES II. SLOPE OPERATION • Keep children out of the mowing area and in the watchful care of a responsible Slopes are a major factor related to loss of adult other than the operator. control and tip-over accidents, which can •...
- Page 5 SAFETY RULES • Remove gas-powered equipment from • Never tamper with safety devices. Check the truck or trailer and refuel it on the their proper operation regularly. ground. If this is not possible, then refuel • Keep machine free of grass, leaves, or such equipment with a portable container, other debris build-up.
-
Page 6: Product Specifications
PRODUCT SPECIFICATIONS CUSTOMER RESPONSIBILITIES Gasoline Capacity 1.50 Gallons/5,67 L • Read and observe the safety rules. and type: Regular Unleaded • Follow a regular schedule in main tain ing, Power Rating*: 12.70 kW @ 3400 RPM caring for and using your tractor. Oil Type: SAE30 (above 32°F/0°C) •... -
Page 7: Unassembled Parts
UNASSEMBLED PARTS Steering Wheel (1) Lock Washer Steering (1) Large Wheel Insert Flat Washer Steering Wheel (1) Hex Bolt Steering Steering Wheel Extension Adapter Steering Boot Shaft Seat Battery (2) Hex Bolts (1) Large Flat Washer (2) Nut Keps (1) Seat (1) Bolt Keys Oil Drain Extension... -
Page 8: Assembly/Pre-Operation
ASSEMBLY/PRE-OPERATION Your new tractor has been assembled at the factory with exception of those parts left unassembled for shipping purposes. To ensure safe and proper operation of your tractor all parts and hardware you assemble must be tightened securely. Use the correct tools as necessary to ensure proper tightness. - Page 9 4. Push down on seat to engage pads in INSTALL MULCHER PLATE slots and pull seat towards rear of tractor. (If previously removed) 5. Raise seat and tighten bolt securely. 1. Raise and hold deflector shield in up right 6. Remove tape and discard. po si tion.
- Page 10 ✓CHECKLIST NOTE: You may now roll your tractor off the skid. Continue using the instructions that Before you operate your new trac tor, we follow to remove the tractor from the skid. wish to assure that you receive the best performance and satisfaction from this WARNING: Before start ing, read, un- Quality Product.
-
Page 11: Operation
OPERATION These symbols may appear on your tractor or in literature supplied with the product. Learn and understand their meaning. FAST SLOW REVERSE NEUTRAL HIGH CHOKE IGNITION SWITCH ENGINE START MOWER HEIGHT REVERSE ENGINE ON PARKING BRAKE MOWER LIFT ENGINE OFF OPERATION SYSTEM (ROS) CLUTCH/BRAKE... -
Page 12: Manual
KNOW YOUR TRACTOR READ THIS MANUAL AND SAFETY RULES BEFORE OPERATING YOUR TRACTOR Compare the illustrations with your tractor to familiarize yourself with the locations of various controls and ad just ments. Save this manual for future reference. Our tractors conform to the applicable safety standards of the American National Stan dards Institute. -
Page 13: Manual
The operation of any tractor can result in foreign objects thrown into the eyes, which can result in severe eye dam age. Always wear safety glass es or eye shields while operating your tractor or per form ing any ad just ments or repairs. We rec om mend standard safety glasses or a wide vision safety mask worn over spectacles. -
Page 14: Manual
TO ADJUST MOWER CUT TING HEIGHT 3. Repeat for all, installing gauge wheel in same adjustment hole. The po si tion of the at tach ment lift le ver (A) de ter mines the cut ting height. TO OPERATE MOWER Your tractor is equipped with an operator presence sensing switch. -
Page 15: Manual
2. With engine running, turn ignition key Trans m ission Engaged counterclockwise to ROS "ON" position. 3. Look down and behind before and while backing. 4. Slowly move motion control lever to reverse (R) po si tion to start movement. 5. -
Page 16: Manual
ADD GASOLINE 6. Insert key into ignition and turn key clock wise to start position and release • Fill fuel tank to bottom of filler neck. Do key as soon as engine starts. Do not run not overfill. Use fresh, clean, regular starter continuously for more than fifteen gasoline with a minimum of 87 octane. -
Page 17: Manual
IMPORTANT: Should your transmission MOWING TIPS require removal for service or re place ment, • DO NOT use tire chains when the mower it should be purged after re in stal la tion before hous ing is attached to tractor. operating the tractor. -
Page 18: Maintenance Schedule
MAINTENANCE BEFORE EVERY EVERY EVERY EVERY EVERY BEFORE MAINTENANCE EACH SEASON STORAGE SCHEDULE HOURS HOURS HOURS HOURS Check Brake Operation Check Tire Pressure Check Operator Presence & ROS Systems Check for Loose Fasteners Check/Replace Mower Blades Lubrication Chart Check Battery Level Clean Battery and Terminals Clean Debris Off Steering Plate ck Transaxle Cooling... -
Page 19: Manual
TRACTOR Always observe safety rules when per form- ing any main te nance. BRAKE OPERATION If tractor requires more than 5 feet (1,5 m) Ros "On" Engine "On" Position to stop at highest speed in high est gear on Position (Normal Operating) a level, dry concrete or paved surface, then brake must be serviced. -
Page 20: Manual
TO CLEAN BATTERY AND TER MI NALS NOTE: Although multi-viscosity oils (5W30, 10W30 etc.) improve starting in cold weather, Corrosion and dirt on the battery and terminals they will result in increased oil consumption when can cause the battery to “leak” power. used above 32°F/0°C. -
Page 21: Manual
CLEAN AIR SCREEN 13. Refill engine with oil through oil fill dip- Air screen must be kept free of dirt and chaff stick tube. Pour slowly. Do not overfill. to prevent engine dam age from overheating. For approximate capacity see “PROD- Clean with a wire brush or compressed air to UCT SPECIFICATIONS”... -
Page 22: Manual
CLEANING • Clean engine, battery, seat, finish, etc. of all foreign matter. • Clean debris from steering plate. Debris can restrict clutch/brake pedal shaft move- ment, causing belt slip and loss of drive. CAUTION: Avoid all pinch points and movable parts Clutch/brake pedal Clean top side... -
Page 23: Service And Adjustments
SERVICE AND ADJUSTMENTS WARNING: TO AVOID SERIOUS INJURY, BEFORE PERFORMING ANY SER VICE OR ADJUSTMENTS: 1. Depress brake pedal fully and set parking brake. 2. Place motion control lever in neutral position. 3. Place attachment clutch in “DISENGAGED” position. 4. Turn ignition key to “STOP” and remove key. 5. -
Page 24: Manual
3. ATTACH MOWER SIDE SUSPENSION 7. Insert end of link (E) into hole in front ARMS (A) TO CHASSIS - Position hole mower bracket (H) and secure with in arm over pin (B) on outside of tractor washer and retainer spring (J). chassis and secure with retainer spring. -
Page 25: Manual
TO LEVEL MOWER FRONT-TO-BACK ADJUSTMENT Ensure tires are properly inflated to the PSI IMPORTANT: Deck must be level side- shown on tires. If tires are over or under to-side. inflated, it may affect the appearance of your To obtain the best cutting re sults, the mower lawn and lead you to think the mower is not blades should be adjusted so the front tip adjusted properly. -
Page 26: Manual
TO REPLACE MOWER BLADE DRIVE BELT BELT INSTALLATION - The mower blade drive belt may be replaced 1. Install new belt from tractor rear to front, without tools. Park the tractor on level sur- over the steering plate (F) and above face. -
Page 27: Manual
TRANSAXLE MOTION CON TROL LE- TO CHECK BRAKE VER NEUTRAL AD JUST MENT If tractor requires more than five (5) feet (1,5 The motion control lever has been pre set m) to stop at highest speed in high est gear at the factory and adjustment should not on a level, dry concrete or paved surface, be necessary. - Page 28 TO START ENGINE WITH A WEAK BAT- REPLACING BATTERY TERY WARNING: Do not short bat tery ter mi- WARNING: Lead-acid batteries gen er- nals by al low ing a wrench or any other object ate ex plo sive gases. Keep sparks, flame to contact both terminals at the same time.
-
Page 29: Manual
TO REPLACE FUSE Replace with 30 amp automotive-type plug- in fuse. The fuse holder is located behind the dash. TO REMOVE HOOD AND GRILL AS- SEM BLY 1. Raise hood. 2. Unsnap headlight wire connector. 3. Stand in front of tractor. Grasp hood at sides, tilt toward engine and lift off of tractor. -
Page 30: Storage
STORAGE Immediately prepare your tractor for stor age ENGINE at the end of the season or if the tractor will FUEL SYSTEM not be used for 30 days or more. IMPORTANT: It is important to prevent gum deposits from forming in essential fuel WARNING: Never store the trac tor with system parts such as carburetor, fuel hose, gas o line in the tank inside a building where... -
Page 31: Troubleshooting
TROUBLESHOOTING CHART: See ap pro pri ate section in manual un less di rect ed to Sears service center. PROBLEM CAUSE CORRECTION Will not start Out of fuel. 1 Fill fuel tank. Engine not “CHOKED” properly. 2 See “TO START ENGINE” in Operation section. -
Page 32: Manual
TROUBLESHOOTING CHART: See ap pro pri ate section in manual un less di rect ed to Sears service center. PROBLEM CAUSE CORRECTION Loss of power Cutting too much grass/too fast. 1 Raise cutting height/reduce speed. Throttle in “CHOKE” position. 2 Adjust throttle control. Build-up of grass, leaves and 3 Clean underside of mower trash under mower. -
Page 33: Manual
TROUBLESHOOTING CHART: See ap pro pri ate section in manual un less di rect ed to Sears service center. PROBLEM CAUSE CORRECTION Mower blades will Obstruction in clutch mechanism. 1 Remove obstruction. not rotate Worn/damaged mower drive belt. 2 Replace mower drive belt. Frozen idler pulley. -
Page 34: Manual
TROUBLESHOOTING CHART: See ap pro pri ate section in manual un less di rect ed to Sears service center. PROBLEM CAUSE CORRECTION Loss of drive Freewheel control in Place freewheel control in “DISENGAGED” position. “ENGAGED” position. Debris on steering plate (if See "CLEANING"... -
Page 36: Manual
09.03.13 BD Printed in the U.S.A.
Need help?
Do you have a question about the 917.98633 and is the answer not in the manual?
Questions and answers