Table of Contents
Advertisement
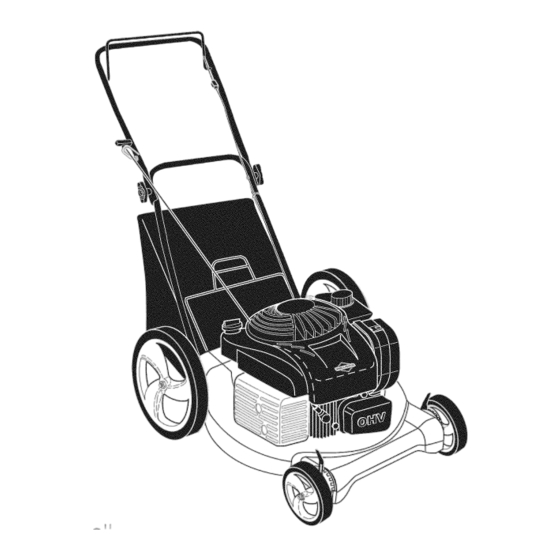
Owner's Manual
®
OTARY LAWN
550 Series Briggs &
21" Rear-Discharge
MOWER
Stratton Engine
Model No.
917.9998A
• EspaSol, p. 18
CAUTION'.
Read and follow all
Safety Rules and Instructions
before operating
this equipment
Sears Brands Management
Corp., Hoffman Estates, IL 60179 U.S.A.
Visit our Craftsman website: www.sears.com
/ craftsman
Advertisement
Table of Contents
Troubleshooting

Subscribe to Our Youtube Channel
Related Manuals for Craftsman 917.9998A


Summary of Contents for Craftsman 917.9998A
- Page 1 Stratton Engine 21" Rear-Discharge Model No. 917.9998A • EspaSol, p. 18 CAUTION'. Read and follow all Safety Rules and Instructions before operating this equipment Sears Brands Management Corp., Hoffman Estates, IL 60179 U.S.A. Visit our Craftsman website: www.sears.com / craftsman...
-
Page 2: Warranty
7-10 Repair Parts ........34-41 Maintenance Schedule ......Sears Service ......Back Cover CRAFTSMAN 2-YEAR FULL WARRANTY For TWO YEARS from the date of purchase, this product is warranted against any defects in material or workmanship. Defective product will receive free repair or replacement if repair is unavailable. -
Page 3: General Operation
I. GENERAL OPERATION • Always wear safety goggles or safety glasses with side shields when operating • Read, understand, and follow all mower. instructions on the machine and in the manual(s) before starting. Be thoroughly II. SLOPE OPERATION familiar with the controls and the proper Slopes are a major factor related to slip &... -
Page 4: General Service
• Never fill containers inside a vehicle, on • Keep nuts and bolts, especially blade a truck or trailer bed with a plastic liner. attachment bolts, tight and keep equip- Always place containers on the ground ment in good condition. away from your vehicle before filling. -
Page 5: Lawn Mower
Repair Protection Agreements Congratulations on making a smart pur- • Fast help by phone- phone sup- chase. Your new Craftsman® product is port from a Sears representative designed and manufactured for years of products requiring in-home repair, plus dependable operation. - Page 6 Read these instructions and this manual in Operator MOWING its entirety before you attempt to assemble POSITION control bar or operate your new lawn mower. IMPORTANT: This lawn mower is shipped WITHOUT OIL OR GASOLINE in the ///! engine. Your new lawn mower been assem- Upper at the factory with the exception of...
- Page 7 KNOW YOUR LAWN MOWER READ THIS OWNER'S MANUAL AND ALL SAFETY RULES BEFORE OPERATING YOUR LAWN MOWER. Compare the illustrations with your lawn mower to familiarize yourself with the location of various controls and adjustments. Save this manual for future reference. These symbols may appear on your lawn mower or in literature supplied with the...
-
Page 8: Safety Glasses
TO CONVERT MOWER The operationof any SAFETY GLASSES lawn mower can result Your lawn mower was shipped ready to be in foreign objects thrown used as a mulcher. To convert to bagging: • Lift rear door of the lawn mower and into the eyes, which can result in severe eye dam- place the grass catcher frame hooks... -
Page 9: To Stop Engine
3. You receive a container of oil with the TO STOP ENGINE unit. Slowly pour the entire container • To stop engine, release operator pres- down the oil fill spout into the engine. ence control bar. NOTE: Initial oil fill requires only 14 oz. TO START ENGINE due to residualoil in engine from the... -
Page 10: Mowing Tips
MULCHING MOWING TiPS MOWING TiPS _, CAUTION: Do not use de-thatcher IMPORTANT: For best performance, blade attachments on your mower. Such keep mower housing free of built-up attachments are hazardous, will damage grass and trash. See "CLEANING" in the Maintenance section of this manual. -
Page 11: General Recommendations
MAINTENANCE BEFORE A FTER EVERY EVERY EVERY BEFORE EACH EACH 25 HOURS SCHEDULE USE USE HOURS OR SEASON HOURS STORAGE Check for Loose Fasteners _ Clean / Inspect Grass Catcher * Check Tires _ Check Drive Wheels Clean Lawn Mower ..M Clean under Drive Cover *** O Check Drive Belt / Pulleys *** Check / Sharpen / Replace Blade... - Page 12 IMPORTANT: Blade bolt is heat treated. LAWN MOWER If bolt needs replacing, replace only with Always observe safety rules when per- approved bolt shown in the Repair Parts forming any maintenance. section of this manual. TIRES TO SHARPEN BLADE • Keep tires free of gasoline, oil, or insect NOTE: We do not recommend sharp- control chemicals which can harm rubber.
- Page 13 TO CHANGE ENGINEOIL _i_CAUTION: Petroleum solvents, such NOTE: Before tipping lawn mower to drain as kerosene, are not to be used to clean oil, empty fuel tank by running engine until cartridge. They may cause deterioration fuel tank is empty. of the cartridge.
- Page 14 ,_ WARNING" To avoid serious injury, Mowing r-'q Mowing before performing any service and _.Niposition ,, position adjustments: 1. Releasecontrol bar and stop engine. 2. Make sure the blade and all moving parts have completely stopped. 3. Disconnectspark plug wire from spark Hairpin plug and place wire where it cannot _Handle...
- Page 15 Immediately prepare your lawn mower for Operator MOWING storage at the end of the season or if the POSITION control bar unit will not be used for 30 days or more. LAWN MOWER ii ii When lawn mower is to be stored for a FOLD -.-..
-
Page 16: Troubleshooting
ENGINE OIL • Replace your gasoline can if your can starts to rust. Rust and / or dirt in your Drain oil (with engine warm) and replace gasoline will cause problems. with clean engine oil. (See "ENGINE" in • If possible, store your unit indoors and the Maintenance section of this manual). - Page 17 TROUBLESHOOTING - See appropriate section in manual unless directed to a Sears Parts & Repair Center. PROBLEM CAUSE CORRECTION 1. Rear of lawn mower Loss of power 1. Raise cutting height. 3lade housing or cutting dragging in heavy grass. 2. Cutting too much grass. 2.
- Page 18 Esta garantia SOLO cubre defectos de material y mano de obra. La cobertura de la garantia NO incluye: •...
- Page 19 I. OPERACION • Siempre use gafas de seguridad o anteojos con protecci6n lateral cuando opere la sega- • Antes de empezar, debe familiarizarse dora. completamente con los controles y el uso correcto de la maquina. Para esto, debe leer y comprender todas las instrucciones que II.
- Page 20 • Nunca repostar la m_.quina al interior de un • Mantenga las tuercas y los pernos, espe- local. cialmente los pernos del accesorio de la • Nunca guardar la m_.quina o el contenedor cuchilla, apretados y mantenga el equipo en buenas condiciones.
-
Page 21: Mantenimiento
Reparaci6n Congratulaciones por su buena compra. • Ayuda rapida pot telefono - soporte tele- nuevo producto Craftsman® estA disehado f6nico pot parte de un representento Sears y fabricado para funcionar de modo fiable pot sobre productos que requieren un arreglo en muchos ahos. - Page 22 Lea estas instrucciones y este manual comple- Barra de POSICION tamente antes de tratar de montar u operar su que sxige la PARA segadora nueva. presencia det SEGAR IMPORTANTE: Este cortac_sped viene SIN operador ACEITE O GASOLINA en el motor. ///J Su segadora nueva ha sido montada en la...
- Page 23 FAMILIARICESE CON SU SEGADORA LEA ESTE MANUAL DEL DUENO Y LAS REGLAS DE SEGURIDADANTES DE OPARAR SU SEGADORA. Compare las ilustraciones con su segadora para familiarizarse con la ubicaci6n de los diversos controles y ajustes. Guarde este manual para referencia en el futuro. Estos simbolos pueden apareser sobre su segadora o en la literatura...
- Page 24 PARA CONVERTIR LA SEGADORA Laoperaci6n de cualquier Su segadora fue enviada lista para usarse como segadora puedehacerque acolchadora de capa vegetal. Para convertirla a saltenobjetos extrahos dentrode una operaci6n de ensacado: susojos,Ioquepuedeproducir • Levantar la puerta trasera de cortac6sped dahosgravesen_stos.Siempre y colocar los ganchos del armaz6n de la useanteojos de seguridad o protecci6n para recolectora...
- Page 25 Usted recibe un envase de aceite con la estanque del combustible, haga arrancar el unidad. Vierta lentamente el envase entero motor y hb.galo funcionar hasta que las Ifneas de aceite en el tubo de relleno del motor. del combustible y el carburador queden vac[os.
- Page 26 CONSEJOS PARA SEGAR CONSEJOS PARA SEGAR Y ACOLCHAR _PRECAUClON: No utilizar dispositivos anti- IMPORTANTE: Para obtener el mejor paja de la hoja en la segadora ya que estos rendimiento mantenga la caja de la segadora accesorios son peligrosos, pueden dahar su sin acumulacion de cesped y basura.
- Page 27 PROGRAMA ANTES DESPUES CADA CADA CADA ANTES DEL DE CADA DE CADA 25 HORAS O ALMACE- MANTEN|M| NTO HORAS TEMPORADA HORAS NAMIENTO Revisar si hay Sujetadores Sueltos Limpiar/Inspeccionar el Recogedor de Cesped Controlar los Neumaticos Controlar las Ruedas Motrices Limpiar la Segadora ..
- Page 28 SEGADORA • La torsi6n para apretar recomendada es de 35 - 40 pies libras. Siempre observe las reglas de seguridad cu- IMPORTANTE: El perno de la cuchilla es tratado ando haga el mantenimiento. a calo. Si es necesario sustituir los pernos, LLANTAS sustituirlos s61o con pernos aprobados mostrados •...
- Page 29 PARA CAMBIAR EL ACEITE DEL MOTOR _,PRECAUCl0N: Los solventes de petr61eo, AVlSO: Antes de inclinar la segadora para dre- tales como el keroseno, no se deben usar para nat el aceite, drene el tanque de combustible limpiar el cartucho. Pueden producir el deteri- haciendo cotter el motor hasta que el tanque oro de _ste.
- Page 30 _ADVERTENClA: Para evitar lesi6nes serias, Posici6n Posici6n /r-? antes de dar calquier servico o de hacer segar', para segar / ajustes: 1. Suelte la barra de control y pare el motor. AsegOrese que la cuchilla y que todas las partes movibles se hayan detenido comple- tamente.
- Page 31 Inmediatamente prepare su segadora para el APRtETE almacenamiento al final de cada temporada o si PARA DOBLAR la unidad no se va a usar pot 30 dias o m_.s. _" Mango inferior SEGADORA Cuando se va a guardar la segadora pot cierto periodo de tiempo, limpiela cuidadosamente, remueva toda la mugre, la grasa, las hojas, etc.
- Page 32 ClLINDRO • Si es posible, guarde su unidad en un recinto Remuevala bujfa. cerrado y cLibrala para protegerla contra el Vac[e una onza (29 ml) de aceite a trav_s polvo y la mugre. del agujero de la bujfa en el cilindro. •...
- Page 33 SOLUCION DE PROBLEMAS - Yea ia seccion apropiada en el manual amenos este dirigido a un centro de servico Sears. CAUSA CORRECClON i PROBLEMA Falta de 1. Cuchilla desgastada, doblada Ajuste a la posici6n de fuerza o suelta. "Corte mb.s alto." AItura de las ruedas dispareja.
- Page 34 CRAFTSMAN ROTARY LAWN MOWER - - MODEL NUMBER 917,9998A ..,,,, ...... 39 65 66 55 .._:_ ... 54 ....49...
- Page 35 CRAFTSMAN ROTARY LAWN MOWER - - MODEL NUMBER 917,9998A PART PART PART DESCRiPTiON DESCRiPTiON DESCRiPTiON 194176X428 Control Bar 87877 Selector Knob 850977 Blade Adapter 194180X479 Upper Handle 401176X004 Axle Arm Assembly, Rear, LH - - - Engine, Briggs & Stratton,...
- Page 36 BRIGGS & STRATTON 4=CYCLE ENGINE MODEL NUMBER 9P702-0027-F1 305_ 1036 EMISSIONS LABEL 9723 1395_ 528i 334_ 745A_ 332_ 333J 745_ 75 _-'_ 9233 ... i¸¸...
- Page 37 BRIGGS & STRATTON 4=CYCLE ENGINE MODEL NUMBER 9P702-0027-F1 I 1058 OPERATOR'S MANUAL [ 1329 REPLACEMENT ENGINE 1330 REPAIR MANUAL 1264 I 48 SHORT BLOCK I 1263(_ 615 @ 404 ® 718 [_ 7180 22A_...
- Page 38 BRIGGS & STRATTON 4-CYCLE ENGINE MODEL NUMBER 9P702-0027-F1 318 _ 1238 © 1026_ 868_ 1029_ 1029A % 1023...
- Page 39 BRIGGS & STRATTON 4=CYCLE ENGINE MODEL NUMBER 9P702-0027-F1 121 CARBURETOR OVERHAUL ® 358 ENGINE GASKET SET 842 _ 868 @ Engine Power Rating information The gross power rating for individual gas engine models is labeled in accordance with SAE (So- ciety of Automo-tive Engineers) code J11940 (Small Engine Power &...
- Page 40 BRIGGS & STRATTON 4=CYCLE ENGINE MODEL NUMBER 9P702-0027=F1 PART PART DESCRIPTION DESCRiPTiON 590519 Cylinder Assembly 591108 Rope-Starter 299819s Kit-Bushing / Seal 691915 Grip-Starter Rope (Magneto Side) 799716 Grip-Starter Rope 590569 Sump-Engine 590546 Washer (Flywheel) 590525 Head-Cylinder 793480 Screw (Flywheel Guard) 799586 Gasket-Cylinder Head...
- Page 41 BRIGGS & STRATTON 4=CYCLE ENGINE MODEL NUMBER 9P702-0027-F1 PART PART DESCRiPTiON DESCRiPTiON 590551 Brake Bracket-Mounting 691487 Guard-Rewind (Carburetor) 590585 793515 Nut (Governor Control Lever) 591003 Cap-Fuel 796503 Cover-Air Cleaner Dipstick 590581 691876 Fuel-Tank Seal-Dipstick Tube 590568 793006 Bowl-Float Hose-Primer (Fuel Tank) 591116 Cover-Rocker (Cut To Required Length)
- Page 42 S_RV|C_ NOTES...
- Page 43 S_RV|C_ NOTES...
- Page 44 NEED HORE HELP? YouTl find the answer and more on managemyho_eoCOm - for fr'ee! o Find this and aLLyour other product manuals online. o Get answers from our team of home experts. o Get a personalized maintenance plan for your home. o Find information and tooLs to help with home projects.
- Page 45 Stratton Engine 21" Rear-Discharge Model No. 917.9998A • EspaSol, p. 18 CAUTION'. Read and follow all Safety Rules and Instructions before operating this equipment Sears Brands Management Corp., Hoffman Estates, IL 60179 U.S.A. Visit our Craftsman website: www.sears.com / craftsman...
- Page 46 7-10 Repair Parts ........34-41 Maintenance Schedule ......Sears Service ......Back Cover CRAFTSMAN 2-YEAR FULL WARRANTY For TWO YEARS from the date of purchase, this product is warranted against any defects in material or workmanship. Defective product will receive free repair or replacement if repair is unavailable.
- Page 47 I. GENERAL OPERATION • Always wear safety goggles or safety glasses with side shields when operating • Read, understand, and follow all mower. instructions on the machine and in the manual(s) before starting. Be thoroughly II. SLOPE OPERATION familiar with the controls and the proper Slopes are a major factor related to slip &...
- Page 48 • Never fill containers inside a vehicle, on • Keep nuts and bolts, especially blade a truck or trailer bed with a plastic liner. attachment bolts, tight and keep equip- Always place containers on the ground ment in good condition. away from your vehicle before filling.
-
Page 49: Lawn Mower
Repair Protection Agreements Congratulations on making a smart pur- • Fast help by phone- phone sup- chase. Your new Craftsman® product is port from a Sears representative designed and manufactured for years of products requiring in-home repair, plus dependable operation. - Page 50 Read these instructions and this manual in Operator MOWING its entirety before you attempt to assemble POSITION control bar or operate your new lawn mower. IMPORTANT: This lawn mower is shipped WITHOUT OIL OR GASOLINE in the ///! engine. Your new lawn mower been assem- Upper at the factory with the exception of...
- Page 51 KNOW YOUR LAWN MOWER READ THIS OWNER'S MANUAL AND ALL SAFETY RULES BEFORE OPERATING YOUR LAWN MOWER. Compare the illustrations with your lawn mower to familiarize yourself with the location of various controls and adjustments. Save this manual for future reference. These symbols may appear on your lawn mower or in literature supplied with the...
- Page 52 TO CONVERT MOWER The operationof any SAFETY GLASSES lawn mower can result Your lawn mower was shipped ready to be in foreign objects thrown used as a mulcher. To convert to bagging: • Lift rear door of the lawn mower and into the eyes, which can result in severe eye dam- place the grass catcher frame hooks...
- Page 53 3. You receive a container of oil with the TO STOP ENGINE unit. Slowly pour the entire container • To stop engine, release operator pres- down the oil fill spout into the engine. ence control bar. NOTE: Initial oil fill requires only 14 oz. TO START ENGINE due to residualoil in engine from the...
- Page 54 MULCHING MOWING TiPS MOWING TiPS _, CAUTION: Do not use de-thatcher IMPORTANT: For best performance, blade attachments on your mower. Such keep mower housing free of built-up attachments are hazardous, will damage grass and trash. See "CLEANING" in the Maintenance section of this manual.
- Page 55 MAINTENANCE BEFORE A FTER EVERY EVERY EVERY BEFORE EACH EACH 25 HOURS SCHEDULE USE USE HOURS OR SEASON HOURS STORAGE Check for Loose Fasteners _ Clean / Inspect Grass Catcher * Check Tires _ Check Drive Wheels Clean Lawn Mower ..M Clean under Drive Cover *** O Check Drive Belt / Pulleys *** Check / Sharpen / Replace Blade...
- Page 56 IMPORTANT: Blade bolt is heat treated. LAWN MOWER If bolt needs replacing, replace only with Always observe safety rules when per- approved bolt shown in the Repair Parts forming any maintenance. section of this manual. TIRES TO SHARPEN BLADE • Keep tires free of gasoline, oil, or insect NOTE: We do not recommend sharp- control chemicals which can harm rubber.
- Page 57 TO CHANGE ENGINEOIL _i_CAUTION: Petroleum solvents, such NOTE: Before tipping lawn mower to drain as kerosene, are not to be used to clean oil, empty fuel tank by running engine until cartridge. They may cause deterioration fuel tank is empty. of the cartridge.
- Page 58 ,_ WARNING" To avoid serious injury, Mowing r-'q Mowing before performing any service and _.Niposition ,, position adjustments: 1. Releasecontrol bar and stop engine. 2. Make sure the blade and all moving parts have completely stopped. 3. Disconnectspark plug wire from spark Hairpin plug and place wire where it cannot _Handle...
- Page 59 Immediately prepare your lawn mower for Operator MOWING storage at the end of the season or if the POSITION control bar unit will not be used for 30 days or more. LAWN MOWER ii ii When lawn mower is to be stored for a FOLD -.-..
-
Page 60: Troubleshooting
ENGINE OIL • Replace your gasoline can if your can starts to rust. Rust and / or dirt in your Drain oil (with engine warm) and replace gasoline will cause problems. with clean engine oil. (See "ENGINE" in • If possible, store your unit indoors and the Maintenance section of this manual). - Page 61 TROUBLESHOOTING - See appropriate section in manual unless directed to a Sears Parts & Repair Center. PROBLEM CAUSE CORRECTION 1. Rear of lawn mower Loss of power 1. Raise cutting height. 3lade housing or cutting dragging in heavy grass. 2. Cutting too much grass. 2.
- Page 62 Esta garantia SOLO cubre defectos de material y mano de obra. La cobertura de la garantia NO incluye: •...
- Page 63 I. OPERACION • Siempre use gafas de seguridad o anteojos con protecci6n lateral cuando opere la sega- • Antes de empezar, debe familiarizarse dora. completamente con los controles y el uso correcto de la maquina. Para esto, debe leer y comprender todas las instrucciones que II.
- Page 64 • Nunca repostar la m_.quina al interior de un • Mantenga las tuercas y los pernos, espe- local. cialmente los pernos del accesorio de la • Nunca guardar la m_.quina o el contenedor cuchilla, apretados y mantenga el equipo en buenas condiciones.
- Page 65 Reparaci6n Congratulaciones por su buena compra. • Ayuda rapida pot telefono - soporte tele- nuevo producto Craftsman® estA disehado f6nico pot parte de un representento Sears y fabricado para funcionar de modo fiable pot sobre productos que requieren un arreglo en muchos ahos.
- Page 66 Lea estas instrucciones y este manual comple- Barra de POSICION tamente antes de tratar de montar u operar su que sxige la PARA segadora nueva. presencia det SEGAR IMPORTANTE: Este cortac_sped viene SIN operador ACEITE O GASOLINA en el motor. ///J Su segadora nueva ha sido montada en la...
- Page 67 FAMILIARICESE CON SU SEGADORA LEA ESTE MANUAL DEL DUENO Y LAS REGLAS DE SEGURIDADANTES DE OPARAR SU SEGADORA. Compare las ilustraciones con su segadora para familiarizarse con la ubicaci6n de los diversos controles y ajustes. Guarde este manual para referencia en el futuro. Estos simbolos pueden apareser sobre su segadora o en la literatura...
- Page 68 PARA CONVERTIR LA SEGADORA Laoperaci6n de cualquier Su segadora fue enviada lista para usarse como segadora puedehacerque acolchadora de capa vegetal. Para convertirla a saltenobjetos extrahos dentrode una operaci6n de ensacado: susojos,Ioquepuedeproducir • Levantar la puerta trasera de cortac6sped dahosgravesen_stos.Siempre y colocar los ganchos del armaz6n de la useanteojos de seguridad o protecci6n para recolectora...
- Page 69 Usted recibe un envase de aceite con la estanque del combustible, haga arrancar el unidad. Vierta lentamente el envase entero motor y hb.galo funcionar hasta que las Ifneas de aceite en el tubo de relleno del motor. del combustible y el carburador queden vac[os.
- Page 70 CONSEJOS PARA SEGAR CONSEJOS PARA SEGAR Y ACOLCHAR _PRECAUClON: No utilizar dispositivos anti- IMPORTANTE: Para obtener el mejor paja de la hoja en la segadora ya que estos rendimiento mantenga la caja de la segadora accesorios son peligrosos, pueden dahar su sin acumulacion de cesped y basura.
- Page 71 PROGRAMA ANTES DESPUES CADA CADA CADA ANTES DEL DE CADA DE CADA 25 HORAS O ALMACE- MANTEN|M| NTO HORAS TEMPORADA HORAS NAMIENTO Revisar si hay Sujetadores Sueltos Limpiar/Inspeccionar el Recogedor de Cesped Controlar los Neumaticos Controlar las Ruedas Motrices Limpiar la Segadora ..
- Page 72 SEGADORA • La torsi6n para apretar recomendada es de 35 - 40 pies libras. Siempre observe las reglas de seguridad cu- IMPORTANTE: El perno de la cuchilla es tratado ando haga el mantenimiento. a calo. Si es necesario sustituir los pernos, LLANTAS sustituirlos s61o con pernos aprobados mostrados •...
- Page 73 PARA CAMBIAR EL ACEITE DEL MOTOR _,PRECAUCl0N: Los solventes de petr61eo, AVlSO: Antes de inclinar la segadora para dre- tales como el keroseno, no se deben usar para nat el aceite, drene el tanque de combustible limpiar el cartucho. Pueden producir el deteri- haciendo cotter el motor hasta que el tanque oro de _ste.
- Page 74 _ADVERTENClA: Para evitar lesi6nes serias, Posici6n Posici6n /r-? antes de dar calquier servico o de hacer segar', para segar / ajustes: 1. Suelte la barra de control y pare el motor. AsegOrese que la cuchilla y que todas las partes movibles se hayan detenido comple- tamente.
- Page 75 Inmediatamente prepare su segadora para el APRtETE almacenamiento al final de cada temporada o si PARA DOBLAR la unidad no se va a usar pot 30 dias o m_.s. _" Mango inferior SEGADORA Cuando se va a guardar la segadora pot cierto periodo de tiempo, limpiela cuidadosamente, remueva toda la mugre, la grasa, las hojas, etc.
- Page 76 ClLINDRO • Si es posible, guarde su unidad en un recinto Remuevala bujfa. cerrado y cLibrala para protegerla contra el Vac[e una onza (29 ml) de aceite a trav_s polvo y la mugre. del agujero de la bujfa en el cilindro. •...
- Page 77 SOLUCION DE PROBLEMAS - Yea ia seccion apropiada en el manual amenos este dirigido a un centro de servico Sears. CAUSA CORRECClON i PROBLEMA Falta de 1. Cuchilla desgastada, doblada Ajuste a la posici6n de fuerza o suelta. "Corte mb.s alto." AItura de las ruedas dispareja.
- Page 78 CRAFTSMAN ROTARY LAWN MOWER - - MODEL NUMBER 917,9998A ..,,,, ...... 39 65 66 55 .._:_ ... 54 ....49...
- Page 79 CRAFTSMAN ROTARY LAWN MOWER - - MODEL NUMBER 917,9998A PART PART PART DESCRiPTiON DESCRiPTiON DESCRiPTiON 194176X428 Control Bar 87877 Selector Knob 850977 Blade Adapter 194180X479 Upper Handle 401176X004 Axle Arm Assembly, Rear, LH - - - Engine, Briggs & Stratton,...
- Page 80 BRIGGS & STRATTON 4=CYCLE ENGINE MODEL NUMBER 9P702-0027-F1 305_ 1036 EMISSIONS LABEL 9723 1395_ 528i 334_ 745A_ 332_ 333J 745_ 75 _-'_ 9233 ... i¸¸...
- Page 81 BRIGGS & STRATTON 4=CYCLE ENGINE MODEL NUMBER 9P702-0027-F1 I 1058 OPERATOR'S MANUAL [ 1329 REPLACEMENT ENGINE 1330 REPAIR MANUAL 1264 I 48 SHORT BLOCK I 1263(_ 615 @ 404 ® 718 [_ 7180 22A_...
- Page 82 BRIGGS & STRATTON 4-CYCLE ENGINE MODEL NUMBER 9P702-0027-F1 318 _ 1238 © 1026_ 868_ 1029_ 1029A % 1023...
- Page 83 BRIGGS & STRATTON 4=CYCLE ENGINE MODEL NUMBER 9P702-0027-F1 121 CARBURETOR OVERHAUL ® 358 ENGINE GASKET SET 842 _ 868 @ Engine Power Rating information The gross power rating for individual gas engine models is labeled in accordance with SAE (So- ciety of Automo-tive Engineers) code J11940 (Small Engine Power &...
- Page 84 BRIGGS & STRATTON 4=CYCLE ENGINE MODEL NUMBER 9P702-0027=F1 PART PART DESCRIPTION DESCRiPTiON 590519 Cylinder Assembly 591108 Rope-Starter 299819s Kit-Bushing / Seal 691915 Grip-Starter Rope (Magneto Side) 799716 Grip-Starter Rope 590569 Sump-Engine 590546 Washer (Flywheel) 590525 Head-Cylinder 793480 Screw (Flywheel Guard) 799586 Gasket-Cylinder Head...
- Page 85 BRIGGS & STRATTON 4=CYCLE ENGINE MODEL NUMBER 9P702-0027-F1 PART PART DESCRiPTiON DESCRiPTiON 590551 Brake Bracket-Mounting 691487 Guard-Rewind (Carburetor) 590585 793515 Nut (Governor Control Lever) 591003 Cap-Fuel 796503 Cover-Air Cleaner Dipstick 590581 691876 Fuel-Tank Seal-Dipstick Tube 590568 793006 Bowl-Float Hose-Primer (Fuel Tank) 591116 Cover-Rocker (Cut To Required Length)
- Page 86 S_RV|C_ NOTES...
- Page 87 S_RV|C_ NOTES...
- Page 88 NEED HORE HELP? YouTl find the answer and more on managemyho_eoCOm - for fr'ee! o Find this and aLLyour other product manuals online. o Get answers from our team of home experts. o Get a personalized maintenance plan for your home. o Find information and tooLs to help with home projects.
Need help?
Do you have a question about the 917.9998A and is the answer not in the manual?
Questions and answers