
Related Manuals for Nexus NX2500

Summary of Contents for Nexus NX2500
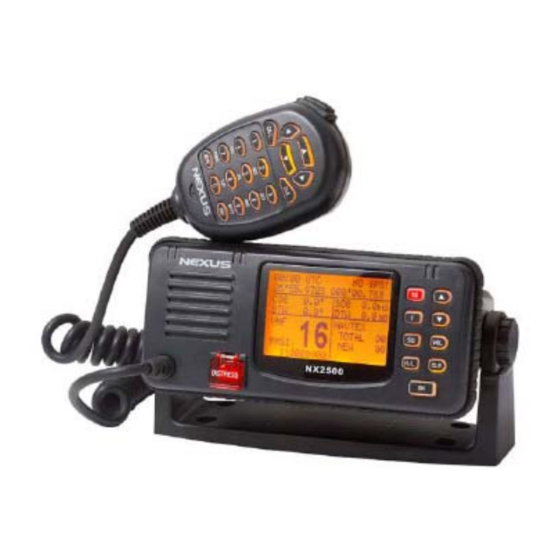
- Page 1 NX2500 Marine VHF Radio with Navtex and GPS repeater Installation and Operation Manual Installation and Operation Manual English English...
- Page 2 VHF NX2500 English...
-
Page 3: Table Of Contents
English VHF NX2500 Contents OPERATION RULES ..............4 Priorities ......................4 Privacy ......................4 Radio licenses....................4 1.3.1 Ship station license ..................4 1.3.2 Operator’s license ..................4 INTRODUCTION ................. 5 PANEL DESCRIPTION ............... 6 Front panel .....................6 Back panel .....................7 LCD Display ....................8 FIST MICROPHONE/CONTROLLER ......... 9 Soft Keypad (0 - 9) ..................9... - Page 4 VHF NX2500 English Set the Directory ..................26 RADIO SETTINGS ..............29 10.1 Backlight adjustment..................29 10.2 Contrast adjustment..................29 10.3 Speaker selecting ..................29 10.4 Beep sound selecting................... 30 10.5 Navtex Only-Mode ..................30 10.6 Set Date And TimE ..................31 NAVTEX Messages Settings............32...
-
Page 5: Operation Rules
English VHF NX2500 OPERATION RULES Priorities • Read all rules and regulations pertaining to priorities and keep an up-to-date copy handy. Safety and distress calls take priority over all others. • You must monitor Channel 16 when you are not operating on another channel. -
Page 6: Introduction
The NX2500 lets you make digitally selected calls, which are quicker and simpler to make compared with conventional voice calls using channel 16. Should a distress, urgency or safety situation occur, you can depend on the NX2500 to raise an alert quickly, thereby indicating your identity and position automatically through a distress communication on the emergency voice channel. -
Page 7: Panel Description
VHF NX2500 PANEL DESCRIPTION Front panel POWER SWITCH (ON) Press the (ON) button once to switch on the NX2500. To switch off, press the (ON) button again. HIGH/LOW POWER KEY (H/L) Select an output power of RF. 3. CLEAR KEY (CLR) Stops current task and returns to the main screen. -
Page 8: Back Panel
Upon completion, insert the screw and tighten once again. Note : To ensure your NX2500 maintains its water-proof integrity, please make sure the water-proof plastic washer is properly inserted before the screw; the screw should be fully tightened to prevent water ingress. -
Page 9: Lcd Display
English VHF NX2500 LCD Display GROUP 1 Volume control activated, the Bar indicates the volume level. Squelch control activated, the Bar indicates the squelch level. Appears when the squelch opens. The Radio is in receptive state (RX) and when receiving a signal. -
Page 10: Fist Microphone/Controller
VHF NX2500 English FIST MICROPHONE/CONTROLLER The fist microphone/controller has the microphone, Push to Talk (PTT) switch and soft keypad as illustrated below: Soft Keypad (0 - 9) The telephone style keypad ITU 0 – 9 / A - Z is used for entering numeric data. When required, the keys will automatically switch to character mode allowing letters, numbers and punctuation marks to be entered. - Page 11 English VHF NX2500 ENTER KEY (ENT) Confirms the action. CLEAR KEY (CLR) Stop tasks and returns to main screen or returns to the last screen. ◄ / ► Key Used to select stored numbers and names as marked by the cursor, or to select through the call log.
-
Page 12: General Operation
English GENERAL OPERATION The NX2500 is switched on by pressing the (ON) key once. If a GPS receiver has been connected to the NX2500, the MAIN screen will be as below: Press the (F) key on the front panel once to enter the Function Selection mode. The FUNCTION SELECTION screen will be displayed as below: Press the ▲... -
Page 13: Dual Watch (Dw)
Once the signal ends or drops below the squelch level, the Radio will continue scanning. Alternatively, you can instruct the NX2500 to continue scanning even if a signal has been detected on any particular channel by pressing the ▲ key once. -
Page 14: Squelch Control
VHF NX2500 English Squelch Control When the (SQ) key on the front panel is pressed, the squelch level bar and “Sq” symbol will appear at the right side of the screen as below: Then use ▲ and ▼ key on the front panel to adjust the receiver muting threshold (squelch) level. -
Page 15: Channel Selection (▲/▼)
English VHF NX2500 Channel Selection (▲/▼) Press ▲ key to go up through the channels. Press ▼ key to go down through the channels. Channel Selection Shortcut: Select the desired channel directly from the main screen by pressing the channel number on the fist microphone/controller, and then press “ENT”... -
Page 16: Receiving A Dsc Call
VHF NX2500 English RECEIVING A DSC CALL DISTRESS ALERT When receiving the DISTRESS ALERT, the radio will give off the alarm and display as follows, then jump to the 16 channel automatically, press the ENT key to confirm the alarm and monitor the communication at the same time, press the CLR to cancel the... -
Page 17: Group Call
English VHF NX2500 GROUP CALL When receiving the GROUP CALL, the receiver will give off the B-B sound and display as follows. The radio will jump to the working channel, waiting for the call, press the ENT key to cancel the B-B sound. -
Page 18: Distress Relay
VHF NX2500 English DISTRESS RELAY When receiving the DISTRESS RELAY CALL, the radio will give off the alarm and display as follows (transmit the ID of calling ship, the ID of the ship in danger, the danger categories of the ship in dangerous, orientation and time), press the CLR key to cancel the alarm, then return to the main interface. -
Page 19: Sending A Dsc Call
English VHF NX2500 SENDING A DSC CALL DISTRESS CALL Press and hold the DIST button on the front for 5seconds and the distress call will be send. If you have more time, you may press a short press on the DIST button and then select the nature of distress with ◄... -
Page 20: Safety Call
VHF NX2500 English SAFETY CALL Press the CALL key on the hand controller, choose the SAFETY CALL, then press the ◄ or ► key to choose ALL SHIP/INDIVIDUAL. If you choose the INDIVIDUAL, you need to input the receiver’s MMSI code, then press the▲ or ▼ to move the cursor “_”... -
Page 21: Urgency Call
English VHF NX2500 URGENCY CALL Press the CALL key on the hand controller, choose the URGENCY CALL, then press the ◄ or ► key to choose ALL SHIP/INDIVIDUAL. If you choose the INDIVIDUAL, you need to input the receiver’s MMSI code, then press the▲ or ▼ to move the cursor “_”... -
Page 22: Distress Relay
VHF NX2500 English DISTRESS RELAY Press the CALL key in the hand controller, choose the DISTRESS RELAY, then press the ◄ or ► key to choose the DISTRESS which want to be transmitted, press the ENT key to confirm transmitting this DISTRESS ALARM. Press the ◄ or ► to choose if you want to transmit to ALL SHIP or INDIVIDUAL. -
Page 23: Log Review
English VHF NX2500 LOG REVIEW There are 2 kinds of logs, they are ROUTINE LOG and DISTRESS LOG. To view the logs, press (MENU) key on the fist microphone/controller keypad, the MENU SELECTION screen will appear on the display as follows: Press ▲... -
Page 24: Review Distress Logs
VHF NX2500 English If there is a “*” symbol on the screen, you can press (ENT) KEY to send an acknowledgement directly to the caller. After acknowledgement, the “*” symbol will disappear. Press (CLR) key to exit the call screen. -
Page 25: Dsc Setting
If you do not have a MMSI-number, you can still use the unit, but the DSC function can not be used, and every time when the NX2500 is switched on, it will be asked to enter the MMSI number. -
Page 26: Set Group Id
VHF NX2500 English Press (ENT) key once again to confirm the number and the screen will now show the MMSI of your vessel. To view your vessel’s MMSI, press (MENU) key on the fist microphone/controller to select the MMSI screen, as below: Press (CLR) key to go back to the main screen. -
Page 27: Set Manual Position/Utc
English VHF NX2500 Press numeric key to enter the GROUP ID number (8-digits, the first digit must be “0”). If a mistake is made, use the ◄ or ► key to move back the cursor and reset the number. Press (ENT) key and the Radio will ask for verification. Check that the No. - Page 28 VHF NX2500 English In the DIRECTORY, you can ADD, EDIT and DELETE MMSI numbes and names of persons you frequently communicate with. This is like an address book in a telephone. Enter the Name and MMSI number. To access a new entry, press ▲ or ▼ to move the cursor in front of “ADD”, then press (ENT) key to enter DIRECTORY-ADD screen as below: Use the keypad to move backwards and forwards along the line to enter a name.
- Page 29 English VHF NX2500 Use the ◄ or ► key to move along the name and MMSI fields, using the keypad to edit the data. Press (ENT) to store the modified entry. To delete an entry, press ◄ or ► key to move the cursor in front of “DEL”, then press (ENT) key to enter DIRECTORY-DEL screen as below: Use the ◄...
-
Page 30: Radio Settings
VHF NX2500 English 10 RADIO SETTINGS Use the instruction listed below to set up user environment. To enter Radio settings, press MENU followed by ENT 10.1 Backlight adjustment Press “▲”“▼”on the fist microphone/controller to select BACKLIGHT option and press (ENT) to obtain the following screen. -
Page 31: Beep Sound Selecting
10.5 Navtex Only-Mode If you want to switch of your NX2500 during night but still receive Navtex messages, you may set the radio to Navtex mode only. Press MENU and scroll down to Radio Settings. Press ENT and scroll down to... -
Page 32: Set Date And Time
VHF NX2500 English To exit Navtex Only mode, you have to switch off and on the radio. 10.6 Set Date And Time Press ▲ or ▼ key to move the cursor on the RADIO SETTING screen to the front of DATE/TIME, then press (ENT) key, the SET DATE/TIME screen will appear. -
Page 33: Navtex Messages Settings
English VHF NX2500 11 NAVTEX Messages Settings If your NX2500is connected to a NX2600 Navtex receiver, you will get navtex messages inti your radio and up to 64 messages may be stored. In order to not fill up the memory, you may ignore messages from some remote stations, you can also ignore some types of messages. -
Page 34: Station Select
11.2 Station Select Select which stations you want to monitor. The NX2500 will exclude all messages from the stations marked IGNORE. Select NAVTEX MSG/SETTING with ▲ or ▼ and press ENT. Goto STATION SELECT with ▲ or ▼and confirm with ENT. Select which Station you want to ignore with ▲... - Page 35 English VHF NX2500 List of stations: LETTER Station Freq. LETTER Station Freq. METAREA I METAREA II UK Home waters and E North Waters to the West of France, Iberia and N Atlantic Africa, including the Azores Niton Corsen Niton Corsen Niton la Coruña...
-
Page 36: Message Select
11.3 Message Select Select which messages you want to monitor. The NX2500 will exclude all messages of the type marked IGNORE. Select NAVTEX MSG/SETTING with ▲ or ▼ and press ENT. Goto MESSAGE SELECT with ▲ or ▼and confirm with ENT. Select which Station you want to ignore with ▲... -
Page 37: Clear Selected Messages
English VHF NX2500 11.5 Clear Selected Messages If you want to clear some Navtex messages, Press MENU and select NAVTEX MSG/SETTING with ▲ or ▼ then press ENT. Go to CLEAR SELECTED MSG with ▲ or ▼and confirm with ENT. If you want to clear one message, select that message with ▲... -
Page 38: Expansion Channels
VHF NX2500 English 12 EXPANSION CHANNELS Authorized users can have up to 10 expansion channels activated on their Nexus NX2500 units. Contact your dealer, National distributor or Nexus Marine AB Service Division 13 ATIS FUNCTION The ATIS function is a mandatory technical requirement according to Automatic Transmitter Identification System (ATIS) used in some countries. -
Page 39: Technical Specifications
English VHF NX2500 14 Technical Specifications Power supply DC 12 V +30/-10% Channel capability 57 international channels UK: includes M1 (previously 37) and M2 Frequency Resolution 25KHz Method of frequency generation synthesizer Dimension 175(W) × 79(H) ×130(D) mm Weight 1175 grams 14.1... -
Page 40: Channel 70 Monitor General Specification
VHF NX2500 English 14.2 CHANNEL 70 MONITOR GENERAL SPECIFICATION 1.Frequency CH70 (156.525MHz) 2.Sensitivity ≤0dBμEMF for 20dB SINAD 3.Bandwidth 16KHz 4. First IF frequency used 17.9MHz 5. Second IF frequency used 455KHz 6. Adjacent Channel Selectivity ≥70dB 7. Spurious response Rejection ≥70dB... -
Page 41: International Vhf Marine Channel Chart
English VHF NX2500 15 International VHF Marine Channel Chart Function Transmitter Receiver Mode Ship Ship Channel Channel Assignment Frequency Frequency Ship Shore 156.050 160.650 Public Correspondence, Port Operation 156.100 160.700 Public Correspondence, Port Operation 156.150 160.750 Public Correspondence, Port Operation 156.200... -
Page 42: Installation
- if mounting the radio is in an enclosed space ensure that the space is vented. The NX2500 is supplied with a reversible mounting bracket. This can be used to mount the radio on the chart table or on an overhead bulkhead (Fig A). Before installing, ensure that there is at least 101mm (4.0 in) verticals clearance and 70mm (2 3/4in) -
Page 43: Antenna Installation Recommendations
English VHF NX2500 On the back of the case of NX2500 there is an antenna socket, a power cable socket and a jack socket for an external speaker / the GPS input and NAVTEX input (Fig D). Fig D The NX2500 requires a 12V DC supply to operate, this lead should be connected to the vessel’s power supply (the red wire is positive, black is negative), keeping the cable... - Page 44 VHF NX2500 English As the range of VHF signals are governed by line of sight, the antenna should be placed as high as possible, while remaining clear of any metallic objects that could influence the resonance of the antenna. The most popular antennae for marine use are 1m (3ft 3in) long. On sail boats these are usually mounted at the masthead, where the length of the antenna keeps it clear from the navigation lights and wind vanes etc.
-
Page 45: Supplied Parts
English VHF NX2500 17 Supplied Parts 1. Mounting Bracket 8. Mounting Bracket Washer 2. Microphone Hanger 9. Hanger Spring washer 3. Bracket Knob Washers 10. GPS/NAVTEX/Speaker 4. Mounting Bracket Knobs plug cord 5. Mounting Bracket Screws 11. Thermoshrink Tube 6. Mic Hanger Screws 12. -
Page 46: Warranty
VHF NX2500 English 18 WARRANTY... - Page 47 English VHF NX2500...
- Page 48 VHF NX2500 English...
-
Page 49: Declaration Of Conformity
English VHF NX2500 19 DECLARATION OF CONFORMITY... - Page 50 VHF NX2500 English...
- Page 51 English VHF NX2500...
- Page 52 VHF NX2500 English Copyright ©: Nexus Marine AB Kuskvägen 4, 191 62 Sollentuna, Sweden Tel: +46 -(0) 8 – 506 939 00. Fax: +46 -(0) 8 -506 939 01 www.nexusmarine.se...
Need help?
Do you have a question about the NX2500 and is the answer not in the manual?
Questions and answers