
Related Manuals for Nexus NX2000

Summary of Contents for Nexus NX2000
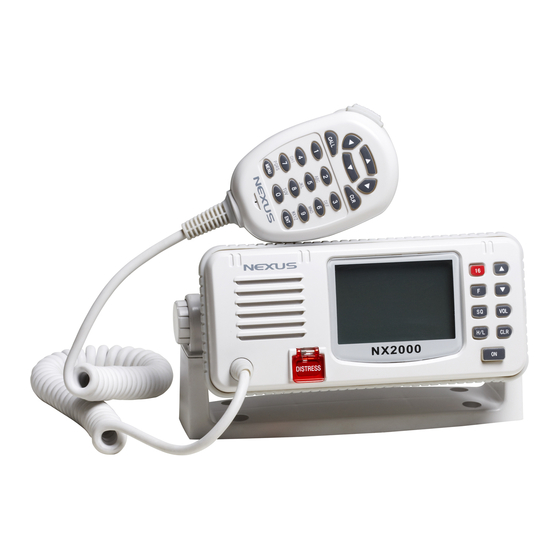
- Page 1 NX2000 - Marine VHF Radio - Installation and Operation Manual Installation and Operation Manual English English...
- Page 2 VHF NX2000 English...
-
Page 3: Table Of Contents
English VHF NX2000 Contents OPERATION RULES ..................4 Priorities ......................4 Privacy ......................4 Radio licenses....................4 1.3.1 Ship station license ..................4 1.3.2 Operator’s license ..................4 INTRODUCTION ....................5 PANEL DESCRIPTION ..................6 Front panel .....................6 Back panel .....................7 LCD Display ....................8 FIST MICROPHONE/CONTROLLER..............9 Soft Keypad (0 - 9) ..................9 GENERAL OPERATION ..................11... - Page 4 VHF NX2000 English 10.3 Set Manual Position/UTC................28 10.4 Set Work Channel..................29 10.5 Set The Directory..................30 EXPANSION CHANNELS................33 ATIS FUNCTION....................33 TECHNICAL SPECIFICATIONS ..............34 13.1 Receiver....................... 34 13.2 Channel 70 Monitor General Specification........... 35 13.3 Transmitter....................35 13.4...
-
Page 5: Operation Rules
English VHF NX2000 OPERATION RULES Priorities • Read all rules and regulations pertaining to priorities and keep an up-to-date copy handy. Safety and distress calls take priority over all others. • You must monitor Channel 16 when you are not operating on another channel. -
Page 6: Introduction
The NX2000 lets you make digitally selected calls, which are quicker and simpler to make compared with conventional voice calls using channel 16. Should a distress, urgency or safety situation occur, you can depend on the NX2000 to raise an alert quickly, thereby indicating your identity and position automatically through a distress communication on the emergency voice channel. -
Page 7: Panel Description
(12) NX2000 (13) DISTRESS POWER SWITCH (ON) Press the (ON) button once to switch on the NX2000. To switch off, press the (ON) button again. HIGH/LOW POWER KEY (H/L) Select an output power of RF. 3. CLEAR KEY (CLR) Stops current task and returns to the main screen. -
Page 8: Back Panel
Upon completion, insert the screw and tighten once again. Note : To ensure your NX2000 maintains its water-proof integrity, please make sure the water-proof plastic washer is properly inserted before the screw; the screw should be fully tightened to prevent water ingress. -
Page 9: Lcd Display
English VHF NX2000 LCD Display GROUP 1 Volume control activated, the Bar indicates the volume level. Squelch control activated, the Bar indicates the squelch level. Appears when the squelch opens. The Radio is in receptive state (RX) and when receiving a signal. -
Page 10: Fist Microphone/Controller
VHF NX2000 English FIST MICROPHONE/CONTROLLER The fist microphone/controller has the microphone, Push to Talk (PTT) switch and soft keypad as illustrated below: C ALL C LR PQRS WXYZ M EN U EN T M i cr ophone Soft Keypad (0 - 9) The telephone style keypad ITU 0 –... - Page 11 English VHF NX2000 ENTER KEY (ENT) Confirms the action. CLEAR KEY (CLR) Stop tasks and returns to main screen or returns to the last screen. ◄ / ► Key Used to select stored numbers and names as marked by the cursor, or to select through the call log.
-
Page 12: General Operation
English GENERAL OPERATION The NX2000 is switched on by pressing the (ON) key once. If a GPS receiver has been connected to the NX2000, the MAIN screen will be as below: Press the (F) key on the front panel once to enter the Function Selection mode. The FUNCTION SELECTION screen will be displayed as below: Press the ▲... -
Page 13: Full Scan (Fs)
Once the signal ends or drops below the squelch level, the Radio will continue scanning. Alternatively, you can instruct the NX2000 to continue scanning even if a signal has been detected on any particular channel by pressing the ▲ key once. -
Page 14: Volume Control (Vol)
VHF NX2000 English Then use ▲ and ▼ key on the front panel to adjust the receiver muting threshold (squelch) level. To cut out weaker signals, press ▲ key to increase the squelch until the background interference noise disappears. To receive weaker signals press ▼ key to decrease the squelch. -
Page 15: High / Low Power Selection (H/L)
English VHF NX2000 HIGH / LOW Power Selection (H/L) Press (H/L) key to select high or low output power of RF. A “Hi” or “Lo” indicator will appear on bottom of LCD. 5.10 Time Out Timer A time out timer is provided to prevent continuous transmissions for periods greater than 5 minutes. -
Page 16: Receiving A Dsc Call
VHF NX2000 English RECEIVING A DSC CALL When a DSC call is received, the Radio will switch to the call log screen to display the details of the call and ring or sound the alarm depending on the nature of the call. The procedures hereunder describe how to handle the types of calls that can be received. -
Page 17: Distress Alert
English VHF NX2000 Press (ENT) key to stop the ringing, then listen for the voice message or begin speaking. Distress Alert If a Distress Alert or a Distress Relay is received from another vessel, an alarm will sound and the Radio will switch to channel 16. The screen will show the details of the... -
Page 18: Sending A Dsc Call
VHF NX2000 English SENDING A DSC CALL Making a DSC Call is very simple. First choose the call type (Routine, Safety, Urgency, Group or Distress Alert). If required, enter the destination and working channel and then send the call by pressing (ENT) key on the fist microphone/controller. The digital signal will be sent out in under a second, containing the vessel’s ID and the call type. -
Page 19: Routine Call
English VHF NX2000 3. The time (from NMEA or Manual input); 4. The nature of the distress. After the Distress Alert has been sent, the Radio will automatically tune to channel 16 and the Radio will repeat the Alert approximately every four minutes until either an... -
Page 20: Urgency And Safety Call
VHF NX2000 English When a reply is received, the Radio will sound a tone and automatically switch to the specified working channel. A voice call can then be made in the normal way. Note. If you have made a directory of stored MMSI numbers, you can only send a Routine Call to someone from the Directory. -
Page 21: Group Call
English VHF NX2000 Press the (ENT) key again to make the call, or press (CLR) to cancel. When the call is sent, the Radio will be set to the working channel 16. Group Call If a group ID has been set up for the called Radio. A call can be made to other members of the group. -
Page 22: Log Review
VHF NX2000 English LOG REVIEW There are 2 kinds of logs, they are DISTRESS LOGS and ROUTINE LOGS. To view the logs, press (MENU) key on the fist microphone/controller keypad, the MENU SELECTION screen will appear on the display as follows: Press ▲... -
Page 23: Review Routine Log
English VHF NX2000 If there are any distress calls in the distress log screen, press the ◄ or ► key to move back and forth through the DISTRESS LOG screen. The DISTRESS LOG screen as below: Press (CLR) key to exit the call log screen. - Page 24 VHF NX2000 English If there are any general calls in the routine log press the ◄ or ► key to move back and forth through the log, the ROUTINE LOG screen as below: If there is a “*” symbol on the screen, you can press (ENT) KEY to send an acknowledgement directly to the caller.
-
Page 25: Radio Settings
English VHF NX2000 RADIO SETTINGS Use the instruction listed below to set up user environment. To enter Radio settings, press MENU followed by ENT Backlight adjustment Press “▲”“▼”on the fist microphone/controller to select BACKLIGHT option and press (ENT) to obtain the following screen. -
Page 26: Speaker Selecting
VHF NX2000 English Speaker selecting Using “▲”“▼”on the fist microphone/controller to select SPEAKER and press (ENT) to obtain the following screen. Then, press “▲”“▼”to select internal, external or both speaker. Press (ENT) for confirmation and exit. Beep sound selecting Using “▲”“▼”to select BEEP and press (ENT) to obtain the following screen. -
Page 27: Set Date And Time
English VHF NX2000 Set Date And TimE Press ▲ or ▼ key to move the cursor on the RADIO SETTING screen to the front of DATE/TIME, then press (ENT) key, the SET DATE/TIME screen will appear. Use the numeric keys to enter numbers, then press (ENT) key to accept the date and time. -
Page 28: Dsc Setting
If you do not have a MMSI-number, you can still use the unit, but the DSC function can not be used, and every time when the NX2000 is switched on, it will be asked to enter the MMSI number. -
Page 29: Set Group Id
English VHF NX2000 Press (CLR) key to go back to the main screen. To change the MMSI number after it has been programmed, the unit must be returned to an authorized dealer to erase the existing number. 10.2 Set Group Id To enter a Group ID (if for example, the vessel is part of a flotilla or fishing fleet etc), press (MENU) key to select the GROUP ID screen. -
Page 30: Set Work Channel
VHF NX2000 English Press (MENU) key to select the “POSITION/UTC” screen as below: Use the numeric key to enter the required data, then press (ENT) key to accept the position and time entered. After 23 hours, if the Radio has not received any position data either manually or from the NMEA input, then the position data will disappear from the screen, and it will show “NO POSITION”. -
Page 31: Set The Directory
English VHF NX2000 Press ◄ or ► key to select “ADD” from the WORK CHANNEL screen, then press (ENT) key to enter, as below: Press ▲ or ▼ key to change the selected channel, and press (ENT) key to accept. - Page 32 VHF NX2000 English To access a new entry, press ▲ or ▼ to move the cursor in front of “ADD”, then press (ENT) key to enter DIRECTORY-ADD screen as below: Use the keypad to move backwards and forwards along the line to enter a name. Then move the cursor with ►until it jumps to the second row and enter the MMSI number,...
- Page 33 English VHF NX2000 To delete an entry, press ◄ or ► key to move the cursor in front of “DEL”, then press (ENT) key to enter DIRECTORY-DEL screen as below: Use the ◄ or ► key to select the number you wish to delete, then press (ENT) key to...
-
Page 34: Expansion Channels
Transmitter Identification System (ATIS) used in some countries. NX2000 can work on ATIS band by a licence. If you have an ATIS licence, NX2000 can work on ATIS channels, and if you have an ATIS SEA licence, NX2000 can work on ATIS channels and SEA channels. Press (16) key together with ▼... -
Page 35: Technical Specifications
English VHF NX2000 13 TECHNICAL SPECIFICATIONS Power Supply DC 12 V +30/-10% Channel Capability 57 international channels UKM1/M2 and includes 10 expansion channels Frequency Resolution 25KHz Method of Frequency Generation synthesizer Dimension 175(W) × 79(H) ×130(D) mm Weight 1175 grams 13.1... -
Page 36: Channel 70 Monitor General Specification
VHF NX2000 English 13.2 Channel 70 Monitor General Specification 1.Frequency CH70 (156.525MHz) 2.Sensitivity ≤6dBμEMF for 20dB SINAD 3.Bandwidth 16KHz 4. First IF Frequency Used 17.9MHz 5. Second IF Frequency Used 455KHz 6. Adjacent Channel Selectivity ≥70dB 7. Spurious Response Rejection ≥70dB... -
Page 37: International Vhf Marine Channel Chart
English VHF NX2000 14 INTERNATIONAL VHF MARINE CHANNEL CHART Transmitter Receiver Mode Channel Channel Assignment Frequency Frequency 156.050 160.650 Public Correspondence 156.100 160.700 Public Correspondence 156.150 160.750 Public Correspondence 156.200 160.800 Public Correspondence 156.250 160.850 Public Correspondence 156.300 156.300 Intership 156.350... - Page 38 VHF NX2000 English ATIS CHANNEL CHART Transmitter Receiver Mode Channel Channel Assignment Frequency Frequency 156.050 160.650 Public Correspondence 156.100 160.700 Public Correspondence 156.150 160.750 Public Correspondence 156.200 160.800 Public Correspondence 156.250 160.850 Public Correspondence 156.300 156.300 Intership(1W) 156.350 160.950 Public Correspondence 156.400...
- Page 39 English VHF NX2000 ATIS/SEA Channel Chart Transmitter Receiver Mode Channel Channel Assignment Frequency Frequency 156.050 160.650 Public Correspondence 156.100 160.700 Public Correspondence 156.150 160.750 Public Correspondence 156.200 160.800 Public Correspondence 156.250 160.850 Public Correspondence 156.300 156.300 Intership 156.350 160.950 Public Correspondence 156.400...
-
Page 40: Installation
Radio can be adjusted by slackening the clamp. Fig A Fig C Fig B On the back of the NX2000 there is an antenna socket, a power cable socket (Fig D) and an external speaker and GPS input socket. -
Page 41: Antenna Installation Recommendations
VHF NX2000 Fig D The NX2000 requires a 12v DC supply to operate. This lead should be connected to the vessel’s power supply (the red wire is positive, black is negative), and the cable kept as short as possible. Although the Radio draws very little current when receiving, a heavier current is drawn when transmitting which may result in a voltage drop if very long cables are used of inadequate core diameter. - Page 42 VHF NX2000 English The most popular antenna for marine use are 1m (3ft 3in) long. On sail boats these are usually mounted at the masthead, where the length of the antenna keeps it clear from the navigation lights and wind vanes etc. This type of antenna can also be mounted on the cabin roof or radar arch on powerboats.
-
Page 43: Supplied Parts
English VHF NX2000 16 SUPPLIED PARTS Mounting Bracket Power Cord Microphone Hanger Mounting Bracket Washer Bracket Knob Washer Hanger Spring Washer Mounting Bracket Knob GPS/Speaker Plug Cord Mounting Bracket Screw Thermoshrink Tube Ф2 Mic Hanger Screw Thermo shrink Tube Ф3... -
Page 44: Warranty
VHF NX2000 English 17 WARRANTY... - Page 45 English VHF NX2000...
- Page 46 VHF NX2000 English 18 DECLARATION OF CONFORMITY...
- Page 47 English VHF NX2000...
- Page 48 VHF NX2000 English Copyright ©: Nexus Marine AB Kuskvägen 4, 191 62 Sollentuna, Sweden Tel: +46 -(0) 8 – 506 939 00. Fax: +46 -(0) 8 -506 939 01 www.nexusmarine.se...
Need help?
Do you have a question about the NX2000 and is the answer not in the manual?
Questions and answers