Table of Contents
Advertisement
Advertisement
Table of Contents

Related Manuals for Prestigio PMP5197D-Ultra


Summary of Contents for Prestigio PMP5197D-Ultra
- Page 1 PMP5197D-Ultra User Manual...
-
Page 2: Table Of Contents
1. Appearance ......................1 2. Initial setup......................... 2 2.1 Charge the battery ..................... 2 2.2 Use the storage card ..................2 2.3 Hot plug of storage card ..................3 2.4 Memory space ....................3 2.5 Power on/off ...................... 3 2.6 Connect to wireless networks ................4 3. -
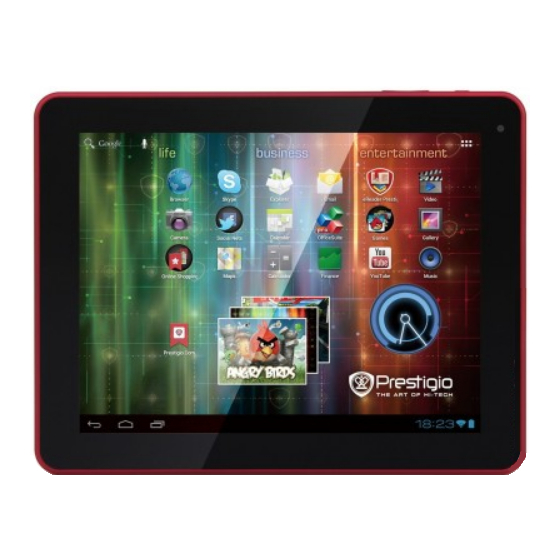
Page 3: Appearance
1. Appearance Front camera MENU button Sound volume down Sound volume up Rear camera RESET button 3.5mm earphone jack Micro USB port:USB HOST,support connecting USB keyboard,U disk and mouse via switch wiring MicroSD card slot Micro USB port: USB OTG, support communicating with PC, and also support connecting external flash, mobile hard drive and 3G dongle via switch wiring Mini HDMI port DC port for charging... -
Page 4: Initial Setup
2.1 Charge the battery Prestigio MultiPad comes with a built-in polymer rechargeable battery and is designed to use only manufacture-specified original batteries and accessories. When the battery is low, please charge it as soon as possible. -
Page 5: Hot Plug Of Storage Card
1. Make sure the location and direction of the storage card is correct when inserting, otherwise it is easy to cause damage to the storage card. 2. To avoid incompatibility issues, using major brand memory cards is recommended. 2.3 Hot plug of memory card Please do not hot plug the memory card when using or browsing its files. -
Page 6: Connect To Wireless Networks
2.6 Connect to wireless networks To connect to a wireless network; 1. Tap Settings on the Home screen 2. Tap Wi-Fi 3. Select ON 4. The network names and security settings of detected Wi-Fi networks will be displayed in the Wi-Fi networks section 5. -
Page 7: Home Screen
3. Home Screen The Home screen is your starting point to access all the features on your device. It displays application icons, widgets, shortcuts and other features. You can customise the Home screen with different wallpapers and widgets, and display items you want. See the Personalizing chapter for more information. -
Page 8: Status And Notifications
Press the bar on the lock screen and then slide your finger upwards to unlock the screen. Browse Home Screen You can go to the extended Home screen by sliding your finger horizontally across the screen to go to the left or right side of the Home screen. Tap the icon view all of the applications on your device. -
Page 9: Shortcuts To Add Widgets
If you have several notifications, you can scroll down the screen to view more notifications. [Tip]: You can also open the Notifications panel on the Home screen by pressing Menu icon on the panel and then tapping Notifications. In the dropdown notification panel, there are shortcut buttons for turning on/off Wi-Fi, airplane mode, auto-rotate screen and for adjusting screen brightness. -
Page 10: Finger Gestures
2. Tap 3. Select an item and slide your finger horizontally on the home screen to check widgets that can be added to the home screen. 3.3 Finger gestures Tap: When you want to type using the keyboard, select items on-screen - such as application and settings icons - or press on-screen buttons, simply tap them with your finger. -
Page 11: Coping Files To And From The Storage Card
Swipe or slide: To swipe or slide means to drag your finger vertically or horizontally across the screen. Drag: Press and hold your finger with some pressure before you start to drag. While dragging, do not release your finger until you have reached the target position. Rotate: For most screens, you can automatically change the screen orientation from portrait to landscape by turning the device sideways. -
Page 12: Searching The Device And The Web
Copy files from the memory card to a folder on your computer. 5. After copying the files, unmount the removable disk (that is, your tablet) as required by your computer's operating system to safely remove your device. 6. Disconnect your tablet from the computer. If your want your device remain connected to the computer while using the memory card well,... -
Page 13: Personalizing
4. Personalizing 4.1 Changing your notification ringtone Choose from the available selections of notification ringtones on your device. You can also download or copy notification ringtones or songs to your tablet's memory card and choose one to use as your notification ringtone. To find out how you can copy files to your storage card, see “Copying files to and from the memory card”... -
Page 14: Personalize Your Home Screen With Widgets
[Note]: you can also press and hold on the home screen to prompt the Choose wallpaper menu 2. Tap Wallpaper. 3. Choose the source for your wallpaper and do one of the following; Tap Super-HD Player to select a picture that you have taken using the camera or copied to your storage card. -
Page 15: Rearrange Or Remove Widgets And Icons On Your Home Screen
[Note]: To remove a widget, press and hold the widget until the icon appears, drag the widget onto it and release your finger. Adding folders on your Home screen You can use folders to group related applications and other shortcuts in order to keep your Home screen tidy and organized. - Page 16 released your finger but a message shows that there’s no space to place the widget or icon, drag it right or left again to another Home screen panel. Removing a widget or icon 1. Press and hold the widget or icon you want to remove. You’ll see a yellow box around the widget or icon.
-
Page 17: Web Browsing
5. Web browsing User can connect to the network via the browser. Tap the browser icon on the Home screen to open it (see picture):... -
Page 18: Manage Applications
6. Managing your applications You can personalize and enrich your MultiPad by installing a wide variety of free and paid apps ranging from productivity apps to entertainment and games. When you find a program you want, you can easily download and install it on your MultiPad with just a few steps. -
Page 19: Typical Applications Introduction
7. Typical applications introduction 7.1 Music Player Enjoy listening to songs and music on your MultiPad using the Music application. You need to copy music files to your memory card first in order to use the Music application to play music. To find out how to copy files, see “Copying files to and from the memory card”. -
Page 20: Video Player
Tap to go to the previous song. Tap to play, pause or resume playing the song Tap to go to the next song Tap to go to the Now Playing list Tap to switch the following repeat modes: repeat all songs; repeat current songs;... - Page 21 When there are multiple video files in the player, tap to display all video files in thumbnail mode or in details display mode. Double tap on a video file to start playing On the video playing screen, tap on the screen to popup the control bar (see the picture below);...
-
Page 22: Gallery
Tap this icon to go back to the video file list interface Drag the slider to adjust playing progress To quit the video playing screen, press the Back icon in the status bar. 7.3 Gallery You use Gallery to view pictures and play videos that you’ve taken with your tablet's camera, downloaded or copied onto your SD card. - Page 23 on upper right corner of the screen to browse all photos/pictures in slideshow mode. Select a picture to view it in full screen mode; drag left or right to view the next or previous picture in the album; move your fingers inward or outward to zoom out or zoom in the selected picture.
- Page 24 to rotate the picture 90° anticlockwise or clockwise. and then the following cropping rectangle will appear on top of the picture/photo; Drag from the inside of the cropping tool to move it; drag an edge of the cropping tool to resize it to any proportion; drag a corner of the cropping tool to resize it with a fixed proportions.
-
Page 25: File Manager
When browsing the video/music in the gallery you can tap to share the video/ music with your friends; tap to delete the selected video/music; or tap to get more details about the video/music. 7.4 File Manager Introduction to File Manager On the Home screen, tap the file manager icon to open it as follows: Tap to go back to the previous interface... -
Page 26: Instant Messaging Tools
in your local disk and your memory card. In addition, you can create/rename files and folders and uninstall third party applications. Paste: press to select an item/multiple items in the list and tap Copy/Move, and then go to the file folder where you want to copy/move the item(s) in, then press and hold the folder until the Folder operation menu pops up, select Paste into Folder. -
Page 27: Emails
and so on. 7.6 Emails Tap the launcher icon on the Home screen to display all icons, tap the Email/Gmail icon to run it. You can: 1. Set mail accounts 2. Create new mails 3. Send and receive emails 4. Download or open the attached files [Note]: press the menu icon can popup the shortcut menu. -
Page 28: Settings
8. Settings Control and customize your device settings in the Settings screen. To open the Settings screen, simply tap the Settings icon on the Home screen. You can scroll on the screen upwards/downwards to check the full settings menu. 8.1 Wireless and networks Configure your device’s wireless connections, e.g. -
Page 29: Display
Volume To adjust the volume for media, ringtone, notification and alarms: 1. Tap Settings > Sound > Volume 2. Drag the control bar leftwards/rightwards to turn down/up the volume for media and notification 3. Tap OK Notification ringtone To set a notification ringtone: 1. - Page 30 Brightness Use the slider to set a brightness level you want at all times when using MultiPad. For the best battery performance, use the dimmest comfortable brightness. Wallpaper Tap to select source of wallpaper and set wallpaper for the device. Auto-rotate screen Check to automatically switch the orientation of the screen as you turn the device sideways or even upside down.
-
Page 31: Storage
Accelerometer coordinate system Open a dialog where you can set the coordinate system for the device. Screen adaption Check to enable screen adaption. 8.4 Storage Check the usage condition of the storage space on the internal l& external storage card. You can erase all data on the SD card and unmount the external SD card for safety removal. -
Page 32: Accounts& Sync
Apps Opens a list of all the applications and other software installed on your MultiPad, along with their sizes. By default, only downloaded applications are shown, and they are sorted in alphabetical order. Press and tap Sort by size to display applications in order by size. -
Page 33: Location Service
to turn on\off account sync . Tap in the above screen to add new accounts by following onscreen instructions. Tap the icon prompt the following screen to manage your accounts; Check to turn on/off data synchronization, press the menu icon and then tap to remove the selected account from your device. -
Page 34: Security Settings
8.8 Security settings Set the screen lock mode and owner information, encrypt your device, manage password and administrate your device. To set screen lock mode, tap Settings > Security> Screen lock to personalize the screen lock mode for you device. Unknown source Check this option to permit the installation of applications that you obtain from web sites, email, or locations other than the Google Play app store. -
Page 35: Date & Time Setting
suggested that you backup data or applications that you want and remove your memory card in case of data loss or damage during the restoration of the factory default settings. 8.11Date and time settings Set the date and time, time zone, and date or time format. Here you can turn off auto time synchronization and manually change time zone settings. -
Page 36: Developer Options
you turn the device sideways or even upside down. Speak password: check to enable speak password 8.13Developer options You can set the USB debugging mode, select screen stay awake and so on. And you can also manage your user interface and apps. USB debugging: Check to permit debugging tools on a computer to communicate with your MultiPad via a USB connection. -
Page 37: Troubleshooting
9. Troubleshooting 9.1 Force shutdown Press the Power Button for about 5 seconds and the device will be forced to shutdown 9.2 Restore default settings To restore the factory default settings, you can tap Settings > Backup& reset> Factory data reset. Warning: data about your Google account, your personalized settings, installed applications will be removed from your device once you execute a factory default reset, so please only use this option if you're completely sure.
Need help?
Do you have a question about the PMP5197D-Ultra and is the answer not in the manual?
Questions and answers