Table of Contents
Advertisement
INSTALLATION, OPERATION AND
SERVICE INSTRUCTIONS
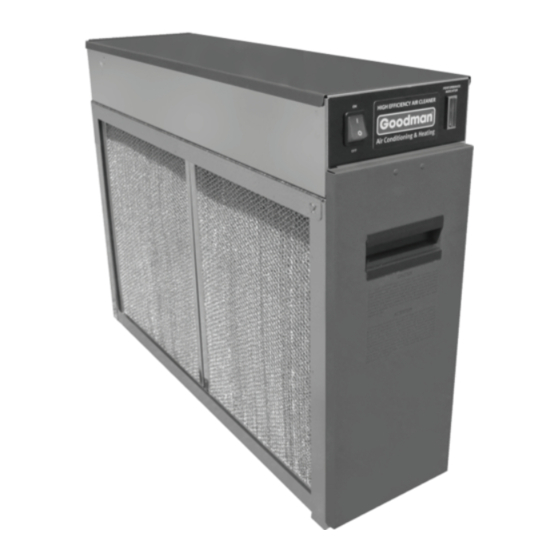
ASAS-10ASC, ASAS-11ASC, ASAS-12ASC, ASAS-18ASC
GSAS-10ASC, GSAS-11ASC, GSAS-12ASC, GSAS-18ASC
IMPORTANT: PLEASE READ MANUAL BEFORE OPERATING UNIT
Features
•
Lifetime Filter System never needs replacing
•
Electronically removes dust, mites, pollen, pet dander, tobacco smoke, cooking smoke
and grease, mold, fungi, bacteria, and more down to 0.01 micron
•
Light Weight Aluminum Collecting Cells are durable and easy to maintain
•
Cell Guides ensure proper placement of collecting cells
•
Activated Carbon Filters remove unpleasant odors
•
Galvanized Steel Cabinet for solid vertical or horizontal installation
•
Durable Scratch-Resistant powder coat paint finish resists corrosion
•
Electronic Air Proving Switch for quick wiring
•
Dual Indicator Lights show Air Cleaner is working properly at a glance
FOR QUESTIONS REGARDING INSTALLATION, OPERATION & SERVICE,
ELECTRONIC AIR CLEANERS
CALL THE AIR CLEANER HOTLINE TOLL-FREE
MODELS
1-800-267-8305
Advertisement
Table of Contents

Related Manuals for Goodman ASAS-10ASC


Summary of Contents for Goodman ASAS-10ASC
-
Page 1: Electronic Air Cleaners
INSTALLATION, OPERATION AND SERVICE INSTRUCTIONS MODELS ASAS-10ASC, ASAS-11ASC, ASAS-12ASC, ASAS-18ASC GSAS-10ASC, GSAS-11ASC, GSAS-12ASC, GSAS-18ASC ELECTRONIC AIR CLEANERS IMPORTANT: PLEASE READ MANUAL BEFORE OPERATING UNIT Features • Lifetime Filter System never needs replacing • Electronically removes dust, mites, pollen, pet dander, tobacco smoke, cooking smoke and grease, mold, fungi, bacteria, and more down to 0.01 micron... -
Page 2: Table Of Contents
IMPORTANT: Please read entire instructions before WARNING installing the Electronic Air Cleaner. Before beginning any installation or modification, CONTENTS be certain that the main line electrical disconnect switch is in OFF position. Electric shock could SAFETY CONSIDERATIONS result. Tag disconnect switch with suitable WHAT THE ELECTRONIC AIR CLEANER DOES warning labels. -
Page 3: Components
Table 1 — SPECIFICATIONS MODEL A/ GSAS-10ASC A/ GSAS-11ASC A/ GSAS-12ASC A/ GSAS-18ASC House Size Area <2400 ft² <3000 ft² <3000 ft² >3000 ft² <222.96 m² <278.70 m² <278.70 m² >278.70 m² Airflow up to 1200 cfm up to 1400 cfm up to 1400 cfm up to 2000 cfm up to 2039 m³/hr... - Page 4 Handle Left to Right or Right to Left Door DIMENSIONS — in (cm) UNIT 23 1/4 13 1/8 20 3/4 1 1/4 23 3/4 2 3/8 ASAS-10ASC (53.0) (43.5) (59.0) (33.5) (53.0) (3.0) (60.5) (6.0) GSAS-10ASC ASAS-11ASC 13 5/8 26 1/2 2 1/8 (53.0)
-
Page 5: Wiring
This white visible dust is normally referred to as Fig. 5 “clean dust.” As the Air Cleaner is removing the dark Models ASAS-10ASC/GSAS-10ASC, ASAS-11ASC/GSAS-11ASC and staining particles from the air, the lint will also be (with Air Proving Switch) cleaner. -
Page 6: Activated Carbon Filter Replacement
efficiency. The frequency of cleaning will vary from one 1. Turn Air Cleaner power switch OFF. house to another. On average, the cells should be 2. Turn off system fan. cleaned every 3 months. 3. Open access door. 1. Remove access door, collecting... -
Page 7: Replacing An Air Proving Switch (Aps)
Replacing An Air Proving Switch (APS) 5. Connect the wiring to the LED terminals on the power board. See Fig. 5 and 6. Before replacing the APS, turn off the power to the Air Cleaner at the source. 6. Replace cover. 1. -
Page 8: Replacing The 24 V Transformer
Table 2 — Power Board Voltage Settings Model Maximum Voltages on Maximum Voltage on Plates (K VDC) Ionizer (K VDC) ASAS-10ASC, ASAS-11ASC 6.2 - 6.5 (HV1) 6.2 - 6.5 (HV1) GSAS-10ASC, GSAS-11ASC Fig. 9 — Testing Voltage At Cell ASAS-12ASC, ASAS-18ASC 4.8 - 5.2 (HV1) -
Page 9: Testing Voltage At Cell
Testing Voltage At Cell 1. Open access door to Air Cleaner. 1. Open access door to Air Cleaner. Air Cleaner will 2. Place a screwdriver between plates of the cell, or shut off. place a small screwdriver into the hole in the end plate insulator and short with another screwdriver 2. -
Page 10: Replacing A Tungsten Ionizing Wire
Replacing A Tungsten Ionizing Wire Replacement wires are cut to the correct length and have eyelets at each end for easy replacement. 1. Turn OFF power to Air Cleaner. 2. Remove cell from Air Cleaner. 3. Remove all parts of broken wire, as well as spring and S-hook. -
Page 11: Troubleshooting Guide
Table 3 — TROUBLESHOOTING GUIDE PROBLEM PROBABLE CAUSE REMEDY System fan is not on. Turn system fan on. Unit does not function correctly. Power light Wiring improperly connected. Check wiring. and performance Defective power switch. Check power switch for continuity with multimeter. Replace if defective. indicator light are off. -
Page 12: Warranty
FIVE (5) years from the date of purchase. The GOODMAN product must not have been moved from the site of original installation. A new or remanufactured part to replace the defective part will be provided without charge for the part itself, through an authorized GOODMAN service dealer, provided the defective part is returned to the GOODMAN distributor prepaid.
Need help?
Do you have a question about the ASAS-10ASC and is the answer not in the manual?
Questions and answers