Table of Contents
Advertisement
INSTALLATION, OPERATION AND
SERVICE INSTRUCTIONS
GSASD-10, GSASD-11, GSASD-12, GSASD-18
ASASD-10, ASASD-11, ASASD-12, ASASD-18
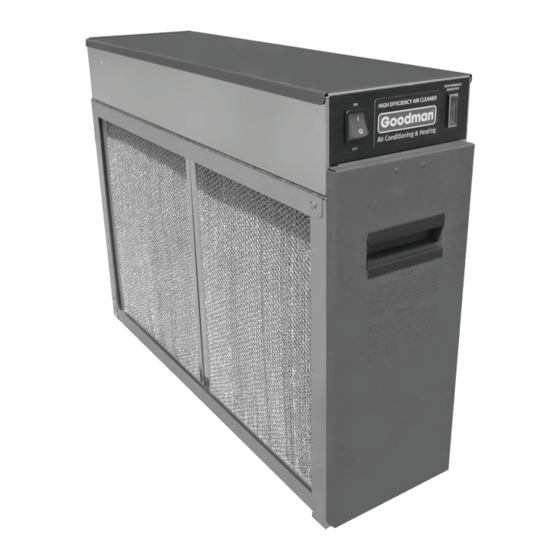
ELECTRONIC AIR CLEANERS
IMPORTANT: PLEASE READ MANUAL BEFORE OPERATING UNIT
Features
•
Lifetime Filter System never needs replacing
•
Electronically removes dust, mites, pollen, pet dander, tobacco smoke, cooking smoke
and grease, mold, fungi, bacteria, viruses and more, down to 0.01 micron
•
Dual Voltage, Aluminum Collecting Cells are durable and easy to maintain
•
Cell Guide ensures proper placement of collecting cells
•
Activated Carbon Filters remove unpleasant odors
•
Electronic Air Proving Switch for quick wiring
•
Dual Indicator Lights show Air Cleaner is working at a glance
•
Galvanized Steel Cabinet for solid vertical or horizontal installation
•
Durable Scratch-Resistant powder coat paint finish resists corrosion
FOR QUESTIONS REGARDING INSTALLATION, OPERATION & SERVICE,
MODELS
CALL THE AIR CLEANER HOTLINE TOLL-FREE
1-800-267-8305
Advertisement
Table of Contents

Related Manuals for Goodman GSASD-10


Summary of Contents for Goodman GSASD-10
-
Page 1: Electronic Air Cleaners
INSTALLATION, OPERATION AND SERVICE INSTRUCTIONS MODELS GSASD-10, GSASD-11, GSASD-12, GSASD-18 ASASD-10, ASASD-11, ASASD-12, ASASD-18 ELECTRONIC AIR CLEANERS IMPORTANT: PLEASE READ MANUAL BEFORE OPERATING UNIT Features • Lifetime Filter System never needs replacing • Electronically removes dust, mites, pollen, pet dander, tobacco smoke, cooking smoke and grease, mold, fungi, bacteria, viruses and more, down to 0.01 micron... -
Page 2: Table Of Contents
WARNING IMPORTANT: Please read entire instructions before installing the Electronic Air Cleaner. Before beginning any installation or modification, be certain that the main line electrical disconnect switch is CONTENTS in OFF position. Electric shock could result. Tag disconnect switch with suitable warning labels. SAFETY CONSIDERATIONS WHAT THE ELECTRONIC AIR CLEANER DOES Installation and servicing of Electronic Air... -
Page 3: Specifications
Table 1 — SPECIFICATIONS MODEL GSASD-10 GSASD-11 GSASD-12 GSASD-18 House Size Area <2400 ft² <3000 ft² <3000 ft² >3000 ft² <222.96 m² <278.70 m² <278.70 m² >278.70 m² Airflow up to 1200 CFM up to 1400 CFM up to 1400 CFM up to 2000 CFM up to 2040 m³/hr... -
Page 4: Installation Location With Humidifier
Fig. 3 — DIMENSIONS DIMENSIONS — in (cm) MODEL 19.8 15.9 23.2 13.1 20.7 23.7 21.2 GSASD-10 (50.4) (40.5) (58.9) (33.3) (52.5) (3.2) (60.2) (53.9) 19.8 15.9 26.1 13.6 24.1 26.6 25.8 GSASD-11 (50.4) (40.5) (66.3) (34.6) (61.2) (2.5) (67.7) (65.4) -
Page 5: Electronic Air Cleaner Installation
WARNING Electronic Air Cleaner Installation Electrical shock can cause injury or death. Be certain 1. Remove existing equipment filter. Thoroughly clean main line disconnect switch is off before wiring. fan compartment and ductwork where Air Cleaner is to be installed. Wiring should only be performed by qualified personnel 2. -
Page 6: Operation
Let stand for Replacement Carbon Filters: 5 minutes or fill up laundry tub with water and DAX Detergent, and dunk cells up and down until water is GSASD-10, GSASD-11 Set of 3 Part #1156-3 dirty. -
Page 7: Service
installer or dealer. To replace filters, perform the following APS output with the jumper, replace the APS. functions: 7. If there is no output from the APS, check the output 1. Turn Air Cleaner power switch OFF. voltage from the on/off switch. 2. -
Page 8: Replacing A Power Board
3. Push the light out through front of power box. If the power board fails to come on with the fan on, check that the sensor is properly set down, to the bottom 4. Push the new light into the power box. of the plastic bushing, in the front of the power box. -
Page 9: Setting Voltage Of Power Board
Max. Voltage on See below for additional testing. Plates (KVDC) Ionizer (KVDC) Testing Cell with an Ohmmeter GSASD-10, GSASD-11 4.8 - 5.3 (HV1) 7.2 - 8.0 (HV2) To test the cell for a dead short or a bad contact an GSASD-12, GSASD-18 4.8 - 5.2 (HV1) -
Page 10: Removing Power Box
1. With the ohmmeter set on its lowest scale, take a 4. Remove the two nuts holding the power box to the reading between the top center contact of the cell cabinet. and the ionizing fingers on the bottom of the cell. You 5. -
Page 11: Parts List
Parts List Use the diagram on the preceding page to identify the part which is required. To order parts call the number listed at the bottom of the page or call your local contractor. Part Description GSASD-10 GSASD-11 GSASD-12 GSASD-18... -
Page 12: Troubleshooting Guide
Table 4 — TROUBLESHOOTING GUIDE PROBLEM PROBABLE CAUSE REMEDY Unit does not function System fan is not on. Turn system fan on. correctly. Power light Wiring improperly connected. Check wiring or if plug is inserted and receptacle is powered. and performance indi- Defective power switch. - Page 13 Cleaning Record The collecting cells and prefilters must be cleaned on a regular basis for the Air Cleaner to function at its peak efficiency. The frequency of cleaning will vary from one house to another. On average, the cells should be cleaned every 3 months. Use the chart below to keep track of your cleaning schedule.
- Page 14 NOTES:...
Need help?
Do you have a question about the GSASD-10 and is the answer not in the manual?
Questions and answers