Table of Contents
Advertisement
For service questions, contact LG at 1-800-243-0000.
For sales inquiries, contact Sylvane at 1-800-934-9194 or visit
www.sylvane.com.
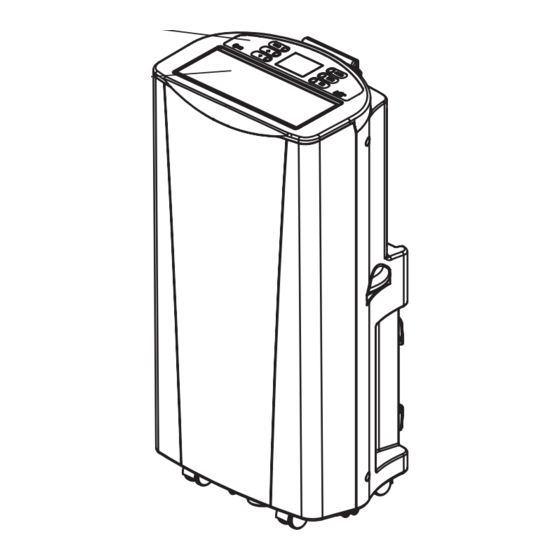
OWNER'S MANUAL
AIR CONDITIONER
Please read this manual carefully before operating
your air conditioner and retain it for future reference.
TYPE PORTABLE AIR CONDITIONER
MODEL LP1414GXR
www.lgappliances.com
Advertisement
Table of Contents

Related Manuals for LG LP2525GXR


Summary of Contents for LG LP2525GXR
-
Page 1: Air Conditioner
For service questions, contact LG at 1-800-243-0000. For sales inquiries, contact Sylvane at 1-800-934-9194 or visit www.sylvane.com. OWNER’S MANUAL AIR CONDITIONER Please read this manual carefully before operating your air conditioner and retain it for future reference. TYPE PORTABLE AIR CONDITIONER MODEL LP1414GXR www.lgappliances.com... -
Page 2: Table Of Contents
Congratulations on your purchase Control Panel and Remote ....9 and welcome to the LG family. HOW TO USE Your new LG Air Conditioner Before Using Your Air Conditioner . -
Page 3: Important Safety Instructions
I M P O R T A N T S A F E T Y I N S T R U C T I O N S BASIC SAFETY PRECAUTIONS Do not store flammables like gasoline benzene thinner etc. near the air conditioner. - Page 4 I M P O R T A N T S A F E T Y I N S T R U C T I O N S Unplug the unit when not using it for a long time.
- Page 5 I M P O R T A N T S A F E T Y I N S T R U C T I O N S Hold the plug by the head When gas leaks, open the window for ventilation before not the cable when taking it out.
-
Page 6: Electrical Safety
I M P O R T A N T S A F E T Y I N S T R U C T I O N S If the liquid from the battery gets onto your skin If you eat the liquid from the battery,brush or clothers wash it well with clean water. - Page 7 RESET butto n will not stay engaged, unplug the air conditioner immediately and contact your LG service technician. Due to potential safety hazards, the use of TEMPORARY GROUNDING an adapter plug is strongly discouraged.
-
Page 8: Parts And Features
P A R T S A N D F E A T U R E S KEY PARTS AND COMPONENTS CONTROL PANEL AND DISPLAY Easy-to-read white LED display shows the operating state. Digital touch buttons make changing settings quick and easy. MOTORIZED AIR DISCHARGE The adjustable louvered air discharge opens automatically when the air conditioner is turned... -
Page 10: How To Use
H O W T O U S E BEFORE USING YOUR AIR CONDITIONER PREPARING FOR OPERATION UNPACKING THE AIR CONDITIONER Refer to the Installation Instructions included in Remove and store packing materials for reuse. this manual before using the air conditioner. Remove any shipping tape before using the Once the air conditioner has been properly air conditioner. -
Page 11: Before Using Your Air Conditioner
H O W T O U S E BEFORE USING YOUR AIR CONDITIONER INSERTING BATTERIES IN THE REMOTE Before using your remote, install the provided AAA batteries. Press and glide the battery cover on the back of the remote, then you can remove the cover. Be sure to note proper polarity! Insert two new alkaline AAA batteries into... -
Page 12: Using The Controls
H O W T O U S E USING THE CONTROLS Control panel buttons shown. Operation Always point the remote at the sensor. The using the remote control is the same, unless remote may not work if the sensor is in bright specifically noted. - Page 13 H O W T O U S E USING THE CONTROLS TIMER Pressing the FAN button cycles the circulation When theTIMER function is selected, you can set the air conditioner to either automatically turn fan speed from low (F1) to medium (F2) to high (F3).The selected fan speed will OFF or turn ON after a delay of up to 24 hours.
- Page 14 H O W T O U S E USING THE CONTROLS AUTO CLEAN AUTO SWING To turn the AUTO CLEAN function on, press AUTO SWING function can only be activated • the AUTO CLEAN button while the air with the remote. When this function is on, the conditioner is running in COOL, air discharge will oscillate to circulate air more evenly...
-
Page 15: Installation Instructions
I N S T A L L A T I O N I N S T R U C T I O N S PREPARING FOR INSTALLATION WARNING The air conditioner is heavy! Use two or more people to lift and install the unit! Failure to do so could result in back injury or other injuries. Panel B (9’’) EXHAUST COMPONENTS The following components are used for window venting. -
Page 16: Selection Of Installation Location
I N S T A L L A T I O N I N S T R U C T I O N S SELECTION OF INSTALLATION LOCATION Place the unit on a level floor. For best performance,allow at least 20 in of air space on back side of the unit for good air circulation. -
Page 17: Window Vent Panel And Extensions
I N S T A L L A T I O N I N S T R U C T I O N S WINDOW VENT PANEL AND EXTENSIONS The window installation kit allows you to install the air conditioner in most vertical-sliding windows 18"... -
Page 18: Installation In Vertical Sliding Windows
I N S T A L L A T I O N I N S T R U C T I O N S INSTALLATION IN VERTICAL SLIDING WINDOWS NOTE: The window installation kit can be used with vertical sliding windows between 18"... -
Page 19: Installation In Vertical Sliding Windows
I N S T A L L A T I O N I N S T R U C T I O N S INSTALLATION IN VERTICAL SLIDING WINDOWS Insert the diffuser into the Vent Panel. And then slide. Small gap Type C screw Second Slide... -
Page 20: Installation In Casement Style Windows
I N S TA L LA T I O N I N S T R U C T I O N S INSTALLATION IN CASEMENT STYLE WINDOWS NOTE: The window installation kit can be used with casement windows between 18 ″ and 50 ″ tall. Foam seal C (Adhesive type-shorter) - Page 21 I N S T A L L A T I O N I N S T R U C T I O N S INSTALLATION IN CASEMENT STYLE WINDOWS Insert the diffuser into the Vent Panel. And then slide. Small gap Type C screw Second Slide...
-
Page 22: Care And Cleaning
For maximum efficiency, it is recommended operation with only minimal cleaning and that you have the cooling coils inspected and maintenance. cleaned annually. Your local LG Authorized Service Center can provide this inspection and cleaning service for a nominal fee. WARNING •... -
Page 23: Emptying The Water Collection Tank
C A R E A N D C L E A N I N G EMPTYING THE WATER COLLECTION TANK When the internal water collection tank is full, FL ll appear in the display and the air conditioner will turn off until the tank is emptied. Using the upper drain port Remove the water plug firstly on the back of the product. -
Page 24: Emptying The Water Collection Tank
C A R E A N D C L E A N I N G EMPTYING THE WATER COLLECTION TANK Using the bottom drain port Unplug the air conditioner, disconnect the exhaust hose from the back, and move the air conditionerto a suitable drain location or outdoors. You may also place a pan under the drain that will hold up to 3 pints of water. -
Page 25: Storing The Air Conditioner
C A R E A N D C L E A N I N G STORING THE AIR CONDITIONER Before using the air conditioner again: If the air conditioner will not be used for an extened period of time: To drain the water collection tank completely, Make sure the filter and drain cap are leave the bottom drain cap off long enough to in place... -
Page 26: Troubleshooting
T R O U B L E S H O O T I N G BEFORE CALLING FOR SERVICE Before you call for service, review this list. It may save you time and expense. This list includes common occurrences that are not the result of a defect in workmanship or materials. Make sure the air conditioner plug is pushed The air conditioner is completely into the outlet. - Page 27 CH01 Short or open circuit in the Unplug the air conditioner and contact your indoor air thermistor. authorized LG service center. CH02 Short or open circuit in the Unplug the air conditioner and contact your indoor pipe thermistor.
-
Page 28: Warranty
(90) days, whichever is longer. Please retain dated receipt or delivery ticket as evidence of the Date of Purchase for proof of warranty (you may be required to submit a copy to LG or authorized representative). - Page 29 Sellado con espuma C (tipo adhesivo- más corto) Sellado con espuma A (tipo adhesivo) Joints en Mousse C (plus court de type adhésif) Sellado con espuma B (tipo adhesivo)
- Page 30 For service questions, contact LG at 1-800-243-0000. For sales inquiries, contact Sylvane at 1-800-934-9194 or visit www.sylvane.com. LG Customer Information Center 1-800-243-0000 Register your product Online LG ELECTRONICS,INC. www.lgappliances.com 1000 Sylvan Ave.,Englewood Cliffs,NJ 07632...
Need help?
Do you have a question about the LP2525GXR and is the answer not in the manual?
Questions and answers