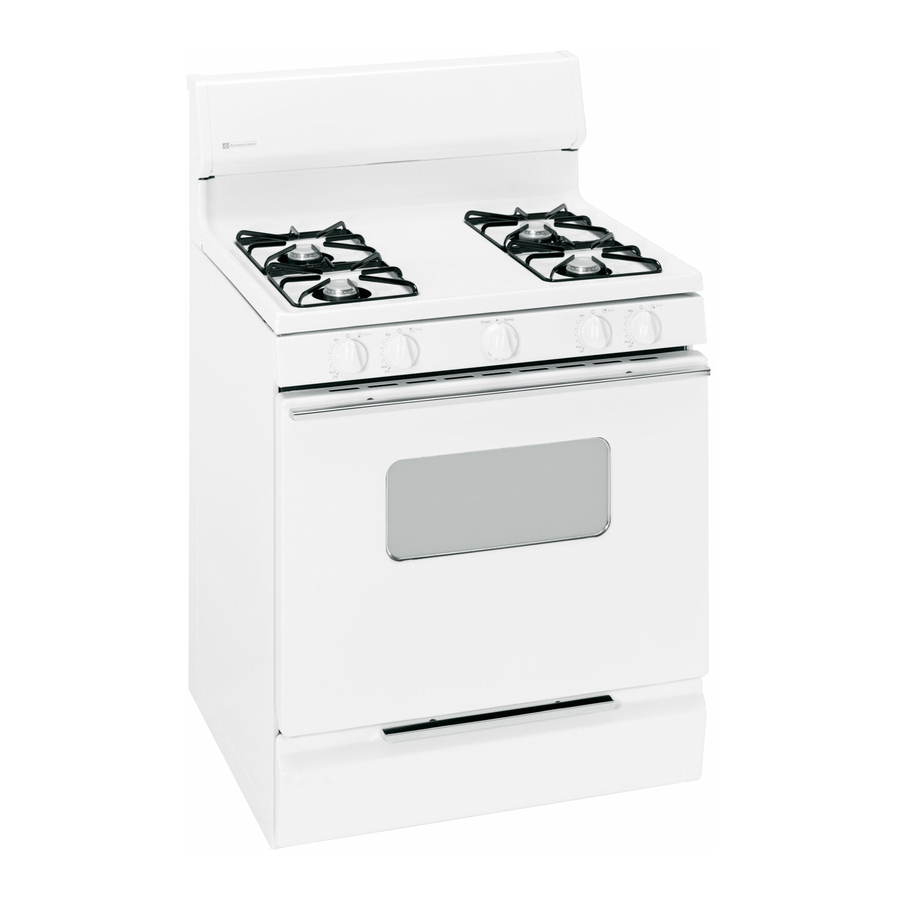
AMERICANA AGBS300 Owner's Manual And Installation Instructions
Non-self-cleaning gas ranges
Hide thumbs
Also See for AGBS300:
- Installation and owner's instructions (48 pages) ,
- Owner's manual & installation instructions (192 pages)
Table of Contents
Advertisement
Write the model and serial
numbers here:
Model #____________________
Serial # ____________________
You can find them on a label on
the front of the range behind the
kick panel or broiler drawer.
Owner's Manual and Installation Instructions
www.AmericanaAppliances.com
Printed in Mexico
Printed on Recycled Paper
Non-Self-Cleaning Gas
Ranges
. . . . . .2-7, 25
Operating Instructions
Aluminum Foil . . . . . . . . . .12, 13
Clock and Timer . . . . . . . . . . . .10
Oven . . . . . . . . . . . . . . . . . . .10-15
Baking and Roasting . . . . . . . . .12
Broiling . . . . . . . . . . . . . . . .13, 14
Broiling Guide . . . . . . . . . . . . . .14
Oven Control . . . . . . . . . . . . . .11
Power Outage . . . . . . . . . . . . . .11
Preheating . . . . . . . . . . . . . . . . .12
Surface Cooking . . . . . . . . . . .8, 9
Thermostat Adjustment . . . . . .15
Air Vents . . . . . . . . . . . . . . . . . .21
Broiler Pan and Grid . . . . . . . .21
Burner Assemblies . . . . . . . .16-18
Burner Caps and Heads . . . . . .18
Burner Grates . . . . . . . . . . . . . .17
Control Panel and Knobs . . . . .21
Cooktop Surface . . . . . . . . . . . .19
Drip Pans . . . . . . . . . . . . . . . . . .16
Lift-Off Oven Door . . . . . . . . . .20
Lift-Up Cooktop . . . . . . . . . . . .19
Oven Bottom . . . . . . . . . . . . . . .20
Oven Interior . . . . . . . . . . .22, 23
Removable Broiler Drawer . . . .21
Shelves . . . . . . . . . . . . . . . . . . . .22
Stainless Steel Surfaces . . . . . . .19
. . . . . . . . . . . . .24-39
Anti-Tip Device . . . . . . .28, 38, 39
Convert to LP Gas . . . . . . . . . . .39
Dimensions and
Clearances . . . . . . . . . . . . . . . . .27
Electrical Connections . . . .33, 34
Level the Range . . . . . . . . . . . . .38
Light the Pilots . . . . . . . . . .34-37
. . . . . . . . . . . . . . . .45
Consumer
Support . . . . . . . . . . . .Back Cover
Product Registration . . . . . .43, 44
Warranty . . . . . . . . . . . . . . . . . .46
Model AGBS300
183D5580P163
49-85076-1
. . . .40-42
09-04 JR
Advertisement
Table of Contents

Related Manuals for AMERICANA AGBS300


Summary of Contents for AMERICANA AGBS300
-
Page 1: Table Of Contents
Support ... .Back Cover Product Registration ..43, 44 Warranty ....46 Model AGBS300 49-85076-1 09-04 JR... -
Page 2: Important Safety Information
IMPORTANT SAFETY INFORMATION. READ ALL INSTRUCTIONS BEFORE USING. WARNING! For your safety, the information in this manual must be followed to minimize the risk of fire or explosion, electric shock, or to prevent property damage, personal injury, or loss of life. ®... - Page 3 WARNING! IMPORTANT SAFETY NOTICE The California Safe Drinking Water and Toxic Enforcement Act requires the Governor of California to publish a list of substances known to the state to cause birth defects or other reproductive harm, and requires businesses to warn customers of potential exposure to such substances. Gas appliances can cause minor exposure to four of these substances, namely benzene, carbon monoxide, formaldehyde and soot, caused primarily by the incomplete combustion of natural gas or LP fuels.
-
Page 4: Safety Precautions
IMPORTANT SAFETY INFORMATION. READ ALL INSTRUCTIONS BEFORE USING. SAFETY PRECAUTIONS Locate the range out of kitchen traffic path and out of drafty locations to prevent pilot outage (on standing pilot models) and poor air circulation. Be sure all packaging materials are removed from the range before operating it to prevent fire or smoke damage should the packaging material ignite. -
Page 5: Aluminum Foil
COOK MEAT AND POULTRY THOROUGHLY… Cook meat and poultry thoroughly—meat to at least an INTERNAL temperature of 160°F and poultry to at least an INTERNAL temperature of 180°F. Cooking to these temperatures usually protects against foodborne illness. OVEN Stand away from the range when opening the door of a hot oven. The hot air and steam that escape can cause burns to hands, face and eyes. -
Page 6: Surface Burners
IMPORTANT SAFETY INFORMATION. READ ALL INSTRUCTIONS BEFORE USING. WARNING! SURFACE BURNERS Use proper pan size—avoid pans that are unstable or easily tipped. Select cookware having flat bottoms large enough to cover burner grates. To avoid spillovers, make sure cookware is large enough to contain the food properly. - Page 7 SURFACE BURNERS (cont.) Always turn the surface burner controls off before removing cookware. Do not lift the cooktop on sealed burner models. Lifting the cooktop can lead to damage and improper operation of the range. When a pilot goes out (on standing pilot models), you will detect a faint odor of gas as your signal to relight the pilot.
-
Page 8: Using The Gas Surface Burners
Using the gas surface burners. Throughout this manual, features and appearance may vary from your model. Before Lighting a Gas Burner If drip pans are supplied with your range; they should be used at all times. Make sure all burners are in place. Make sure all grates on the range are properly placed before using any burner. -
Page 9: Top-Of-Range Cookware
How to Select Flame Size For safe handling of cookware, never let the flames extend up the sides of the cookware. Watch the flame, not the knob, as you reduce heat. When fast heating is desired, the flame size on a gas burner should match the cookware you are using. -
Page 10: Using The Clock And Timer
Using the clock and timer. Throughout this manual, features and appearance may vary from your model. To Set the Clock NOTE: When you first plug in the range or after a power failure, the entire Clock/Timer display will light up. Press the CLOCK pad. -
Page 11: Using The Oven
Using the oven. To avoid possible burns, place the shelves in the desired position before you turn the oven on. Before You Begin… The shelves have stop-locks, so that when placed correctly on the shelf supports (A through E), they will stop before coming completely out, and will not tilt. -
Page 12: Baking And Roasting
Using the oven. How to Set the Oven for Baking or Roasting Your oven is not designed for open-door cooking. Close the oven door. Turn the OVEN CONTROL knob to the desired temperature. Check food for doneness at minimum time on recipe. Cook longer if necessary. -
Page 13: Broiling
How to Set the Oven for Broiling Broiling is cooking food by direct heat from above the food. Most fish and tender cuts of meat can be broiled. Follow these directions to keep spattering and smoking to a minimum. Your range has a compartment below the oven for broiling. -
Page 14: Broiling Guide
Using the oven. Broiling Guide The size, weight, thickness, starting temperature and Food your preference of doneness Bacon will affect broiling times. This guide is based on meats Ground Beef at refrigerator temperature. Well Done †The U.S. Department of Agriculture Beef Steaks says “Rare beef is popular, but you Rare... -
Page 15: The Type Of Margarine Will Affect Baking Performance
Adjust the oven thermostat—Do it yourself! You may find that your new oven cooks differently than the one it replaced. Use your new oven for a few weeks to become more familiar with it. If you still think your new oven is too hot or too cold, you can adjust the thermostat yourself. Do not use thermometers, such as those found in grocery stores, to check the temperature setting of your oven. -
Page 16: Care And Cleaning Of The Range
Care and cleaning of the range. Be sure electrical power is off and all surfaces are cool before cleaning any part of the range. If your range is removed for cleaning, servicing or any reason, be sure the anti-tip device is re-engaged properly when the range is replaced. -
Page 17: Burner Grates
Sealed Burner Assemblies Grate Turn all controls OFF before removing the burner parts and drip pans (if so equipped). Burner cap The burner grates, caps, burner heads and drip pans (if so equipped) can be lifted off, making them easy to clean. The electrodes Burner head are not removable. -
Page 18: Care And Cleaning
Care and cleaning of the range. Burner Caps and Heads NOTE: Before removing the burner caps and heads, remember their size and location. Replace them in the same location after cleaning. Burner caps Lift off when cool. Wash burner caps in hot, soapy water and rinse with clean water. -
Page 19: Cooktop Surface
Cooktop Surface To avoid damaging the porcelain enamel surface of the cooktop and to prevent it from becoming dull, clean up spills right away. Foods with a lot of acid (tomatoes, sauerkraut, fruit juices, etc.) or foods with high sugar content could cause a dull spot if allowed to set. -
Page 20: Care And Cleaning
Care and cleaning of the range. Lift-Off Oven Door The oven door is removable, but it is heavy. You may need help removing and replacing the door. To remove the door, open it a few inches to the special stop position that will hold the door open. -
Page 21: Care And Cleaning Air Vents
Broiler Pan and Grid Grid After broiling, remove the broiler pan from the oven. Remove the grid from the pan. Carefully pour out grease from the pan into a proper container. Wash and rinse the broiler pan and grid in hot water with a soap-filled or plastic scouring pad. -
Page 22: Oven Interior
Care and cleaning of the range. Oven Shelves Clean the shelves with an abrasive cleanser or scouring pad. After cleaning, rinse the shelves with clean water and dry with a clean cloth. Porcelain Oven Interior With proper care, the porcelain enamel interior will retain its attractive finish for many years. -
Page 23: Oven Interior
Special Care of Continuous-Cleaning Oven Interior The special coating is a porous ceramic material, which is dark in color and feels slightly rough to the touch. The Continuous-Cleaning Oven cleans itself while cooking. The oven walls are finished with a special coating that cannot be cleaned in the usual manner with soap, detergents, steel wool pads, commercial oven cleaners, coarse abrasive pads or coarse brushes. -
Page 24: Installation Instructions
Installation Instructions If you have questions, call 1.800.432.2737 IN THE COMMONWEALTH OF MASSACHUSETTS • This product must be installed by a licensed plumber or gas fitter. • When using ball-type gas shut-off valves, they shall be the T-handle type. • A flexible gas connector, when used, must not exceed 3 feet. -
Page 25: Materials You May Need
Installation Instructions FOR YOUR SAFETY Do not store or use combustible materials, gasoline or other flammable vapors and liquids in the vicinity of this or any other appliance. If you smell gas: Open windows. Don’t touch electrical switches. Extinguish any open flame. Immediately call your gas supplier. -
Page 26: Installation Safety Instructions
Installation Instructions WARNING! INSTALLATION SAFETY INSTRUCTIONS Read these instructions completely and carefully. Improper installation, adjustment, alteration, service or maintenance can cause injury or property damage. Refer to this manual. For assistance or additional information, consult a qualified installer, service agency, manufacturer (dealer) or the gas supplier. -
Page 27: Dimensions And Clearances
Installation Instructions DIMENSIONS AND CLEARANCES Provide adequate clearances between the range and adjacent combustible surfaces. These dimensions must be met for safe use of your range. The location of the electrical outlet and pipe opening (see Gas Pipe and Electric Outlet Locations) may be adjusted to meet specific requirements. The range may be placed with 0″... -
Page 28: Model And Serial Number Location
Installation Instructions WARNING! ANTI-TIP DEVICE All ranges can tip and injury could result. To prevent accidental tipping of the range, attach an approved Anti-Tip device to the wall. (See Installing the Anti-Tip Device in this section.) To check if the device is installed and engaged properly, carefully tip the range forward. -
Page 29: Provide Adequate Gas Supply
Installation Instructions PROVIDE ADEQUATE GAS SUPPLY Your range is designed to operate at a pressure of 4″ of water column on natural gas or, if designed for LP gas (propane or butane), 10″ of water column. Make sure you are supplying your range with the type of gas for which it is designed. - Page 30 Installation Instructions GAS PIPE AND ELECTRICAL OUTLET LOCATIONS (for models with Sealed Burners) This area allows for flush range installation with through-the-wall connection of pipe stub/shut-off valve and rear wall 120V outlet. Shortest connection from hard pipe stub location to range hookup.
- Page 31 Installation Instructions FLEXIBLE CONNECTOR HOOKUP (for models equipped with Sealed Burners) Pressure regulator Installer: Inform the consumer of the location of the gas shut-off valve. RIGID PIPE HOOKUP OPTIONS (for models equipped with Sealed Burners) Gas Flow into Range 45° Elbow Nipple Union Pressure...
- Page 32 Installation Instructions FLEXIBLE CONNECTOR HOOKUP (for models equipped with Standard Twin Burners) Manifold pipe Installer: Inform the consumer of the location of the gas shut-off valve. RIGID PIPE HOOKUP (for models equipped with Standard Twin Burners) Pressure regulator Manifold pipe Installer: Inform the consumer of the location of the...
-
Page 33: Electrical Connections
Installation Instructions ELECTRICAL CONNECTIONS Electrical Requirements 120-volt, 60 Hertz, properly grounded branch circuit protected by a 15-amp or 20-amp circuit breaker or time delay fuse. Extension Cord Cautions Because of potential safety hazards associated with certain conditions, we strongly recommend against the use of an extension cord. -
Page 34: Seal The Openings
Installation Instructions ELECTRICAL CONNECTIONS (cont.) When disconnecting the power cord from the adapter, always hold the adapter with one hand. If this is not done, the adapter ground terminal is very likely to break with repeated use. Should this happen, DO NOT USE the appliance until a proper ground has again been established. - Page 35 Installation Instructions LIGHT THE PILOTS (cont.) Adjust the Surface Burner Pilots if Necessary CAUTION — Make sure the surface burner control knobs are in the OFF position before attempting to adjust the pilots. 1. Raise the cooktop. 2. Locate the pilot adjustment screw. It can be accessed through the small hole near the center of the manifold panel.
- Page 36 Installation Instructions LIGHT THE PILOTS (cont.) Check Ignition of Oven Burner The oven is designed to operate quietly and automatically. To operate the oven, turn the OVEN CONTROL knob to a setting above 260°F. After 30–90 seconds, the oven burner will ignite and burn until the set temperature is reached.
- Page 37 Installation Instructions LIGHT THE PILOTS (cont.) Check Ignition of Surface Burners Operation of all cooktop and oven burners should be checked after pilots have been lighted (on some models) and the range and gas supply lines have been carefully checked for leaks. Standing Pilot Models Select a top burner knob and simultaneously push in and turn to HI position.
-
Page 38: Level The Range
Installation Instructions LEVEL THE RANGE Install the oven shelves in the oven and position the range where it will be installed. Raise range Lower range leveler Raise range (on some models) (on some models) Check for levelness by placing a spirit level or a cup, partially filled with water, on one of the oven shelves. -
Page 39: Convert To Lp Gas
Installation Instructions INSTALL THE ANTI-TIP DEVICE (cont.) For wood construction, drill a pilot hole at an angle of 20° from the horizontal. A nail or awl may be used if a drill is not available. Mount the Anti-Tip device with the screw provided. -
Page 40: Troubleshooting Tips
Before you call for service… Troubleshooting Tips Save time and money! Review the charts on the following pages first and you may not need to call for service. Problem Possible Causes Top burners do not light Plug on range is not completely or do not burn evenly inserted in the electrical outlet. - Page 41 Problem Possible Causes Clock does not work Plug on range is not completely inserted in the electrical outlet. A fuse in your home may be blown or the circuit breaker tripped. Oven controls improperly set. Food does not bake Oven controls improperly set. or roast properly Shelf position is incorrect.
- Page 42 Before you call for service… Troubleshooting Tips Problem Possible Causes “Crackling” or This is the sound of the “popping” sound metal heating and cooling during cooking. Rainbow effect in This is caused by the heat the oven window treatment applied to the (on some models) oven window.
-
Page 43: Product Registration
GE Service Protection Plus GE, a name recognized worldwide for quality and dependability, offers you Service Protection Plus —comprehensive protection on all your appliances— ™ No Matter What Brand! Benefits Include: • Backed by GE • All brands covered • Unlimited service calls •... - Page 44 Consumer Product Ownership Registration Dear Customer: Thank you for purchasing our product. Registration for Americana Thank you for placing your confidence in us. We are proud to have you as a customer! Follow these three steps to protect your new appliance investment: 1 2 3 Complete and mail your Consumer...
-
Page 45: Accessories
Accessories. Looking For Something More? You can find these accessories and many more by calling 800.626.2002 (during normal business hours). Have your model number ready. Drip Pans Oven Racks Tired of discolored racks? Wishing you had extra-heavy-duty oven racks? New innovative porcelain-coated oven racks! •... -
Page 46: Warranty
Gas Range Warranty. All warranty services for Americana Service Centers, or an authorized Customer Care To schedule service, call 800.432.2737. For The Period Of: We Will Replace: One Year Any part of the range which fails due to a defect in materials or workmanship. During this From the date of the full one-year warranty, we will also provide, free of charge, all labor and in-home service to original purchase... - Page 47 Notes.
-
Page 48: Parts And Accessories
Consumer Support. Schedule Service Expert GE repair service is only one step away from your door. Schedule service at your convenience by calling 800.432.2737 during normal business hours. In Canada, call 1.800.361.3400 Extended Warranties Purchase a GE extended warranty and learn about special discounts that are available while your warranty is still in effect.
Need help?
Do you have a question about the AGBS300 and is the answer not in the manual?
Questions and answers
How to adjust stovetop flame. To either higher or lower