Baby Trend FLEX-LOC Owner's Manual
Infant seat/carrier
Hide thumbs
Also See for FLEX-LOC:
- Owner's manual (52 pages) ,
- Owner's manual (15 pages) ,
- Owner's manual (27 pages)
Table of Contents
Advertisement
Quick Links
Download this manual
See also:
Owner's Manual
KEEP INSTRUCTIONS FOR FUTURE USE.
Carefully read and understand all instructions and warnings in this
manual. Failure to properly use this infant car seat increases the
risk of serious injury or death in a sudden stop or crash.
Store this manual in the pocket provided on the bottom of the seat.
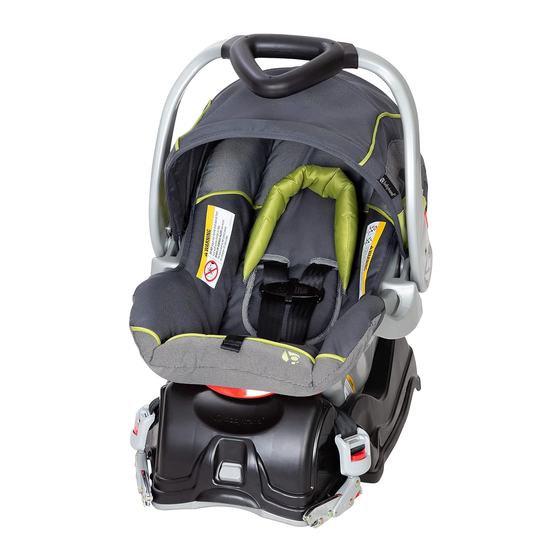
FLEX-LOC
INFANT SEAT/CARRIER
Fixed Back
Adjustable Back
Child Weight:
2.2 to 10 kg (5 to 22 lbs)
Child Height:
72.4 cm or less (28.5")
OWNER'S MANUAL
CC0190C1010
Convenience through innovation and thoughtful design
www.babytrend.com
E22FL1010C
Advertisement
Table of Contents

Related Manuals for Baby Trend FLEX-LOC


Summary of Contents for Baby Trend FLEX-LOC
- Page 1 Failure to properly use this infant car seat increases the risk of serious injury or death in a sudden stop or crash. Store this manual in the pocket provided on the bottom of the seat. FLEX-LOC INFANT SEAT/CARRIER Fixed Back...
-
Page 2: Table Of Contents
9.1 Using the Infant Seat in an Airplane ........... 50 4.3 Check that the Vehicle Seat Belt is Safe to Use ........ 15 9.2 Using your Baby Trend Infant Seat with a Baby Trend Stroller ..50 INFANT SEAT FEATURES AND THEIR PROPER USE ........ 20 9.3 Cleaning and Maintenance .............. -
Page 3: How To Register Your Infant Seat
Send your name, essential for proper installation. Not all vehicle seat belts will address and the restraint’s model number and manufacturing date to Baby Trend, Inc, 1607 S. Campus Avenue, Ontario, adequately secure the Infant Seat. CA 91761 or call 1-800-328-7363. -
Page 4: Safety Information
SAFETY SAFETY SAFETY INFORMATION the safety of your child. Quick turns, sudden stops, or other maneuvers in avoiding a crash, as well as a crash, can injure your child if not properly secured in the seat or if the seat is not 3.1 About your child properly installed in the vehicle. -
Page 5: About Active Air Bags
SAFETY SAFETY 3.3 About Active Air Bags 3.5 About this Infant Seat NEVER PLACE THIS INFANT SEAT IN A VEHICLE SEATING • This Infant Seat is constructed of plastic that can deform over LOCATION THAT HAS AN ACTIVE AIR BAG. If an Active time if left with any object in the seat while stored. - Page 6 SAFETY SAFETY from the surface that the seat is on as well as from the pressure • Strings and cords can cause strangulation: on their chest from the safety harness. In addition, if the carrier - DO NOT place items with string around a child’s neck, such is placed too upright, the child’s head can fall forward and cause as hood strings, pacifier cords, etc.
-
Page 7: Selecting The Best Location For The Infant Seat
4.2 Check that the Vehicle Seat Meets the Following your vehicle manufacturer directly, or through their dealer Requirements before using this seat. You are also invited to call Baby Trend at1-800-328-7363 for additional information or assistance. WARNING Canadian Motor Vehicle Safety Standards allow infant seats to be used in certain classes of vehicles. -
Page 8: Check That The Vehicle Seat Belt Is Safe To Use
LOCATION LOCATION 4.3 Check that the Vehicle Seat Belt is Safe to Use • Never place this Infant Seat in a vehicle seating location that has an Active Air Bag! Active Air Bags inflate with great The Infant Seat is designed to be tightly installed at all force! An inflating active Air Bag can strike an Infant Seat with times. - Page 9 LOCATION LOCATION Seat securely in place at all times. In addition, closed. This type of seat belt will NOT the locking clip provided with this product will adequately restrain the Infant Seat. not make these belt systems safe to use. (Fig.
- Page 10 LOCATION LOCATION Seat belt systems that are Adequate for use with the Infant This combination seat belt does not require a Seat: locking clip (Fig. 19-1). The following seat belt systems can be used with the Infant Seat • A lap/shoulder combination belt system provided, that all of the other requirements prescribed in these Fig.
-
Page 11: Infant Seat Features And Their Proper Use
FEATURES FEATURES INFANT SEAT FEATURES AND THEIR 5.2 Rear view of Adjustable Back Model PROPER USE Harness Slots 5.1 5-Point Harness Carry Handle Canopy Moving Seat Canopy Back (Adjustable Back Model) Adjuster Seat Angle Knob Indicator Seat Pad Harness Belt Handle Harness Release... -
Page 12: Rear View Of Fixed Back Model
FEATURES FEATURES 5.3 Rear View of Fixed Back Model 5.4 Base Attachment Harness Slots Locks Canopy UAS Connector Harness Storage Belt Belt Path for Seat Angle Vehicle Belt Indicator Installation Foot Adjustment Lock Button Base/Stroller Owner’s UAS Hook Hook Manual Release Holder Button... -
Page 13: Use Of The Infant Seat With The Base
FEATURES FEATURES 5.5 Use of the Infant Seat with the Base Your Infant Seat Base can be installed with either the vehicle belt or with the included UAS attachment system. • To remove the Infant Seat from the Base, squeeze the Base To properly install the Infant Seat and protect your child, you must Release handle, located below carefully follow the instructions that correspond with the model... -
Page 14: Operation Of The Carry Handle
FEATURES FEATURES Crotch Strap 5.7 Operation of the Carry Handle The crotch strap is adjustable in length to ensure a safe and • The Carry Handle has three positions: comfortable fit for harness. the upright carry position, a mid-storage position, and the non-rocking position. Seat Angle Indicator •... -
Page 15: Attaching The Canopy
FEATURES FEATURES 5.8 Attaching the Canopy To adjust the seat back height, turn the moving Knob handle must be vertical back adjuster knob behind the seat clockwise Slip the canopy stays through the sleeves on to increase the seat back height and counter the canopy. - Page 16 FEATURES FEATURES Belt Threading Tool straps to be even with or just below your Adjuster Plate. From the front of the seat, Proper height is even or just below shoulder child’s shoulders. (Fig. 30-1) The harness pull the Harness Straps through the shoulder straps are adjusted as follows: area slots and seat pad.
- Page 17 FEATURES FEATURES 10. Before using the Infant Seat, please pull on 2. The length of the crotch strap is the Harness Straps from the front to ensure shortened by wrapping additional strap that they are securely reattached. material around the metal clip. The length is increased by unwrapping material from around the metal clip.
-
Page 18: Using Infant Seat
USING INFANT SEAT USING INFANT SEAT USING INFANT SEAT The clothing you dress you affect the proper use of the Infant Seat. Please dress your child in clothing that will: 6.1 Securing your Child in the Infant Seat / Carrier •... -
Page 19: For The 5-Point Harness
Infant Seat, that securely buckle. Please call Baby Trend at must be combined with the information provided by your vehicle Fig. 36-2 1-800-328-7363 for assistance. -
Page 20: Preparation
INSTALLATION INSTALLATION 7.1 Preparation 5. Check that the vehicle seat back is locked in the upright position and will not fold forward onto the Infant Seat. 1. Park your vehicle on a level surface so that (Fig. 39-1) the level indicator located on the left side of the Infant Seat will properly indicate the 7.2 Installation of the Infant Seat / Vehicle proper angle of recline of the seat. - Page 21 INSTALLATION INSTALLATION 4. Buckle the seat belt being careful that the 6. To tighten a lap belt only: seat belt is not twisted and is securely • An automatically retracted lap seat belt latched into the appropriate buckle, and is tightened by feeding belt back into its not the adjacent buckle.
-
Page 22: Installation Of The Base Using Uas
Infant Seat with the Base if it does not securely latch into place. Fig. 42-2 • While maintaining downward pressure Please call Baby Trend at 1-800-328-7363 for assistance. on the Infant Seat or Base, squeeze the shoulder belt and lap belt together just above the buckle to prevent from moving. - Page 23 4. Locate the UAS anchors in the vehicle securely latch onto the Base. Please call seat. (Fig. 44-2) Once located, snap the Baby Trend at 1-800-328-7363 for assistance. Fig. 45-2 Infant Seat UAS connectors onto the steel rod. Listen for the click and check that 7.
-
Page 24: Setting Proper Recline Of The Infant Seat / Base
INSTALLATION INSTALLATION 7.4 Setting Proper Recline of 1. Infant Seat with Base: Make sure the vehicle is parked on level ground. the Infant Seat / Base Lock the Infant Seat onto the Base and For your child’s safety, the Infant check that the Infant Seat is level side Seat must be properly reclined to side on the vehicle seat. -
Page 25: Final Safety Checks
INSTALLATION FINAL CHECKS FINAL SAFETY CHECKS proper angle of recline, place a rolled towel, or car seat noodle, under the 1. If your child is already in the Infant Seat, check that the base at the foot end to achieve the harness is properly fitted and tight as instructed in the section correct position. -
Page 26: Additional Information
3. For the Adjustable Back Infant Seat, carefully remove the headrest fabric then adjust the Adjustable Back to its lowest 9.2 Using your Baby Trend Infant Seat with a Baby position. Carefully remove the seat fabric. For the Fixed Trend Stroller Back Infant Seat, carefully remove the seat fabric. -
Page 27: Replacement Parts
ADD’L INFORMATION and Harness-Tie. See section Adjustment of the Shoulder Straps for re-threading of shoulder straps. • To re-install the Harness straps on the adjustable seat back model, move the Seat Back to its highest position, then follow steps in section Adjustment of the Shoulder Straps.
Need help?
Do you have a question about the FLEX-LOC and is the answer not in the manual?
Questions and answers