Table of Contents
Advertisement
Advertisement
Table of Contents

Subscribe to Our Youtube Channel
Related Manuals for Tatung LCD TV


Summary of Contents for Tatung LCD TV
- Page 1 Tatung LCD TV User Manual...
-
Page 2: Table Of Contents
Table of contents 1. General Information …………………………………………………………3 2. Safety Precautions ……………………………………………………………4 3. Features ....…………………………………………………………….7 4. Connection ...……………………………………………………………..8 5. Controls Location ……………………………………………………………11 6. Accessories ..…………………………………………………………….12 7. Remote Control..……………………………………………………………13 Summary of Control Button……………………………………………………14 8. Controls & Adjustment A. General Adjustment ..........…………………………15 Turning the LCD-TV On and Off......………………………...15 View Menus and On-Screen Displays ...…………………………15 Switching PC/Video/S-Video/TV/Component Modes……………………….16... - Page 3 E. Other function explanation ....……………………………………..…43 9.OSD Language List………………………………………………………………45 10. Troubleshooting. ………………………………………………………………50 11.Specifications……………………………………………………………………54...
-
Page 4: General Information
General Information Tatung LCD TV is the latest multi-display active matrix TFT (thin film transistor) liquid crystal high brightness display unit. It is designed to use with VIDEO electronics appliances and PC. Important Information Warning: To reduce the risk of fire or electric shock, do not expose this product to rain or moisture. - Page 5 800.827.2850. Thank You for Choosing This Product Your new LCD TV represents the latest product in television technology. We have designed it with easy-to-use on-screen menus and closed caption capabilities making it one of the best products in its class. We are proud to offer you a product that will...
-
Page 6: Safety Precautions
Safety Precautions 1. Cleaning: Unplug the power cord from the AC outlet before cleaning the product. Use a damp cloth to clean the product. Do not use liquid or aerosol cleaners. 2. Water and moisture: Do not use the product near water, such as bathtubs, washbasins, kitchen sinks, laundry tub, swimming pools or wet basements. - Page 7 6. Stand: Do not place the product on an unstable cart, stand, tripod or table. Placing the product on an unstable base can cause the product to fall, resulting in serious personal injuries as well as damage to the product. Use only a cart, stand, tripod, bracket or table recommended by the manufacturer or sold with the product.
-
Page 8: Features
Features List of Features Your TV was designed with the latest technology that includes the following special features: 1. Standard VESA mounting holes for use of a wall mount or robot arm. 2. Rotate and tilt features to optimize viewing. 3. -
Page 9: Connection
Connection VIDEO Input device... - Page 10 Head Phone VIDEO Output device SUBWOOFER OUT Antenna terminal...
-
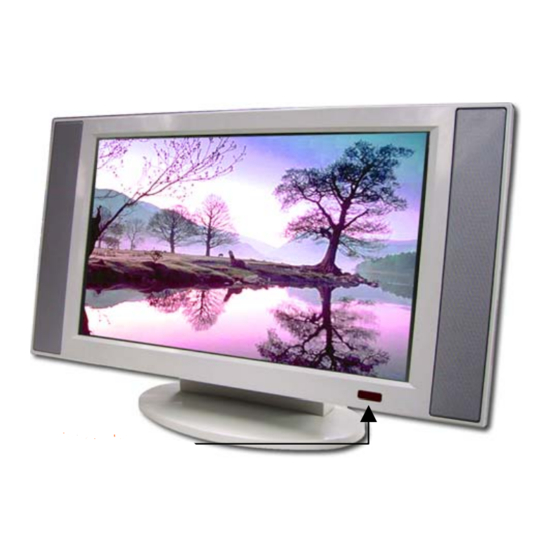
Page 11: Controls Location
These buttons control your TV’s basic features including on-screen menus. To use the advanced features, you must the remote control. POWER: turn on or turn off the LCD TV. SOURCE: set up the input source (PC,VIDEO,SV,TV,CV). MENU: displays the main menu. -
Page 12: Accessories
Accessories User’s manual Remote control & Batteries (4A x2) 15 Pin D-Sub Signal Cable Antenna Cable Power Cord... -
Page 13: Remote Control
Remote Control The remote control pad illustrates the basic functions or your remote control. Sleep Power Number Buttons Return Channel UP Mute SWAP MENU/Enter VOL+ VOL- TITLE / EXIT Reset Channel DOWN Subwoofer Audio Function Other Function PIP Function... -
Page 14: Summary Of Control Button
Summary of Control Button Press POWER button Turns the display on/off Selecting the signal source Press TV button Switches to TV mode. Press AV button Switches to AV Video mode. Press SV button Switches to S-Video mode. Press CV button Switches to Component mode (Y Pb Pr). -
Page 15: Controls & Adjustment
Controls & Adjustment A. General Adjustment Turning the LCD-TV On and Off: To turn on the TV, plug the power cable into a 110V or 220V outlet. Press the Power button on the top of the panel or you can use the remote to turn the TV on. -
Page 16: Switching Pc/Video/S-Video/Tv/Component Modes
Switching PC/Video/S-Video/TV/Component Modes: 1.Turn on the power of the connected video Power equipment. 2.Press the applicable input source. Press button to switch to TV mode. Press button to switch to PC mode (VGA). Press button to switch to AV mode. Press button to switch to S-Video mode. -
Page 17: Adjusting The Volume
Language English Frangais Deutsch Espanol 繁體中文 4. Press the button to exit OSD mode. EXIT Adjusting the Volume: Using Volume Control Press the button to increase or VOL (+) VOL (-) decrease the sound volume. Using Mute At any time, you can temporarily disable the sound using the Mute button. -
Page 18: How To Enter The Menu Items
EXIT or exit from the Menu. Setting the Sleep Timer: You can set the Sleep Timer to automatically turn off Sleep the LCD TV. 1. Press the button to display the Sleep Timer SLEEP screen. 2. Press the... -
Page 19: Pc Mode Adjustment
3 seconds. B.PC mode Adjustment Adjusting the Contrast & Brightness Settings: You may need to perform separate adjustments for brightness and contrast for different video modes. Generally, PC mode will be best viewed with lower brightness and contrast settings than are appropriate for the other modes. 1. -
Page 20: Adjusting The Picture Settings
Contrast - 6.Press the button to return to the previous EXIT screen or exit. Adjusting the Picture Adjust Settings: 1.Press the button to display the main menu. MENU Management Main Display PIP Display Language VOL(-) Reset VOL(+) NTSC Menu/Enter Title/Exit H :... -
Page 21: Adjusting Image Settings
5.1When selecting user, press the button to enter User Color Adjust. ENTER Color Temp - + - + - + 5.2 Press the button to the desired item(R, G, B). DOWN 5.3 Press the button to set the desired item(R, G, B). VOL (+) VOL (-) -... -
Page 22: Adjusting The Audio Settings
PC Adjust H Position - + V Position - + Phase - + Clock - + Auto Image 3. Press the button to enter PC Adjust. ENTER 4. Press the button to the desired item (H. DOWN Position V. Position Phase. Clock. Auto Image). 5. - Page 23 2.Press the button to move the cursor VOL(+) VOL(-) to Audio Adjust. Audio Adjust Treble - + VOL(-) Bass - + VOL(+) Balance - + Menu/Enter Title/Exit Sound Main Down Mute 3. Press the button to enter Audio Adjust. ENTER 4.
-
Page 24: Viewing Picture-In-Picture (Pip)
Audio Adjust Treble - + Bass - + Balance - + Sound Main Mute - + 6. Press the button to return to the previous EXIT screen or exit. Viewing Picture-in-Picture ( PIP): PIP: When you select PC source as the main display, you can also select another source as sub-display: Video, S-video, TV and Component video. - Page 25 3.Press the button to select the VOL (+) VOL (-) desired source. 4.Return to previous OSD and press the VOL(+) button to select the PIP. VOL(-) H Position - + V Position - + PIP Size - + Border - +...
- Page 26 A shortcut to access the PIP menu: Simply press the PIP Function Button on the remote control. Selecting a Signal Source (External A/V) for Press the button to display the PIP ON/OFF window. Press the AV SV CV TV to select all of the available signal sources: “Video”, “S-Video”, “DVD”...
-
Page 27: Tv Mode Adjustment
C.TV mode Adjustment Adjustment the TV adjust settings: 1.Press the button to display the main menu. MENU 2.Press the button to enter Management ENTER Press the button to select the Main DOWN Display (TV). VOL(-) VOL(+) Management Menu/Enter Title/Exit Main Display Down PIP Display Language... -
Page 28: Special Sound Option
5.Press the button to TV Setting. ENTER 6. Press the button to select the desired DOWN item. 7. Press the button to set the VOL (+) VOL (-) desire item. 8. Press the button to return to the previous EXIT screen or exit from the Menu. -
Page 29: Adjusting The Picture Settings
Adjusting the Picture settings: 1.Press the button to display the main menu. MENU 2. Press the button to enter Management Press ENTER button to select the Main Display DOWN (TV). VOL(-) VOL(+) Menu/Enter Management Title/Exit Main Display Down PIP Display Language Reset NTSC... -
Page 30: Memorizing The Channel
6. Press the button to set the desired VOL (+) VOL (-) item. Brightness - Contrast - - Saturation - Sharpness - 7. Press the button to return to the previous screen EXIT or exit from the Menu. Memorizing the Channel: Your TV can memorize and store all of the available channels for both standard broadcast (antenna) and cable channels. - Page 31 Management Main Display PIP Display Language Reset NTSC H : 31.2 kHz V : 50.2 Hz - + 3.Press the button to select TV VOL (+) VOL (-) source than press the button. ENTER 4.Press the button to return to the previous EXIT screen Press the button to select the...
- Page 32 First, select the correct signal source (ANT, STD, IRC, HRC). See previous step. 1Press the button to display the main menu. MENU 2.Press the button to select the TV VOL(+) VOL(-) Setting. VOL(-) 3.Press the button to TV Setting. ENTER VOL(+) 4.Press the button to select the Auto...
-
Page 33: Changing The Channel
TV Setting ANT/CATV Number Buttons Autoscan Yes… Add/Erase Parent Control VOL(-) Caption VOL(+) Fine Tune + Menu/Enter Title/Exit Down Erase - + ERASE 5.Press the button to select VOL (+) VOL (-) Add/Erase than press the button. ENTER 6. You can use the button on the ADD/ERASE remote control to add/erase the channel directly. -
Page 34: How To Use The Parent Control
changes channel in sequence. You will see all the channels that have been memorized, (the TV must be memorized). You will not see channels that were either erased or not memorized. Number Buttons Directly Accessing Channel Return Using the buttons to watch a specific Number channel. - Page 35 VOL(-) VOL(+) Menu/Enter Please Enter Pin : Title/Exit Down 5.The “Please Enter Pin” screen will appear, enter your 4-digit PIN number. For the initial setup, you must enter 1234 (initial code). 6.After entering a valid PIN number, the Parent Control screen will appear, Press the DOWN button to select the “Change PIN”.
- Page 36 As soon as the 4-digits are entered, the “Change Pin OK!!” screen appears. Your PIN has been memorized. Press the EXIT button to exit. How to Enable / Disable the Parent Control 1. Press the button to display the main MENU menu.
-
Page 37: How To Set Up Restrictions Using The 'Tv Rating
How to Set up Restrictions Using the “TV Rating”: First, set up a personal identification number (PIN), and enable the Parent control. (See previous section). Parental restrictions can be set up using either of two methods: The TV Guidelines or MPAA rating. 1.Press the button to display the main MENU... - Page 38 7.The “TV Rating ” screen will appear, press button to select a particular DOWN TV category. Press the ter button to select “B”: Note 1: The Parental Control will automatically block certain categories that are “More restrictive”. For example, if you block “TV-GB ” then “TV-PG B”, “TV-14 B”...
-
Page 39: How To Set Up Restrictions Using The "Mpaa Rating
“More restrictive”. For example, if you block: L” sub-rating in TV-PG, then the “L” sub-rating in TV-14 and TV-MA will automatically be blocked also. If the TV is turned to a restricted channel, the parent control will block it .The Screen will go blue and the following message will appear: “... - Page 40 MAPP PG13 NC17 7.Press the button to select a DOWN particular MPAA category. Press the button to select “B”. Enter : General audience (no restrictions). : Parental guidance suggested. PG-13 : Parents strongly cautioned. : Restricted. Children under 17 should be accompanied by an adult.
-
Page 41: Viewing Closed Captions
“ Parent Control working Level: ” MPAA PG-13 Viewing Closed Captions: Your TV decodes and displays closed captions that are broadcast with certain TV shows. These captions are usually for the hearing impaired or foreign-language translations. All VCRs record closed caption signals from television programs, so home-recorded videotapes also provide closed captions. -
Page 42: Av/Sv/Cv Mode Adjustment
6.Depending on the particular broadcast, it might be necessary to make changes to “Channels” and “Field”: To make the change follow the same procedure as in Steps 4~5 above. Different channels and fields display different information: Field 2 carries additional information that supplements the information in Field1. (For example, Channel 1 may have subtitles in English, while Channel 2 has subtitles in Spanish). - Page 43 item. 6.Press the button to set the VOL (+) VOL (-) desired item. 7.Press the button to return to the previous EXIT screen or exit from the Menu. NOTE: All the adjustment items in AV/SV/CV menu are described in TV mode menu, so you can refer to the TV mode adjustment.
- Page 44 If you continue to press “APC “ key you will see the display on the right upper screen to change to “ Normal”, “Clear”, “Dark” or “Theater”. For example, when the screen is showing a night scene or darker screen, you can use APC to change the screen to “Clear”...
-
Page 45: Osd Language List
OSD Language List English Main Display PIP Display Main H. Position V. Position PIP Size Border Language Recall ANT/CATV Auto Scan Add/Erase Caption Parent Control Fine Tune Bass Treble Balance Sound Mute Brightness Contrast Saturation Sharpness Color Temp. Warm Cool Neut. - Page 46 French Affichage Pri. Affichage PIP Pri.ncipal Position H. Position V. Taille ISI Frontière Langue Rappel ANT/CATV Balayage Ajout./Effac. Légende Commande Parent Feglaheimage Graves Aigus Balance Bruit Muet Luminosite Contraste Teinte Saturation Acuité Temp. Couleur Chaud Frais Neut. Util. Image Auto. Position H Position V Horloge...
- Page 47 German HauptcAnzeige Anzeige PIP Haup.tsächlich H. Position V. Position PIP Größe Rand Sprache Zurücksetzen ANT/CATV Autoscan ADD/Löschen Untertitel Eltern. Feineinstell. Baß Diskant Balance Stummer Helligkeit Kontrast Farbton Sättigung Schärfe Farbe Temp. Warm Kühl Neut. Benu. Selbstbild H Position V Position Takt Fase Lösc.
- Page 48 Spanish Pantalla Pri. Principal PIP Pri.ncipal Posición H. Posición V. PIP Tamaño Frontera Lengua Restaurar ANT/CATV Exploración Agregue/Borre Subtítulo Control Padre Sintonizar Bajos Agudos Balance Sonido Silenciar Brillo Contraste Matiz Saturación Agudeza Temp. de Color Cálid Frío Neut. Usua. Imagen Auto Posición H Posición V.
- Page 49 繁體中文 主畫面 子畫面 主畫面 子畫面 水平位置 垂直位置 子畫面比例 外框 語言 回復 無線/有線 頻道搜尋 增加/消除 關閉字幕 節目分級 微調 低音 高音 平衡 音源 靜音 亮度 對比 色調 色濃度 清晰度 色溫 暖色 冷色 自然 使用者 紅 綠 藍 自動調整 水平位置 垂直位置 時脈 相位 增加...
-
Page 50: Troubleshooting
Troubleshooting When there is no picture or sound • Make sure the AC adapter is properly inserted in the Power outlet. • Reception other than those of broadcasting stations can be considered. • Make sure the input mode is set to TV. •... - Page 51 When there picture is not clear. • The reception may be weak. • The state of the broadcast may also bad. • Make sure the antenna is not disconnected. When the picture is light or improperly tinted. • Check color adjustment. •...
- Page 52 When the picture is not sharp. • The reception may be weak. • The state of the broadcast may also be bad. • Make sure the antenna is not disconnected. When ther picture moves. • The reception may be weak. •...
- Page 53 When there are stripes on the screen or colors fade. • Is the unit receiving interference from other devices? • Transmission antennas of radio broadcasting station and transmission antennas of amateur radio and cellular phones may also cause interference. • Use the units as far apart as possible from device that may cause possible interference.
Need help?
Do you have a question about the LCD TV and is the answer not in the manual?
Questions and answers