Advertisement
Models
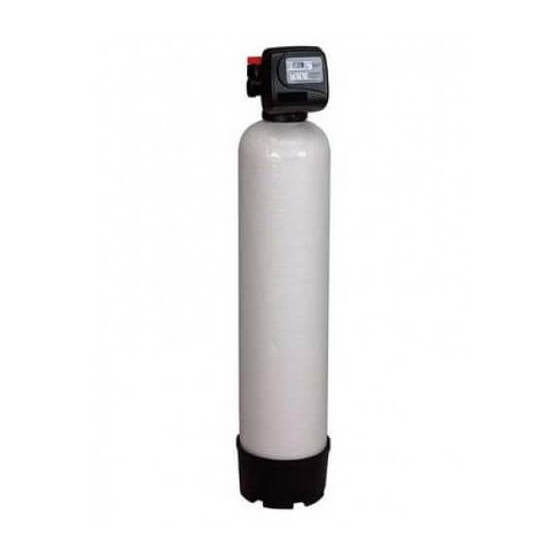
APIF100
APIF100J
APIF150
APIF150J
APIF200
APIF200J
APIF300
APIF300J
Installer, please leave with homeowner.
Homeowner, retain for future reference.
INSTR2188 0710
INSTALLATION AND OPERATING
INSTRUCTIONS
APIF SERIES RESDENTIAL
IRON REDUCTION SYSTEMS
APIF100M
APIF150M
APIF200M
APIF300M
APIF100PT
APIF100MPT
APIF150PT
APIF150MPT
APIF200PT
APIF200MPT
APIF300PT
APIF300MPT
APIF100MJ
APIF150MJ
APIF200MJ
APIF300MJ
Advertisement

Subscribe to Our Youtube Channel
Related Manuals for 3M APIF100


Summary of Contents for 3M APIF100
- Page 1 INSTALLATION AND OPERATING INSTRUCTIONS APIF SERIES RESDENTIAL IRON REDUCTION SYSTEMS Models APIF100 APIF100J APIF100M APIF100PT APIF100MPT APIF100MJ APIF150 APIF150J APIF150M APIF150PT APIF150MPT APIF150MJ APIF200 APIF200J APIF200M APIF200PT APIF200MPT APIF200MJ APIF300 APIF300J APIF300M APIF300PT APIF300MPT APIF300MJ Installer, please leave with homeowner.
-
Page 3: Safety Information
• Utilize a NIOSH-approved dust fi lter mask, protective gloves, and appropriate eye protection when handling and pouring gravel and fi lter media. • To request an MSDS relating to this product call 203-238-8965 or visit the web at http://solutions.3M.com/WPS/Portal/3M/EN_US/MSDS (click MSDS search). For emergencies, call 800-364-3577 or 651-737-6501 (24 hours). - Page 4 CAUTION To reduce the risk associated with property damage due to water leakage: • Read and follow Use instructions before installation and use of this water treatment system. • Installation and use MUST comply with existing state or local plumbing codes. •...
-
Page 5: Table Of Contents
TABLE OF CONTENTS SECTION DESCRIPTION GENERAL INFORMATION BEFORE INSTALLATION IMPORTANT INSTALLATION INSTRUCTIONS PLUMBING SYSTEM CLEAN-UP BACKWASHING INSTRUCTIONS TROUBLESHOOTING SPECIFICATION AND OPERATING DATA MAINTENANCE LIMITED WARRANTY SECTION 1: GENERAL INFORMATION Congratulations on your purchase of an Iron Reduction System! The Iron Reduction System reduces dissolved, precipitated and bacterial iron from your water supply. Contrary to conventional methods, your Iron Reduction System requires NO chemicals (either added to the water supply or the fi... -
Page 6: Before Installation
SECTION 2: BEFORE INSTALLATION Inspecting And Handling Your Filter: Inspect the equipment for shipping damage. If damaged, notify the transportation company and request a damage inspection. Handle the fi lter with care. Damage can occur if dropped or set on sharp, uneven projections on the fl oor. Do not turn the fi lter upside down. Installation must comply with state and local laws and regulations. - Page 7 • Do not install system where water lines could be subjected to vacuum conditions without appropriate measures for vacuum prevention. The pumping rate of your well pump must be suffi cient for satisfactory operation of the Hydro-Charger and to backwash the fi lter. For model APIF100, the required rate is 5 gpm (refer to Specifi...
- Page 8 Locate Water Conditioning Equipment Correctly: Select the location of your Iron Reduction System with care. Various conditions which contribute to proper location are as follows: 1) Locate as close as possible to water supply source. 2) Locate as close as possible to a drain. 3) Locate in correct relationship to other water conditioning equipment (Figure 1, page 3-1).
- Page 9 Facts to Remember While Planning Your Installation: 1) All installation procedures MUST conform to local and state plumbing codes. 2) If lawn sprinkling, a swimming pool, or geothermal heating/cooling or water for other devices/activities are to be treated by the Iron Reduction System, a larger model MUST be selected to accommodate the higher fl...
-
Page 10: Important Installation Instructions
SECTION 3: IMPORTANT INSTALLATION INSTRUCTIONS Proper installation sequence of water conditioning equipment is very important. Refer to the following diagram for your particular water supply. Failure to follow installation, operation, and maintenance instructions may result in property damage due to leakage and will void warranty. TREATED WATER TREATED SOFT WATER... - Page 11 NOTE: Have you read “ Section 4”, PLUMBING SYSTEM CLEANUP, for instructions on some procedures that may need to be performed fi rst? GRAVEL AND CHEM-FREE MEDIA SCHEDULE APIF100 Models APIF150 Models APIF200 Models APIF300 Models Unit Model Number (APIF100, APIF100J, APIF100M, (APIF150, APIF150J, APIF150M, (APIF200, APIF200J, APIF200M, (APIF300, APIF300J, APIF300M, APIF100PT, APIF100MPT, APIF100MJ) APIF150PT, APIF150MPT, APIF150MJ) APIF200PT, APIF200MPT, APIF200MJ)
- Page 12 Step 4 Step 4 Turn back on the power to the well pump and pressurize the water lines to allow for Turn back on the power to the well pump and pressurize the water lines to allow for adjustment of the Hydro-Charger. Check for leaks and adjust as necessary. adjustment of the Hydro-Charger.
- Page 13 Step 8 BYPASS VALVE Assemble and attach bypass valve to the control valve. See Figure 3 if needed. Next locate and assemble the 1” NPT connection fi ttings before attaching them to the bypass valve. Use the appropriate method of connection to ensure a permanent connection. Please refer to fi...
- Page 14 CAUTION To reduce the risk associated with property damage due to water leakage: • Take care when using pliers or pipe wrenches to tighten plastic fi ttings, as damage may occur if over tightening occurs. Typical examples of proper drain line diameters and lengths are: 1/2”...
- Page 15 BACKWASH FREQUENCY SCHEDULE Models: APIF100, APIF100J, APIF100M, APIF100PT, APIF100MPT, and APIF100MJ Persons IRON CONTENT - (PPM) Family Models: APIF150, APIF150J, APIF150M, APIF150PT, APIF150MPT, and APIF150MJ Persons IRON CONTENT - (PPM) Family...
- Page 16 Models: APIF200, APIF200J, APIF200M, APIF200PT, APIF200MPT, and APIF200MJ Persons IRON CONTENT - (PPM) Family Models: APIF300, APIF300J, APIF300M, APIF300PT, APIF300MPT, and APIF300MJ Persons IRON CONTENT - (PPM) Family Step 18 The installation of your Iron Reduction System is now complete. If your water system installation is something other than a private well system, please familiarize yourself with the SPECIAL INSTRUCTIONS FOR SPLIT-STREAM AND PUBLIC WATER SUPPLY TYPE INSTALLATIONS on page 3-12.
- Page 17 HOW TO SET TIME OF DAY STEP 1 - Press SET HOUR and release. STEP 2 - Set the clock display to the closest hour by pressing the or . An arrow will appear in the display pointing to PM during PM hours. STEP 3 - Press SET HOUR to return to the display mode.
- Page 18 HOW TO CHANGE DAYS BETWEEN REGENERATION STEP 1 - Press and hold SET HOUR and buttons simultaneously for three (3) seconds and release. STEP 2 - Press SET HOUR button. STEP 3 - Press buttons to change the number of days between regenerations. STEP 4 - Press SET HOUR to return to the display mode.
- Page 19 Control Valve Function and Cycles of Operation The AC adapter comes with a 15 foot power cord that is designed for use with the control valve. The AC adapter is for dry location use only. If the power goes out, only the time of day needs to be reset. All other settings are permanently stored in the non-volatile memory.
- Page 20 Error Message Regen Time - Hour If “E1” “E2” or “E3” appears on the display, contact 3M Purifi cation Inc.’s Technical Support Services @1- Min. Fill Regen Days To Regen 866-692-2543.
- Page 21 CAUTION To reduce the risk associated with property damage due to water leakage: • Installation and use MUST comply with existing state or local plumbing codes; Special Instructions For Split-Stream and Public Water Supply Type Installation: For SPLIT-STREAM type installation, a secondary PRESSURE TANK must be installed as in Figure 1. On PUBLIC WATER SUPPLY type installations, a PRESSURE TANK must be installed as in Figure 1.
- Page 22 Figure 8 Figure 9 Figure 11 Figure 10 3-13...
-
Page 23: Plumbing System Clean-Up
SECTION 4: PLUMBING SYSTEM CLEAN UP The following procedures are guidelines only but have proven successful in most instances. Under no circumstances should any procedure outlined below be followed if contrary to the appliance manufacturer’s instructions. Should there be any questions concerning the advisability of performing a procedure, it is strongly recommended the manufacturer’s authorized service outlet be consulted prior to performing the pro- cedure. -
Page 24: Backwashing Instructions
Number in box represents number of days, between regenerations. Refer to How to Change Days Between Regeneration on page 3-9. Example: You have model APIF100, 4 people in family, and 8 ppm iron. Refer to Schedule for model APIF100 and locate box intersected by 4 in family and 8 ppm iron. The fi... - Page 25 SECTION 6: TROUBLESHOOTING - CONTROL VALVE Problem Possible Cause Solution 1. Timer does not display time of day a. AC adapter unplugged a. Connect power b. No electric power at outlet b. Repair outlet or use working outlet c. Damaged AC adapter c.
- Page 26 SECTION 6: TROUBLESHOOTING - FILTER UNIT Problem Possible Cause Solution 1. Water CLEAR when drawn, turns RED upon standing a. Insuffi cient air-draw by Hydro-Charger. a. Check Hydro-Charger adjustment. If unable to (Stain producing) adjust for long enough draw, check pumping rate. b.
- Page 27 SECTION 7: VALVE SPECIFICATION AND OPERATING DATA Maximum Service Flow Rate: 27 gpm (102.2 lpm) @15 psig (103 kPa) drop Includes Bypass Valve Maximum Backwash Flow Rate: 27 gpm (102.2 lpm) @15 psig (103 kPa) drop Includes Bypass Valve Minimum/Maximum Operating Pres- 20 psi (138 kPa) - 125 psi (862 kPa) sure: Minimum/Maximum Operating Tem-...
-
Page 28: Specification And Operating Data
SECTION 7: SPECIFICATION AND OPERATING DATA APIF100 APIF150 APIF200 APIF300 APIF100J APIF150J APIF200J APIF300J APIF100M APIF150M APIF200M APIF300M ITEM APIF100PT APIF150PT APIF200PT APIF300PT APIF100MPT APIF150MPT APIF200MPT APIF300MPT APIF100MJ APIF150MJ APIF200MJ APIF300MJ Media Volume, cu. ft. (cu. mtr.) (Note 1): 1.0 (0.03) 1.5 (0.04) - Page 29 SECTION 7: COMPONENT PARTS LIST APIF100 APIF150 APIF200 APIF300 APIF100J APIF150J APIF200J APIF300J Ref. APIF100M APIF150M APIF200M APIF300M Description APIF100PT APIF150PT APIF200PT APIF300PT APIF100MPT APIF150MPT APIF200MPT APIF300MPT APIF100MJ APIF150MJ APIF200MJ APIF300MJ Control Valve, Complete, Less Bypass Valve W217530-003-0N W217530-003-0N W217750-003-0N...
- Page 30 SECTION 7: COMPONENTS ASSEMBLIES IRON REDUCTION SYSTEM ASSEMBLIES AND COMPONENTS DRIVE CAP ASSEMBLY, DOWNFLOW PISTON, AND SPACE STACK ASSEMBLIES Reference No. Part No. Description Quantity V3005 Spacer Stack Assembly V3004 Drive Cap Assembly V3178 Drive Back Plate V3001 Piston Downfl ow Assembly V3135 O-ring 228 V3180...
- Page 31 SECTION 7: FRONT COVER AND DRIVE ASSEMBLY Reference No. Part No. Description Quantity V3175TC-01 Time Clock Front Cover Assembly V3107-01 Motor V3106-01 Drive Bracket & Spring Clip V3108TC Time Clock PC Board V3110 Drive Gear 12 x 36 V3109 Time Clock Cover V3002TC Time Clock Drive Assembly NOT SHOWN...
- Page 32 SECTION 7: QUICK CONNECT BYPASS Part Number V3006 Reference No. Part No. Description Quantity V3151 Nut 1” Quick Connect V3150 Split Ring V3105 O-ring Not Shown Part# V3191-01 Vertical Bypass Adapter V3151 1” Quick Connect Nut V3150 Split Ring V3105 O-ring 215 V3191 Vertical Bypass Adapter...
- Page 33 SECTION 7: INSTALLATION FITTING AND ASSEMBLIES Quick Connect Assemblies Part # V3007-02 1” Copper Brass Sweat Adapter Reference No. Part No. Description: 1” Brass Sweat Assembly Quantity V3151 1” Quick Connect Nut V3150 1” Quick Connect Split Ring V3105 1” Quick Connect O-Ring 215 V3188 1”...
- Page 34 Reference Part No. Description Quantity H4615 Elbow Locking Clip PKP10T58S-BLK 5/8” Insert Sleeve V3192 Quick Connect 3/4” Drain Elbow Nut V3158-01 Quick Connect 3/4” Drain Elbow V3163 O-ring 019 V3159-01 Drain Line Flow Control Retainer Assembly V3162-042 4.2 gpm Drain Line Flow Control Button V3162-053 5.3 gpm Drain Line Flow Control Button V3162-075...
-
Page 35: Maintenance
Iron and Manganese reduction possible. 3M Purifi cation Inc. recommends that you test your treated water pH once a quarter. When Iron is the only problem, a water pH needs to be 7.2 higher. When Man- ganese and Iron are present, the treated water pH needs to 8.2 or higher. -
Page 36: Limited Warranty
For any warranty questions, please refer to the enclosed warranty card or call 1-800-222-7880 or mail your request to: 3M Purifi cation Inc. 400 Research Parkway Meriden, CT 06450 3M Purifi cation Inc. 400 Research Parkway Meriden, CT 06450 1-800-222-7880 3M is a trademark of 3M Company. © 2010 3M Company. All rights reserved. www.3Mpurifi cation.com...
Need help?
Do you have a question about the APIF100 and is the answer not in the manual?
Questions and answers