Table of Contents
Advertisement
Advertisement
Table of Contents

Related Manuals for Honda 2009 GL1800 GOLDWING


Summary of Contents for Honda 2009 GL1800 GOLDWING
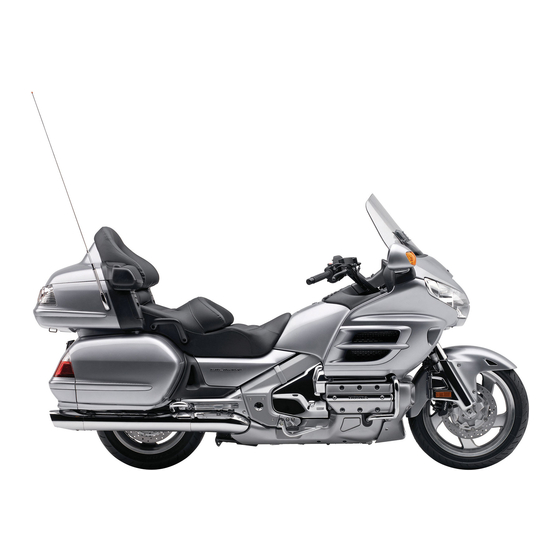
- Page 1 2009 GL1800 GOLDWING OWNER’S MANUAL AIRBAG SUPPLEMENT...
- Page 3 Before operating your GOLDWING, please read your owner’s manual and this supplement carefully. If you have any questions or need special service, remember that Honda dealers know your vehicle best, and they are the only ones qualified to service your airbag system.
- Page 4 A Few Words About Safety Your safety, and the safety of others, is very important. And operating this motorcycle safely is an important responsibility. To help you make informed decisions about safety, we have provided operating procedures and other information on labels, in the owner’s manual, and in this supplement.
-
Page 5: Table Of Contents
Instruments & Controls ..................Operation Component Locations ..............Gauges & Indicators ..................Operation Controls & Features ................ Headlight Beam Adjustment Switch ............... Audio Systems ...................... Audio Component Locations ................Audio Systems Controls ................... Servicing Your Honda ..................Maintenance Component Locations ..............Contents... -
Page 7: The Motorcycle Airbag
The Motorcycle Airbag This section of your owner’s manual supplement describes the components of your motorcycle airbag system and explains how the airbag is designed to work. It also discusses how to care for a motorcycle equipped with an airbag, and offers some important safety precautions. - Page 8 The Motorcycle Airbag The airbag is designed to help protect the rider. It is not designed to help protect a passenger. The airbag is not intended to replace a helmet. Helmets have proven effective in reducing the severity of head injuries in all types of crashes. So always wear a helmet, and make sure a passenger wears one as well.
-
Page 9: Important Safety Precautions
Important Safety Precautions Do not install or temporarily attach any items, such as a map holder, over the airbag cover or in the area between the rider’s seat and the handlebars. This could prevent the airbag from deploying properly, or cause items to be propelled by the airbag and possibly hurt someone. -
Page 10: Airbag System Components
Airbag System Components Your motorcycle airbag system includes: An airbag that is stored forward of the rider’s seat, under a cover marked ‘‘ AIRBAG. ’’ ‘‘AIRBAG’’ Four crash sensors; two on the left fork and two on the right fork. The sensors measure the rate of deceleration during a frontal impact. - Page 11 Airbag System Components A sophisticated electronic system that continually monitors information about the sensors, the control unit, and the airbag inflator whenever the ignition is in the ON position. An indicator on the instrument panel that alerts you to a possible problem with the airbag system (see page for more information).
-
Page 12: How The Airbag System Works
How The Airbag System Works If you ever have a frontal impact, sensors will detect the vehicle’s deceleration and send that information to the control unit. If the rate of deceleration is high enough, the control unit will signal the airbag to instantly inflate. Tethers help keep the airbag upright. -
Page 13: Airbag System Service
The airbag ever inf lates. Any airbag that has deployed must be replaced along with the control unit and other related parts. Do not try to remove or replace the airbag by yourself. This must be done by a Honda dealer. The Motorcycle Airbag... -
Page 14: Safety Labels
Safety Labels Your motorcycle has two labels with important information about your airbag system. Motorcycle owners are encouraged not to attempt servicing the airbag system. Please refer to the safety label pages in your owner’s manual for information about additional safety labels on your vehicle. The Motorcycle Airbag... -
Page 15: Instruments & Controls
Instruments & Controls This section shows the location of all controls, gauges and indicators you would normally use before or while riding your motorcycle. This supplement includes information only for operating items that are unique to your GOLDWING model. For all other controls and features, please refer to your owner’s manual. -
Page 16: Operation Component Locations
Operation Component Locations Most controls on your GOLDWING are in the same locations as they are on other models equipped with the navigation system. However, in order to provide adequate space for storing and deploying your airbag, some controls have been moved from the center of the vehicle to the fairing panels and handlebars. -
Page 17: Gauges & Indicators
Gauges & Indicators The instrument panel on your vehicle includes an airbag indicator, as shown and described below. Please refer to your owner’s manual for locations and explanations of the other gauges and indicators on the instrument panel. airbag indicator airbag indicator (red) This indicator lights when there may be a problem with your airbag system. -
Page 18: Operation Controls & Features
Operation Controls & Features Fairing Panel Controls & Features On your GOLDWING, the Hazard Warning System Switch is located on the left fairing panel (see page 16 for the other left fairing panel controls). The right fairing panel on your vehicle includes the Headlight Beam Adjustment Switch and the Rear Suspension Spring Pre-load Adjustment Switch. -
Page 19: Headlight Beam Adjustment Switch
Operation Controls & Features Headlight Beam Adjustment Switch The adjustment switch is used to raise or lower the height of the headlight beam. You can confirm the headlight beam position by referring to the multi information display. If you carry a heavier or lighter than normal load, you may need to adjust your headlight beam so you can better see the road ahead and don’t blind oncoming drivers. - Page 20 Operation Controls & Features To lower the beam, push the Headlight Beam Adjustment Switch down ( To raise the beam, push the Headlight Beam Adjustment Switch up ( RIGHT SIDE headlight beam adjustment switch To Lower For USA For Canada To Raise When approximately 5 seconds pass without operating the Headlight Beam Adjustment Switch, the display automatically returns to the previous display.
-
Page 21: Audio Systems
Audio Systems This section shows the locations of all controls and components of your audio systems, including your radio, intercom, and navigation systems. The only difference between your GOLDWING model and others is that some controls are on the left fairing panel. Please refer to your owner’s manual for operational instructions. -
Page 22: Audio Systems Controls
Audio Systems Audio Systems Controls LEFT HANDLEBAR CONTROLS CB radio levers (for accessory CB radio) TALK lever VOLUME lever (for accessory CB radio) TUNE/DISC lever MUTE button LEFT FAIRING PANEL CONTROLS CB button (for accessory CB radio) I-COM button AUDIO button NAVI button FM button AM button... -
Page 23: Servicing Your Honda
If an airbag system component needs to be removed in order to reach a serviceable part, it must be done by a Honda dealer. Maintenance Component Locations...
Need help?
Do you have a question about the 2009 GL1800 GOLDWING and is the answer not in the manual?
Questions and answers