Table of Contents
Advertisement
Quick Links
L
e
v
e
L
e
v
e
U
U
Copyright ©2004 A
Document Version: 1.4 (March, 2004)
P/N: 9590B506A0
All trademark and trade names are the properties of their respective owners.
l
O
n
l
O
n
S
e
r
v
S
e
r
v
FPS-2111TXU
FPS-2013TXU
s
e
r
G
s
e
r
G
R
R
LL
IGHTS
ESERVED
e
P
r
i
e
P
r
i
e
r
s
e
r
s
u
i
d
u
i
d
.
n
t
e
r
n
t
e
r
e
e
Advertisement
Table of Contents

Related Manuals for LevelOne FPS-2111TXU


Summary of Contents for LevelOne FPS-2111TXU
- Page 1 FPS-2111TXU FPS-2013TXU Copyright ©2004 A IGHTS ESERVED Document Version: 1.4 (March, 2004) P/N: 9590B506A0 All trademark and trade names are the properties of their respective owners.
-
Page 2: Table Of Contents
Table of Contents Introduction.......................1 Features ........................1 Safety Instructions....................2 Package Contents ....................2 Models........................3 LAN Installation....................6 Procedure.........................6 Configuration ....................8 Required Configuration ...................8 Configuration Methods & Utilities................8 Using the Windows Setup Wizard................9 BiAdmin Utility Program ................10 Requirements......................10 Installation......................10 Main Screen......................10 Menu Options ......................14 AppleTalk ......................16 Software Requirements ..................16 AppleTalk Setup....................16... - Page 3 Printing Methods – Overview ................46 LPD Printing Configuration ..................47 Other Printing Methods ..................51 Windows NT Server (TCP/IP) ...............52 Software Requirements ..................52 LevelOne Printer Server Configuration..............52 Windows NT Host Configuration................53 Printing with Windows NT ...................56 Windows Peer-to-Peer ..................57 Overview .......................57 Setup........................57 Special Features....................61 Internet Printing.....................61 SNMP ........................67...
-
Page 4: Introduction
Introduction This chapter provides details of your LevelOne Printer Server's features and components. Congratulations on the purchase of your new LevelOne Printer Server. This device was designed to provide a simple and efficient network printing solution. Features Versatility. The LevelOne Printer Server supports up to five protocols: NetWare, TCP/IP, SMB (Service Message Block), AppleTalk (EtherTalk), and NetBEUI. -
Page 5: Safety Instructions
Level One Printer Servers Safety Instructions For your own safety, and to protect your LevelOne Printer Server, please observe the following safety advice. 1. Unplug this device from its power source before cleaning. Use only a slightly dampened cloth for cleaning. Do not use liquid or aerosol cleaners. -
Page 6: Models
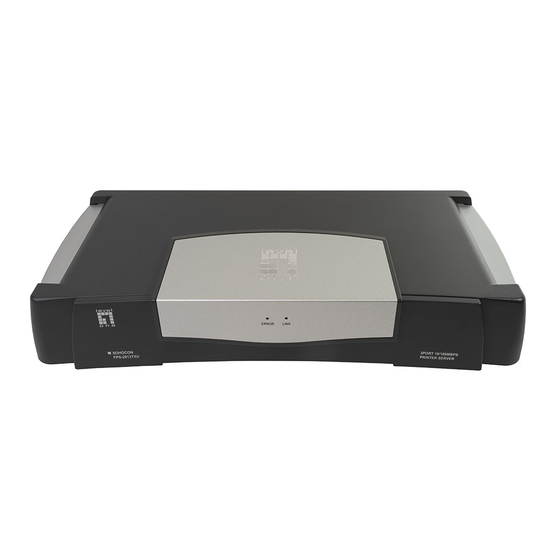
Green Link LED See page 5 for details. 12V Power port 10/100BaseT Switches See page 5 for details. 10/100BaseT STP Connector 10/100BaseT Link LED The FPS-2111TXU offers support for both 10BaseT and 100BaseT environments. It features one UTP connector and one bi-directional parallel port. - 3 -... - Page 7 Level One Printer Servers FPS-2013TXU Figure 2: FPS-2013TXU Item Description Parallel Port 1 Parallel Port 2 Parallel Port 3 Red Error LED. See page 5 for details. Green Link LED. See page 5 for details. Reset Button. This will Reboot the LevelOne Printer Server.
-
Page 8: Led Indicators
Introduction LED Indicators All LevelOne Printer Servers are fitted with 2 LED indicators. The red LED is the Status/Error indicator. The green LED is the Power/Link indicator. The LED indicator modes are described in the following table. Green LED Red/Orange LED Status Description No power. -
Page 9: Lan Installation
LAN Installation This chapter describes how to install the LevelOne Printer Server in your Local Area Network. Procedure 1. Find the Default LevelOne Printer Server Name • The Default Server Name is shown on a sticker on the base of the device. It consists of 8 letters and/or digits. - Page 10 LAN Installation 4. Power Up and Check • Plug in the power adapter cable. • If using 10/100BaseT, check the LAN connection LED next to the 10/100BaseT connector. If this LED does not light when the LevelOne Printer Server is powered up, auto- negotiation has failed.
-
Page 11: Configuration
Configuration This chapter provides an overview of the configuration process. Required Configuration The LevelOne Printer Server is designed to support many different platforms, and the configuration required will depend upon the environment in which it is installed. Depending upon the situation, any of the following may require configuration: •... -
Page 12: Using The Windows Setup Wizard
Telnet All TCP/IP networks Telnet can be used only to monitor the printers attached to the LevelOne Printer Server. WebAdmin Windows NT Server WebAdmin is installed on the NT (TCP/IP) Server, and then accessed using a Web Web Browser Browser. Windows 3.1 Not all LevelOne Printer Server WPConfig... -
Page 13: Biadmin Utility Program
BiAdmin Utility Program This chapter covers the installation and operation of the BiAdmin utility. Requirements This program requires: • Windows 95, Windows 98 or ME • Windows NT 3.51, Windows NT 4.0, Windows 2000 or XP Additional Recommendations: • Screen resolution of 800 * 600 or greater. •... - Page 14 BiAdmin Utility Program Groups On the left side of the screen is a column for Groups. Each LevelOne Printer Server may be placed in a group, using the Configuration-System Configuration-Groups menu option. • If a group is selected, only LevelOne Printer Servers in that group will be listed on the right side of the screen.
- Page 15 Level One Printer Servers If the desired device is not listed, try the following: • Check that the device is installed and ON, then Refresh the list. • Use the InitDevice - Find menu option to search for the LevelOne Printer Server. You need to know the Default Name of the LevelOne Printer Server.
-
Page 16: Appletalk Configuration
BiAdmin Utility Program allows you to configure both the LevelOne Printer Server and the NetWare server from within BiAdmin. • If this Novell NetWare Client 32 is NOT installed, you can configure only the LevelOne Printer Server itself, not the NetWare server. See Chapter 6 for more details on using BiAdmin with NetWare Servers. -
Page 17: Menu Options
Level One Printer Servers Menu Options Status Menu Device Info Same as Device button. Display all the configuration and status information about the selected LevelOne Printer Server. The data is presented in a scrolling, read-only window. Port Same as Port Status buttons. -
Page 18: Configuration Menu
BiAdmin Utility Program Configuration Menu The System option allows you to: • Change the name of the selected LevelOne Printer Server. • Change the "Group" for the selected LevelOne Printer Server. • Set the Network Protocols used the selected LevelOne Printer Server. (Any protocols not used on your LAN may be disabled. -
Page 19: Appletalk
AppleTalk This chapter details using the LevelOne Printer Server in the AppleTalk environment. The LevelOne Printer Server supports AppleTalk (EtherTalk), PAP, ATP, NBP, ZIP and DDP protocols, enabling Macintosh computers on the network to view and use the LevelOne Printer Server as a regular AppleTalk printer. Configuring and printing in the EtherTalk environment operates completely as usual. -
Page 20: Advanced Setup And Management
AppleTalk Advanced Setup and Management This section describes the configuration changes which can be made to your LevelOne Printer Server device. Changing the Device Configuration Windows Software In a mixed Windows PC/Macintosh environment, you can use the BiAdmin utility program to configure the LevelOne Printer Server. - Page 21 Level One Printer Servers AppleTalk Settings When editing the CONFIG file, only the parameter should be changed. The parameter is the last part of the line, after the colon (:). Ensure that you use only valid parameters. 0001 Device Name: xxxxxxxx The Device Name will initially be the Default Server Name.
-
Page 22: Netware
NetWare This chapter describes using your LevelOne Printer Server in the NetWare environment. Overview This section describes how the LevelOne Printer Server functions in the Novell NetWare environment. The LevelOne Printer Server fully supports both Bindery and NDS Novell systems, and be configured as either a NetWare Printer Server or NetWare Remote Printer. -
Page 23: Configuration Methods
Level One Printer Servers Configuration Methods To support the widest possible range of users , the LevelOne Printer Server is supplied with the utilities listed in the following table. Note that this document covers only BiAdmin with Novell's Client 32 software installed on your PC. -
Page 24: Using Biadmin With Client 32
NetWare Using BiAdmin with Client 32 With NetWare Client 32 installed on your PC, BiAdmin’s NetWare capabilities are enhanced. As well as configuring the LevelOne Printer Server, you can configure the NetWare Server or Servers. Preparation 1. Ensure that you are logged into the NetWare server(s) you wish to use. You need to have ADMIN rights so you have permission to create printer objects and queues. -
Page 25: Print Server Mode - Bindery
Level One Printer Servers Print Server Mode - Bindery If Bindery Print Server Mode is selected, the following screen will appear: Figure 6: Bindery Print Server Mode Data Change the name of the selected LevelOne Printer Server if you Print Server Name wish. - Page 26 NetWare Quickset Button (Bindery) The Quickset button on the previous screen will configure the NetWare server using default values derived from the default name, as shown on the following example. Figure 7: Bindery Quickset This screen displays the name the selected LevelOne Printer Server, and the following information for each port: Printer - the NetWare printer object which will be created on the current server.
- Page 27 Level One Printer Servers • The right column lists any available servers. Note that to be available, you must be logged into the Server with Supervisor rights. • Use the “<<” and “>>” buttons to move file servers to and from the Serviced Fileserver list on the left.
- Page 28 NetWare "Printer" Button 1. After selecting the Printer button on the screen above, the NetWare printer objects ( 1 for each port on the LevelOne Printer Server) will be created if they do not yet exist. 2. The next screen (shown below) allows you to select the desired port on the LevelOne Printer Server.
- Page 29 Level One Printer Servers Assigning Printer Queues (Required) This screen will be displayed when a port button is clicked on the previous screen. Use this screen to assign queue(s) to the printer object associated with the selected port. Figure 11: Assign Queues (Bindery) This screen displays the name of the NetWare Printer on the top of the screen.
- Page 30 NetWare To Assign Users to Queues (Required) Select the queue, then click Users on the screen above to see the following screen. The current queue name is shown on the top of the screen. Figure 12: Assign Users to Queue (Bindery) •...
- Page 31 Level One Printer Servers Password Clicking the Password button on the screen shown in Figure 9: Configure NetWare Server (Bindery PS mode), allows you to simultaneously change the NetWare password for the Master File Server, and the NetWare login password stored in the LevelOne Printer Server.
-
Page 32: Print Server Mode - Nds
NetWare Print Server Mode - NDS If Print Server - NDS Mode was chosen, the following screen will appear. Figure 15: NDS Print Server Mode Data Print Server Change the name of the selected LevelOne Printer Server if you Name wish. - Page 33 Level One Printer Servers Quickset Button (NDS) The Quickset button on the screen above will configure the NetWare server with default values based on the default name of the LevelOne Printer Server. You will see a screen like the following example.
- Page 34 NetWare • Password - Change the login password used by the LevelOne Printer Server when it connects to the NetWare server. By default, there is no password. See Password (NDS) for details. Printer button 1. After selecting Printer above, the NetWare printer objects (1 for each port on the LevelOne Printer Server) will be created if they do not yet exist.
- Page 35 Level One Printer Servers • Stop servicing a queue by selecting it from the list on the left, and clicking the “>>” button. • When a Queue on the left is selected, the Users, Operators, and Information buttons become available.
- Page 36 NetWare The current Queue and Context are displayed at the top of the screen. • Use the Change Context button to change the current context. The Available Operators list on the right will then change to show the queues available in that context. •...
-
Page 37: Remote Printer Mode - Bindery
Level One Printer Servers Remote Printer Mode - Bindery If, on the original screen, Remote Printer Mode - Bindery, was selected, the following screen will be shown. Figure 23: Bindery Remote Printer Data Device Name Change the name of the selected LevelOne Printer Server if you wish. -
Page 38: Remote Printer Mode - Nds
NetWare Remote Printer Mode - NDS If, on the original screen, Remote Printer Mode - NDS was selected, the following screen will be shown. Figure 24: NDS Remote Printer Data Device Name Change the name of the selected LevelOne Printer Server if you wish. -
Page 39: Ndps (Netware 5)
Level One Printer Servers NDPS (NetWare 5) Overview • The LevelOne Printer Server must first be configured as a valid device on your TCP/IP network. See Chapter 7 - TCP/IP for details. • To use DNPS (Novell Distributed Printing Services), the Novell server must be running Novell NetWare 5, and the PCs (clients) must be running IntranetWare Client V2.2. -
Page 40: Creating An Ndps Printer Agent
NetWare 8. Click Create. The new NDPS Manager will appear in the main browser window. • To start the NDPS Manager in future, enter the following command at the console: LOAD NDPSM then select the NDPS Manager object. • To start the NDPS Manager whenever you bring up the server, add a command like the following to your server's AUTOEXEC.NCF file: LOAD NDPSM SerMGR.TeSupp The last item is the name of the NDPS Manager object you wish to load. -
Page 41: Workstation Configuration
Level One Printer Servers Figure 27: Configure Port Handler 10. In the Host address IP field, enter the IP Address previously assigned to the LevelOne Printer Server device. 11. In the Printer Name field, enter the Logical Port name on the LevelOne Printer Server. - Page 42 NetWare Figure 28: NDPS Manager - Client 4. The printer (e.g.: SerPrinter in the example above) appears in the main Printer Manager window in the Name list, and is available for print jobs. Printer drivers are automatically downloaded from the server as required. 5.
-
Page 43: Tcp/Ip
TCP/IP This chapter covers configuration of the LevelOne Printer Server in a TCP/IP environment. Overview • The following procedure can NOT be used with model EPS-3001TU. For this model, the BiAdmin utility program should be used for configuration. See Chapter 4 for details on installing and using BiAdmin. -
Page 44: Connecting To The Levelone Printer Server
TCP/IP Connecting to the LevelOne Printer Server 1. Start your Web Browser 2. In the Address box, enter HTTP:// followed by the IP Address of the LevelOne Printer Server. e.g. http://192.168.0.21 3. You will then be prompted for the password. If no password has been set, just press NTER 4. - Page 45 Level One Printer Servers TCP/IP Configuration Selecting TCP/IP will display the screen below. Figure 29: TCP/IP Screen Data - TCP/IP Screen The LevelOne Printer Server is able to obtain an IP Address IP Address dynamically, using DHCP, Bootp, or rarp. Normally, it will check these methods in sequence, but each method can be individually disabled using BiAdmin.
-
Page 46: Logical Printer Configuration
TCP/IP Logical Printer Configuration Logical Printers can be used to create a “Virtual” printer. For example, to create a Landscape printer, you could define a Logical Printer as follows: Pre-string Printer Control codes to switch the printer to Landscape mode Printer Control codes to reset the printer, restoring the default Post-string settings. -
Page 47: Telnet
Level One Printer Servers Telnet Telnet can be used to monitor the status of the printers attached to the LevelOne Printer Server. Operation Establish a connection to the LevelOne Printer Server, by starting your Telnet program and providing the IP Address of the LevelOne Printer Server. (No port number is required.) e.g. -
Page 48: Unix
Unix This chapter describes using your LevelOne Printer Server in the Unix environment. Overview Software Requirements • TCP/IP protocol, FTP (Optional: - BOOTP, Rarp, Telnet) • LPD printing system (for LPD printing) • C Compiler (for PSfilter proprietary printing system only). IP Address Configuration The LevelOne Printer Server must be provided with a IP Address so that it will be a valid device on the LAN. -
Page 49: Printing Methods - Overview
Level One Printer Servers Using BOOTP If using bootp, no arp table entry is necessary, but the following configuration is required: 1. Add the following entry to the Boot Table /etc/bootptab NAME:ht=ether:vm=rfc1024::ha=PA:ip=IP:sm=SM:gw=GW Where NAME is the LevelOne Printer Server’s name PA is the hardware address of the LevelOne Printer Server IP is the LevelOne Printer Server’s IP Address... -
Page 50: Lpd Printing Configuration
Unix FTP (File Transfer Protocol) FTP is also a standard print method in most UNIX systems, but it is NOT recommended except as a test and back-up method of printing, because it does not use a print queue. LPD Printing Configuration LPD is a built-in printing protocol for most UNIX systems, and is also supported in Windows NT 3.5 or later. - Page 51 Level One Printer Servers LPD on System V Before beginning LPD Setup, ensure that an IP Address has been assigned to the LevelOne Printer Server. Keep the following points in mind: • The remote host name is the name of the LevelOne Printer Server.
- Page 52 Unix Where: printer_name is the Print Queue name used to store jobs for the corresponding logical printer PS_NAME is the LevelOne Printer Server name defined in /etc/hosts Logical_Printer_name is the logical printer name on the LevelOne Printer Server (L1..L3 or L1..L8, depending on your model) Spooler_directory is the directory you created in Step 6.
-
Page 53: Printing Using Lpd
Level One Printer Servers Adding Remote Printers A remote printer is added by inserting the following line in the /etc/printcap file. The entry is really one line, but can be entered as shown. Use a TAB character where shown. printer_name|Remote_Printer_Alias:\... -
Page 54: Other Printing Methods
Unix Other Printing Methods Your LevelOne Printer Server supports 2 other printing methods: • DSI (Direct Socket Interface) • PSfilter (Proprietary print method) Printing Using DSI Logical printers must be configured on the LevelOne Printer Server as explained in Chapter 7 - TCP/IP (DSI supports only 3 Logical Printers). -
Page 55: Windows Nt Server (Tcp/Ip)
Windows NT Server (TCP/IP) This chapter explains how to configure and use your LevelOne Printer Server in the Windows NT Server TCP/IP environment. Software Requirements • Windows NT3.51 or later • TCP/IP network protocol • TCP/IP remote printing system (provided with Windows NT; configuration is described in this document). -
Page 56: Windows Nt Host Configuration
Windows NT Server (TCP/IP) Windows NT Host Configuration This section covers configuration of a Windows NT host. The LevelOne should be configured first. For Windows NT configuration in a Peer-to-Peer environment, see Chapter 10 - Windows Peer-to-Peer. Host File Entry (Optional) If you wish to refer to the newly-installed LevelOne Printer Server by its name, rather than by its IP Address, you must add an entry for it to the hosts file \SYSTEM32\DRIVERS\ETC\HOSTS... - Page 57 Level One Printer Servers Preparing for TCP/IP Printing To create a TCP/IP remote printer, Microsoft TCP/IP Printing Support must be installed. If it is already installed, proceed to Adding a TCP/IP Remote Printer. Otherwise, the procedure to install TCP/IP printing support is as follows.
- Page 58 Windows NT Server (TCP/IP) Providing LPD Server Name Of Printer On That Enter the appropriate logical printer number Machine (L1..L8) 5. When the Create Printer dialog box reappears, check the Share This Printer On The Network option. 6. In the Share Name box, Printer Manager creates a MS-DOS compatible resource name, which you can change if you wish.
-
Page 59: Printing With Windows Nt
Level One Printer Servers Printing with Windows NT Windows Applications The LevelOne Printer Server’s printers will appear as Network Printers to users on the LAN. • To install the printer on each PC, use the Add Printer wizard. Select Network Printer when prompted, and then select the appropriate destination. -
Page 60: Windows Peer-To-Peer
Windows Peer-to-Peer This chapter describes operation in a Windows Peer-to-Peer Networking environment. Overview In a peer-to-peer environment, each PC communicates directly with the LevelOne Printer Server. The LevelOne Printer Server supports both NetBEUI and TCP/IP. Both protocols can be used simultaneously. The following Windows versions are supported: •... - Page 61 Level One Printer Servers Figure 30: Add Port (Peer-to-peer Print Driver) If your LevelOne Printer Server is not listed: • Select "List all Print Servers", and click the "Refresh" button. • Check that both the LevelOne Printer Server and the printer are properly connected, and powered on.
- Page 62 Windows Peer-to-peer Figure 31: Configure Printer Port 8. Select the correct Windows printer in the Existing Printers list, and click the "Connect" button. If the correct printer type is not listed, click "Add New Printer" to run the Windows Add Printer wizard. Step through the Wizard and install the required printer: •...
- Page 63 Level One Printer Servers Port Options The options for the Peer-to-peer Print Driver are accessed via the Port Settings button. Use Start - Settings - Printers to open the Printers folder, then right-click the Printer, and select Properties. The Port Settings button is on the Details or Ports tab, depending on your version of Windows.
-
Page 64: Special Features
Special Features This chapter covers the special features of the LevelOne Printer Server. When using the TCP/IP protocol, the LevelOne Printer Server supports 2 special features: • Internet Printing • SNMP Internet Printing Overview The Internet Printing System allows users (employees, colleagues, suppliers, customers…) to print data to your printer across the Internet. - Page 65 Level One Printer Servers Internet Printer Server • TCIP/IP Protocol. The LAN must use the TCP/IP protocol. • Mail Server Access. The LevelOne Printer Server must be able to access the Mail Server using a single IP address. • Mail Account. The LevelOne Printer Server must have a Mail Account. Users print by sending an E Mail to this mail account.
-
Page 66: User Software
Special Features Internet Mail Printing Configuration The LevelOne Printer Server must be configured with the data in the following table. This can be done with either the supplied BiAdmin utility program (see Chapter 4) or your Web Browser (see Chapter 7). Mail Server The IP Address of the E Mail Server used by the IP Address... - Page 67 Level One Printer Servers • Directory - C:\Program Files\Internet_Printer • Start Menu folder - InterNet Printing Port Driver 3. You will then see the Configure Port screen, as shown in the following screenshot. Figure 33: InterNet Printer Port 4. The following data must be provided.
- Page 68 Special Features Using the new Port The Windows Control Panel is used to connect the correct printer to the InterNet Printing Port. In Windows 95/98/NT, the procedure is: 1. Select the Printer which matches the remote printer, then choose Properties, as shown in the example below.
-
Page 69: Printing Through The Internet
Level One Printer Servers Printing through the Internet 1. Create or open the document you wish to print. 2. Select the Printer connected to the InterNet Printing Port. 3. If you do not have a permanent Internet connection, establish a connection now. (Note: The InterNet Printing Port will NOT establish a dial-up connection, but it will send the E Mail the next time you are connected.) -
Page 70: Snmp
Special Features SNMP The LevelOne Printer Server supports SNMP (Simple Network Management Protocol). The LevelOne Printer Server’s SNMP support allows network supervisors to monitor and control the LevelOne Printer Server using network management platforms such as HP OpenView, IBM SystemView, etc. This is accomplished through the SNMP agent and the SNMP MIB. -
Page 71: Troubleshooting
Troubleshooting This chapter describes some problem situations which may arise, and the solutions to them. Overview If you encounter printing difficulties, please refer to the Hardware section first, then the Printing section, then the section for your specific situation. If, after following the advice in these documents, the LevelOne Printer Server still does not function properly, please contact your dealer for further advice. -
Page 72: Printing - General
Troubleshooting Printing - General Problem No. 1 When using 10BaseT cabling, the LevelOne Printer Server unit does not work. Solution No. 1 Check the Hub’s link LED for the port to which the LevelOne Printer Server is connected. If it is off, there is a problem in the network cable. -
Page 73: Appletalk
Level One Printer Servers AppleTalk Problem No. 1 Why do I get an incorrect printout? Solution No. 1 Some possible reasons are: • You may have chosen Binary encoding to print the file. Try to use ASCII encoding. • Some of the fonts in your print file may not be supported by the printer. - Page 74 Troubleshooting page printing on the first or last page of your document. • Install the Apple LaserWriter 7 driver. You are having trouble printing with the Apple LaserWriter 8 driver. Problem No. 8 Why do I have trouble printing with the LaserWriter 8? Solution No.
-
Page 75: Netware
Level One Printer Servers NetWare Problem No. 1 My LevelOne Printer Server prints garbage. Solution No. 1 Follow the following steps to identify the problem: 1. Print a diagnostic file using PSConfig program. (a) Run PSConfig and select your LevelOne Printer Server from the list. - Page 76 Troubleshooting • If the printouts are the same, then the problem is NOT the LevelOne Printer Server. The problem might be that an incorrect printer driver was chosen or the timeout setting in the CAPTURE command is too short. • If the printouts are NOT the same, there may be a problem with the LevelOne Printer Server.
- Page 77 Level One Printer Servers • Password Mismatch: Clear the NetWare password with PCONSOLE, or set the correct password for the LevelOne Printer Server using WPConfig or BiAdmin. • Print Server Not Defined: Install LevelOne Printer Server again 4. Check NetWare to see if the login status of the Print Server to the file servers is Ready.
- Page 78 Troubleshooting Solution No. 5 Try the following. 1. Check if the printer attached to the LevelOne Printer Server is on-line. 2. Check if your LevelOne Printer Server is logged into the file server (See Problem 3) 3. Check the current status of the queue. Run PCONSOLE and select Print Queue Information.
- Page 79 Level One Printer Servers Solution No. 8 This means that the LevelOne Printer Server did not log in the master file server. It might be that the Ethernet frame types do not match. 1. Try to find a workstation that use the same frame type as the LevelOne Printer Server so that PSConfig can see the device.
-
Page 80: Tcp/Ip (Unix & Windows Nt)
Troubleshooting TCP/IP (Unix & Windows NT) Problem No. 1 LevelOne Printer Server device is not recognized. Solution No. 1 Check the following: • There are no routers between the LevelOne Printer Server and the UNIX host during IP address assignment. •... - Page 81 Level One Printer Servers 3. Reconfigure as for a new device. Problem No. 6 Printing by FTP, I receive an error message: Invalid print queue Print queue not ready • Check that the printer is ready Solution No. 6 •...
-
Page 82: Windows Peer-To-Peer
Troubleshooting Windows Peer-to-peer Problem No. 1 When I tried to install the Printing software for Peer-to-Peer printing, I received an error message and the installation was aborted.. Solution No. 1 This may be caused by an existing installation of the printer port software. - Page 83 Level One Printer Servers Details tab, as shown below. 7. Click the Add Port button. On the resulting screen, select Other, then Printer Server, as the port to add, as shown below. 8. Click OK to see the Print Port Configuration screen, as shown below.
- Page 84 Troubleshooting 9. Click the Browse Device button, select the desired LevelOne Printer Server, and click OK. 10. Click OK to return to the Printers folders, and right-click on the Printer. Ensure that the Work off-line option is NOT checked. The Printer should no longer be grayed out, and is ready for use. Problem No.
-
Page 85: Internet Printing
Level One Printer Servers • When the Details screen appears, click the Spool Settings button. • When the Spool Settings dialogue box appears, choose Start printing after last page is spooled and click OK. Problem No. 5 A printing device connected to the LevelOne Printer Server port cannot print or prints garbage. - Page 86 Troubleshooting the section on Logical Printers in the Unix or NT Server sections for details of Logical Printers. Problem No. 6 The Print job seemed to go through OK, but it was never received. Solution No. 6 Check the E Mail address. If you use more than one Internet Printer with the same printer driver, ensure that you use the correct port each time you print.
-
Page 87: Specifications
Specifications FPS-2111TXU Power Consumption 5w max. External Power Adapter 12V DC LEDs Parallel Port 1 Centronic female DB-25 connector Ethernet cables 10BASE-T, 100BASE-T FPS-2013TXU Power Consumption 5w max. External Power Adapter 12V DC LEDs Parallel Port Three Centronic female DB-25... - Page 88 Specifications Environmental Specifications Operating Temperature 0 ~ 40°C Storage Temperature -10 ~ 70°C Shipping Temperature -40 ~ 70°C Operating Humidity 10 ~ 80% Storage Humidity 5 ~ 90% Shipping Humidity 5 ~ 100% Parallel Port Pin Assignments Signal Name Direction -Strobe To printer +Data 0...
Need help?
Do you have a question about the FPS-2111TXU and is the answer not in the manual?
Questions and answers