Table of Contents
Advertisement
Quick Links
Model No.:
65-C0482-MA
PS2-2200/PS2-2600/PS4-840/PS4-1200/PS4-1600
PS2-420/PS2-600/PS2-800/PS2-1250/PS2-1800
PS2-2200/PS2-2600/PS4-840/PS4-1200/PS4-1600
PS2-420/PS2-600/PS2-800/PS2-1250/PS2-1800
INTRODUCTION
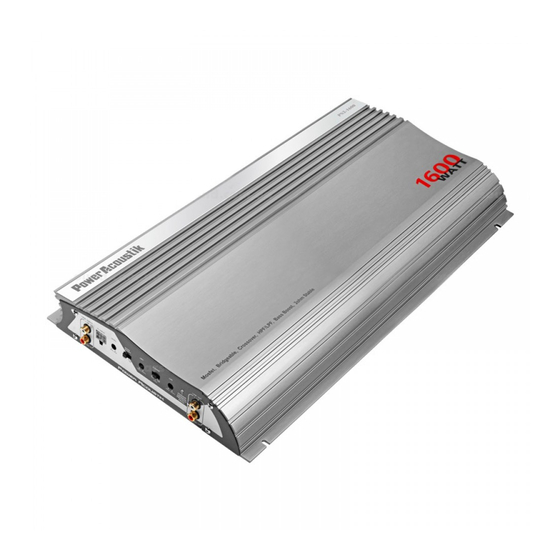
Amplifiers provide high-performance sound reinforcement for your mobile audio equipment.
It s versatility enables compatibility with optional Equalizers,Frequency Dividing Network
Crossovers,and other audio processors in a customized system.The Multi-Mode bridging
Capabilities allow flexibility in hosting several different speaker configurations.
To achieve optimum performance,it is highly recommended that you read this Owner s
Manual before beginning installation.
FEATURES
Full Mosfet Power Supply
PWM Circuitry
Full Selectable Crossover Hi/Full/Low
Three Way Protection Circuit
2 Ohm Stable Stereo
Tri-Mode Capable
Variable Low Pass 40Hz-250Hz/30Hz-500Hz
Variable Hi Pass 40Hz-250Hz/50-500Hz
Variable 18 dB Bass Boost @ 40Hz
Frequency Response: 10Hz to 30 KHz
S/N Ratio: 98dB
THD: 0.02%
System Distress Indicator
4 Gauge Power/Ground Connection
Platinum Plated RCA Connectors
Line Output
High/Low Level Inputs With Floating Ground
WARNING
High powered audio systems in a vehicle are capable of generating Live Concert high
levels of sound pressure,Continual exposure to excessively high volume sound levels may
cause hearing loss or damage.Also,operation of a motor vehicle while listening to audio
equipments at high volume levels may impair your ability to hear external sounds such as;
horns,warning signals,or emergency vehicles,thus constituting to a potential traffic hazard.
In the interest of safety,Consumer Electronics recommends listening at lower volume levels
While driving.
2
:A1
Advertisement
Table of Contents

Summary of Contents for Power Acoustik Power PS2-420
- Page 1 PS2-420/PS2-600/PS2-800/PS2-1250/PS2-1800 Model No.: 65-C0482-MA :A1 PS2-2200/PS2-2600/PS4-840/PS4-1200/PS4-1600 INTRODUCTION Amplifiers provide high-performance sound reinforcement for your mobile audio equipment. It s versatility enables compatibility with optional Equalizers,Frequency Dividing Network Crossovers,and other audio processors in a customized system.The Multi-Mode bridging Capabilities allow flexibility in hosting several different speaker configurations.
-
Page 2: Table Of Contents
TABLE OF CONTENTS PLANNING YOUR SYSTEM Before beginning the installation,consider the following: a.If you plan to expand your system by adding other components sometime in the future, ensure adequate space is left,and cooling requirements are met. PLANNING YOUR SYSTEM..........b.Speaker level or RCA,which to use and why? If your source unit is equipped with both types of outputs,Use the RCA s for the amplifier inputs,as this provides for increased bandwidth and you can still utilize the speaker MOUNTING YOUR AMPLIFIER........... -
Page 3: Wiring Connection
BASS P O W E R ( G R E E N ) FULL P R O T E C T ( R E D ) PS2-420 20A/PS2-600:30A/PS2-800:20AX2/PS2-1250:25AX2/PS2-180030AX2 0dB 18dB 40Hz 250Hz 40Hz 250Hz PS2-2200 25AX3/PS2-2600:30AX3/PS4-840:20AX2/PS4-1200:25AX2/PS4-1600:40AX2 R CH(+) L CH(+) (3)Remote Turn-On Input:To Power Antenna output of Car Stereo This Amplifier is turned ON remotely when the vehicle s stereo is turned ON . -
Page 4: Power Indicator Led
Should the Amplifier be SHORT CIRCUITED overloaded or overheated,the protection circuit will SHUT-DOWN the Amplifier. CAUTION PS2-420/PS2-600 THIS AMPLIFIER WAS DESIGNED TO BE USED WITH EITHER 2 OHM STEREO/CHANNEL OR 4 OHM EACH MONO BRIDGED CHANNEL.IN THE CASE OF TRI-MODE OPERATION,USE EITHER 8 OHM STEREO CHANNEL SPEAKERS AND 4 OHM SUB OR VICE VERSA.SEE THE SECTION TRI-MODE FOR FURTHER INFORMATION... -
Page 5: Connecting The Speaker
P R O T E C T ( R E D ) Only the rear left and right channels are shown below. Input Sensitivity Control INDUCTOR LOW PASS FILTER CONNECTING THE SPEAKERS PS2-420/PS2-600/PS2-800/PS2-1250/PS2-1800/PS2-2200/PS2-2600 (A)STEREO MODE LEFT CHANNEL 2-4Ohm CAPACITOR HIGH PASS FILTER (B)MONO MODE... - Page 6 (D)6 CHANNEL MODE Model:PS4-840/PS4-1200/PS4-1600 (A)4 CHANNEL MODE RIGHT 2-4Ohm 2-4Ohm WOOFER 8 Ohm INDUCTOR LOW PASS FILTER F U S E 4-8Ohm CAPACITOR HIGH PASS FILTER 4-8Ohm 2-4Ohm 2-4Ohm F U S E (B)3 CHANNEL MODE 2-4Ohm 2-4Ohm F U S E 4-8Ohm CAPACITOR HIGH PASS FILTER...
-
Page 7: Trouble Shooting Guide
TROUBLE SHOOTING GUIDE WARNING system SYMPTOMS CHECK POINTS CURE Check fuses in amplifier. In the power Be sure Turn-on lead is connected LED illuminated? Check signal leads.Check gain control. Check Tuner/Deck volume level. NO SOUND Clean contacts on fuse holders. Check for speaker short or Is the Diagnosis amplifier overheating. -
Page 8: Specification
SPECIFICATIONS MODEL NO PS2-420 PS2-600 PS2-800 PS2-1250 PS2-1800 MAX Power@2 Ohm 420W 600W 800W 1250W 1800W @4 Ohm 80WX2CH 95WX2CH 150WX2CH 220WX2CH 300WX2CH @2 Ohm 95WX2CH 120WX2CH 180WX2CH 280WX2CH 380WX2CH Bridged Power 190W 240W 360W 560W 760W <0.02% <0.02% <0.02% <0.02%...


Need help?
Do you have a question about the Power PS2-420 and is the answer not in the manual?
Questions and answers
How to hook it up
To hook up the Power Acoustik PS2-420 amplifier:
1. Select Mounting Location:
- Choose a location with good air circulation.
- Avoid small enclosures without airflow.
- For best cooling, mount vertically in a trunk or under a seat with at least 1 inch (2 cm) clearance above the fins.
2. Mount the Amplifier:
- Use the amplifier as a template to mark and drill four mounting holes.
- Secure it using the provided screws.
3. Connect Power:
- Run a power wire from the battery to the amplifier.
- Connect a ground wire to a clean, unpainted metal surface near the amp.
- Use a remote turn-on wire from the head unit to the amp's remote input.
4. Connect Inputs:
- Use pre-amp (low-level) RCA outputs from the head unit to the amplifier for better sound quality and lower distortion.
5. Connect Speakers:
- Connect speaker wires from the amplifier output to the speakers or subwoofers.
- Ensure speaker impedance is between 2–8 Ohms and power rating matches or exceeds the amplifier’s output.
6. Adjust Settings:
- Use the input sensitivity control to match input levels.
- If using as a subwoofer channel, set the filter switch to LPF and adjust the crossover frequency (40Hz–250Hz) as needed.
7. Check Operation:
- Power on the system and verify operation using the power indicator LED.
Ensure all wiring is secure and properly insulated.
This answer is automatically generated