Table of Contents
Advertisement
Quick Links
o o o o o o o o o o o o o o o o o o o o o o o o o o o o o o o o o o o o o o o o o o o o o o o o o o o o o o o o o o o o o o o o o o o o o o o o o
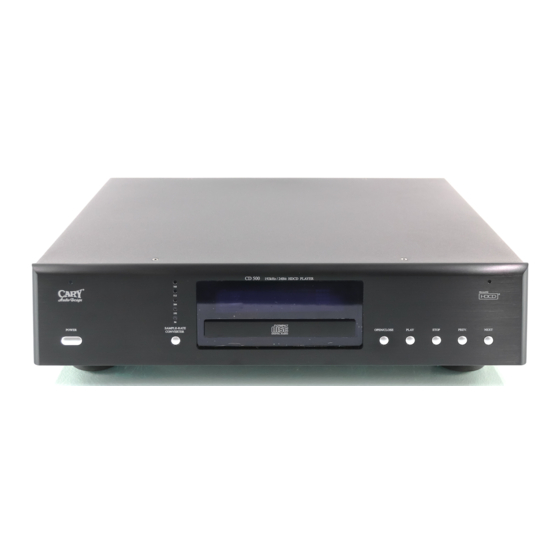
CD-500
CD Player
NOTE: Before installing your new component, please read this manual carefully
as it will inform you of the product specifications, proper installation and correct
operating procedures for your unit. Also included in this manual are guidelines
on how to service and care for your new Cary Audio Design product.
Advertisement
Table of Contents

Subscribe to Our Youtube Channel
Related Manuals for Cary Audio Design CD-500


Summary of Contents for Cary Audio Design CD-500
- Page 1 NOTE: Before installing your new component, please read this manual carefully as it will inform you of the product specifications, proper installation and correct operating procedures for your unit. Also included in this manual are guidelines on how to service and care for your new Cary Audio Design product.
-
Page 3: Table Of Contents
TABLE OF CONTENTS Important Safety Instructions ............2 Welcome Product Overview ..................4 Unpacking and Installation ..............5 Specifications ..................6 Controls & Displays Front Panel .....................8 Rear Panel ....................10 Pin Assignment ..................11 Remote Control..................12 Playback Starting Playback .................14 Stopping Playback ................14 Various Playback Functions ..............15 Service and Care Care and Cleaning................18 Factory Service ..................18... -
Page 4: Important Safety Instructions
IMPORTANT SAFETY INSTRUCTIONS WARNING: The triangle with the lightning flash symbol displayed on the unit advises the user of dangerous uninsulated voltage inside the product’s enclosure. CAUTION: To reduce the risk of electric shock, do not remove the cover. There are no user-serviceable parts inside;... - Page 5 This type of damage is not covered by product warranties, and Cary Audio specifically disclaims responsibility for any such damage. • Power Cord: The removable power cord provided with your player was specifically designed for use with this product, but other AC cords may be used.
-
Page 6: Welcome
Digital to Analog Converters (DACs) or to the digital output, the jitter is incredibly low - in fact the CD-500 has the lowest jitter we have ever measured on a CD player - around 90 picoseconds, with the jitter spectrum held below 0.1 Hz. -
Page 7: Unpacking And Installation
We strongly recommend saving all original packing cartons to protect your component for storage or future shipping. Power Requirement The CD-500 is designed to operate from AC mains current. The specified AC voltage is either 110-120 volts or 220-240 volts AC at 50-60 Hz. Connections •... -
Page 8: Specifications
SPECIFICATIONS Operating the CD-500 is a simple procedure since each unit is designed for long-term stability in virtually any home operating situation. However, if the unit is operated outside the parameters outlined in this owner’s manual, damage may occur. Please read this manual carefully before operating your new CD-500. - Page 9 SPECIFICATIONS AUDIO (CD) ..............................Frequency Range 2 Hz - 22 kHz (44.1 kHz) ..............................Amplitude Linearity 0.1 dB (20 Hz – 20 kHz) ..............................Phase Linearity 3 degrees (20 Hz - 20 kHz) ..............................Dynamic Range 129 dB (1 kHz) ..............................
-
Page 10: Controls & Displays
CONTROLS AND DISPLAYS FRONT PANEL 1. POWER Press once to turn the power on. Press again to turn power off. 2. ANALOG OUTPUT SAMPLE RATE COVERTER This switches the analog output sample-rate converter mode. 44.1 kHz ---> 96 kHz---> 192 kHz ---> 384 kHz ---> 512 kHz---> 768 kHz ---> 3. - Page 11 HDCD algorithm. 10. ALPHANUMERIC DISPLAY This multi-character display provides a wide range of information concerning the operation of the CD-500. 11. ANALOG OUTPUT SAMPLE RATE CONVERTER INDICATOR This indicator lights when the analog output sample rate converter function is on.
-
Page 12: Rear Panel
CONTROLS AND DISPLAYS REAR PANEL 1. RIGHT CHANNEL ANALOG OUTPUT JACK (BALANCED) Use this jack for connection to the amplifier/preamplifier balanced input jack. 2. RIGHT CHANNEL ANALOG OUTPUT JACK (RCA UNBALANCED) Use this jack for connection to the amplifier/preamplifier RCA unbalanced input jack. -
Page 13: Pin Assignment
CONTROLS AND DISPLAYS 9. POWER INPUT (AC IN) Connect to AC mains using the included power supply cord. 10. RS 232 JACK Use this jack for connection to computer control. PIN ASSIGNMENT The pin assignments of all of the XLR-type male analog outputs, the XLR-type male digital output, and XLR-type female digital inputs are as follows: Pin 1: Signal ground Pin 2: Signal + (non-inverting) -
Page 14: Remote Control
CONTROLS AND DISPLAYS REMOTE CONTROL 1. POWER: Use to turn the power on and off. 2. PROGRAM: Preset tracks to be played by keying in track numbers. When using PROGRAM function, the player must be in STOP mode. 3. NUMBER: Use the number buttons to select a track. - Page 15 CONTROLS AND DISPLAYS 14. MUTE: Use to mute and resume sound. 15. REPEAT: Use to repeat play. Press once for single track, press a second time to repeat all tracks, and press a third time to clear. 16. OPEN/CLOSE: Use to open and close the disc holder.
-
Page 16: Playback
PLAYBACK STARTING PLAYBACK 1. Press the POWER button to turn the power on. 2. Press the OPEN/CLOSE button. The disc holder opens. 3. Load the disc you want to play. 4. Press the PLAY button. Playback starts then stops automatically after the last track on the disc has been played. -
Page 17: Various Playback Functions
VARIOUS PLAYBACK FUNCTIONS (REMOTE CONTROL UNIT ONLY) Playing a Specific Track [Direct Play] 1. Use the number buttons and “+ 10” button to select the desired track. Playback starts from the selected track. Stopping Playback Temporarily [Pause] 1. During playback, press the PAUSE button on the remote control unit. - Page 18 Automatic Search 1. Press the NEXT button. • Press the button more than once to move ahead to the beginning of subsequent tracks. • When the NEXT button is pressed during random playback, the next track is selected at random and played. 2.
- Page 19 Playing the Tracks in the Desired Order [Programmed Play] Use this function to select the desired tracks on the disc and play them in the desired order. Up to thirty- five tracks can be programmed. 1. In the stop mode, press the PROGRAM button. 2.
-
Page 20: Service And Care
SHIPPING INSTRUCTIONS In the event that the owner needs to return the unit to Cary Audio Design for service or repair of a possible defect, he must follow the following steps: 1. Contact Cary Audio Design at 919.355.0010 to obtain a Return Authorization (RA) number prior to shipping;... -
Page 21: United States Limited Warranty
Cary Audio Design. Under no circumstances is Cary Audio Design liable for incidental or consequential damages. Any... - Page 22 UNITED STATES LIMITED WARRANTY INTERNATIONAL PURCHASERS (Export markets) Cary Audio Design warrants its merchandise to purchasers within the United States exclusively for use within the United States of America. It provides no other warranties, expressed or implied. If you are living outside the USA, please consult your local dealer...
- Page 23 Notes...
- Page 24 CARY AUDIO DESIGN 1020 Goodworth Drive, Apex, NC 27539 phone 919-355-0010 fax 919-355-0013 www.caryaudio.com o o o o o o o o o o o o o o o o o o o o o o o o o o o o o o o o o o o o o o o o o o o o o o o o o o o o o o o o o o o o o o o o o o o o o o o o o...
Need help?
Do you have a question about the CD-500 and is the answer not in the manual?
Questions and answers