Table of Contents
Advertisement
o o o o o o o o o o o o o o o o o o o o o o o o o o o o o o o o o o o o o o o o o o o o o o o o o o o o o o o o o o o o o o o o o o o o o o o o o o o o o o o o o o o o
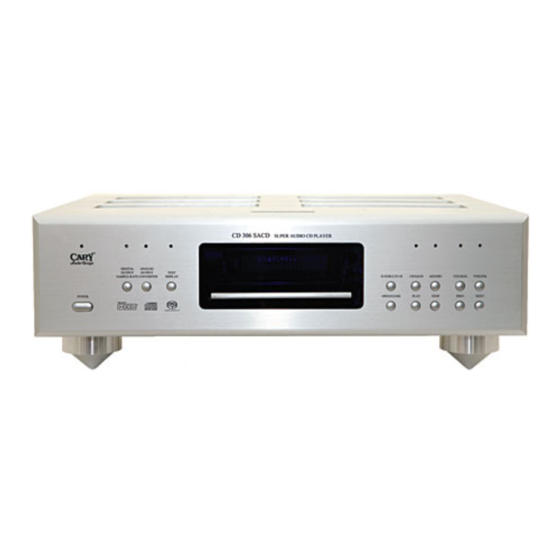
CD 306 SACD
Professional Version
Super Audio CD Player
NOTE: Before installing your new component, please read this manual
carefully as it will inform you of the product specifications, proper
installation and correct operating procedures for your unit. Also included
in this manual are guidelines on how to service and care for your new
Cary Audio Design product.
Advertisement
Table of Contents

Related Manuals for Cary Audio Design CD 306 SACD


Summary of Contents for Cary Audio Design CD 306 SACD
- Page 1 NOTE: Before installing your new component, please read this manual carefully as it will inform you of the product specifications, proper installation and correct operating procedures for your unit. Also included in this manual are guidelines on how to service and care for your new Cary Audio Design product.
-
Page 2: Table Of Contents
TABLE OF CONTENTS Important Safety Instructions ......................2 Welcome Product Overview ..........................5 Unpacking and Installation ........................6 Specifications ............................7 Controls & Displays Front Panel ............................9 Rear Panel ............................11 Remote Control ..........................13 Playback Normal Playback ..........................15 Starting Playback .......................... -
Page 3: Important Safety Instructions
IMPORTANT SAFETY INSTRUCTIONS WARNING: To reduce the risk of fire or electric shock, do not expose this appliance to rain or moisture. The lightning flash with arrowhead symbol within an equilateral triangle is intended to alert the user to the presence of un-insulated dangerous voltage within the product’s enclosure that may be of sufficient magnitude to constitute a risk of electric shock to persons. - Page 4 IMPORTANT SAFETY INSTRUCTIONS 14. LIGHTNING: For added protection for the unit during a lightning storm, or when it is left unattended and unused for long periods of time, unplug it from the wall outlet and disconnect the antenna or cable system. This will prevent damage to the unit due to lightning and power line surges.
- Page 5 IMPORTANT SAFETY INSTRUCTIONS 26. FCC INFORMATION FOR USER: CAUTION: ANY changes or modifications not expressly approved by the party responsible for compliance could void the user's authority to operate the equipment. NOTE: This equipment has been tested and found to comply with the limits for a Class B digital device pursuant to Part 15 of the FCC Rules.
-
Page 6: Welcome
WELCOME PRODUCT OVERVIEW Following the tremendous success of the 306 line of CD players, Cary Audio Design’s new CD 306 SACD Professional Version includes the latest in SACD, HDCD and CD playback technology. The new CD 306 SACD Professional Version features a new servo board design with internal components tested to 105°... -
Page 7: Unpacking And Installation
If you are the original purchaser of this unit and you purchased it in the United States, you should fill out the enclosed warranty registration card and return it to Cary Audio Design within 15 days of your purchase. Cary Audio Design also suggests that you keep your original packing cartons in case you ever need to ship the unit when moving to a new home. -
Page 8: Specifications
SPECIFICATIONS Operating the CD 306 SACD Pro Transport/Processor is a simple procedure, since each unit is designed for long term stability in virtually any home operating situation. However, if the unit is operated outside the parameters outlined in this owner’s manual, damage may result. Please read this manual carefully before putting your new CD 306 SACD Pro in operation. - Page 9 SPECIFICATIONS ................................... 109dB (1 kHz) Channel Separation ................................... 0.0004% (1 kHz) Total Harmonic Distortion ................................... 3.0V RMS (220 Ω output impedance) Audio Output Level ................................... 6.0V RMS (440 Ω output impedance) Balanced AUDIO (SACD) ................................... 2 Hz - 100 kHz (2.822 MHz) Frequency Range ...................................
-
Page 10: Controls & Displays
CONTROLS AND DISPLAYS FRONT PANEL 1. POWER • Press once to turn the power ON. • Press again to set to the “OFF” position and turn the power off. 2. DIGITAL OUTPUT SAMPLE-RATE CONVERTER button: (CD only) • Use this button to switch the digital output sample-rate converter mode. •... - Page 11 CONTROLS AND DISPLAYS 10. AUTOMATIC SEARCH FORWARD button • Press this button to move the pickup forward to the beginning of the next track. • Press again to move ahead to other tracks 11. EXTERNAL IN TOSLINK (OPTICAL) button • Press this button to select the program source connected to the digital input jack TOSLINK (Optical).
-
Page 12: Rear Panel
CONTROLS AND DISPLAYS REAR PANEL 1. RIGHT CHANNEL ANALOG OUTPUT JACK (AES/EBU BALANCED) • Use this jack for connection to the amplifier/preamplifier’s balanced input jack. 2. RIGHT CHANNEL ANALOG OUTPUT JACK (RCA UNBALANCED) • Use this jack for connection to the amplifier/preamplifier’s RCA unbalanced input jack. 3. - Page 13 CONTROLS AND DISPLAYS 12. DIGITAL OUTPUT JACK (COAXIAL) • 44.1 kHz - 192 kHz digital data output from this jack. • With Super Audio CD disks, no digital signals output. 13. DIGITAL OUTPUT JACK (AES/EBU) • 44.1 kHz-192 kHz digital data output from this jack. •...
-
Page 14: Remote Control
CONTROLS AND DISPLAYS REMOTE CONTROL This section explains how best to use the remote control to set up and operate the CD 306 SACD Pro. 1. POWER: Use to turn the power on and off. 2. PROGRAM: Use to preset tracks to be played by keying in track numbers. - Page 15 CONTROLS AND DISPLAYS 18. MUTE: Use to mute sound. Press to resume sound. 19. RANDOM: Use to play all the tracks on the disc once in random order. 20. REPEAT: Use to repeat play. Press once for single track, press 2 time to repeat ALL, press time to clear.
-
Page 16: Playback
PLAYBACK NORMAL PLAYBACK Setting the Top Priority Playback layer for Super Audio CD • The SACD disk layer for top priority playback after the disc is loaded can be set. • The SACD disk layer set for top priority playback upon shipment from the factory (default setting) is the Super Audio CD (stereo) layer. -
Page 17: Starting Playback
PLAYBACK STARTING PLAYBACK 1. Press the POWER button to turn on the power. 2. Press the OPEN/CLOSE button. • The disc holder opens. 3. Load the disc you want to play. 4. For Super Audio CD, use the 2CH/MULTI CHANNEL button to set the layer to be played, as necessary. -
Page 18: Various Playback Functions
PLAYBACK VARIOUS PLAYBACK FUNCTIONS 1. Playing a specific track (Remote control unit only) [Direct Play] Use the number buttons and + 10 button to select the desired track. Playback starts from the selected track. 2. Stopping playback temporarily (Remote Control unit only) [Pause] During playback, press the PAUSE button on the remote control unit. - Page 19 PLAYBACK 4. Finding the desired spot while listening to the sound (Remote Control unit only) Use this function to skip forward or backward while listening to the sound. This function comes in handy for finding the desired spot in the middle of long tracks.
- Page 20 PLAYBACK 7. Repeat play (Remote control unit only) Playing all the tracks repeatedly. 1. In the PLAY mode, press the REPEAT button twice. The "RepAll" indicator lights. To cancel the all-track repeat mode, press the REPEAT button three times. Playing a single track repeatedly.
-
Page 21: Using The Cd 306 As A Digital To Analog (D/A) Converter
PLAYBACK USING THE CD 306 SACD PRO AS A DIGITAL TO ANALOG (D/A) CONVERTER Select "AES/EBU", "COAXIAL" or "TOSLINK" button. 1. Press the POWER button to turn on the power. 2. Press the COAXIAL button. 3. COAXIAL D-IN : NONE D-OUT: NONE A-OUT: NONE Analog Out is the first to appear on the display, then the external digital inputs sampling frequency appears. -
Page 22: Service And Care
Please retain and always use the original shipping carton for shipping the player. NON-WARRANTY REPAIRS Cary Audio Design will provide repair service for its products charging on a time and expense basis. At this time, the standard non warranty service bench fee is $125 with all parts used for repair charged extra. -
Page 23: Limited Warranty
LIMITED WARRANTY Cary Audio Warrants to the original United States purchaser for use in the United States the Following Cary Audio Products for the Periods Indicated: 1. Power Amplifiers, Integrated Amplifiers, Surround Sound Processors, and Preamplifiers have a three (3) year parts and labor warranty from the date of the original purchase from Cary Audio. - Page 24 LIMITED WARRANTY What Will We Pay For? We will pay for all labor and material expenses for items covered by the warranty. Payment of shipping charges is discussed in the next section of this warranty. How You Can Get Service? In the event that the owner needs to return the unit to Cary Audio for service or repair of a possible defect, he must follow the following steps: 1.
- Page 25 LIMITED WARRANTY How State Law Relates to the Warranty Some states do not allow limitations on how long an implied warranty lasts and/or do not allow the exclusion or limitation of incidental or consequential damages, so the above limitations or exclusions may not apply to you.
- Page 26 CARY AUDIO DESIGN 1020 Goodworth Drive, Apex, NC 27539 phone 919-355-0010 fax 919-355-0013 www.caryaudio.com o o o o o o o o o o o o o o o o o o o o o o o o o o o o o o o o o o o o o o o o o o o o o o o o o o o o o o o o o o o o o o o o o o o o o o o o o o o o o o o o o o o o o...
Need help?
Do you have a question about the CD 306 SACD and is the answer not in the manual?
Questions and answers