
Related Manuals for Targa DPV-5300x


Summary of Contents for Targa DPV-5300x
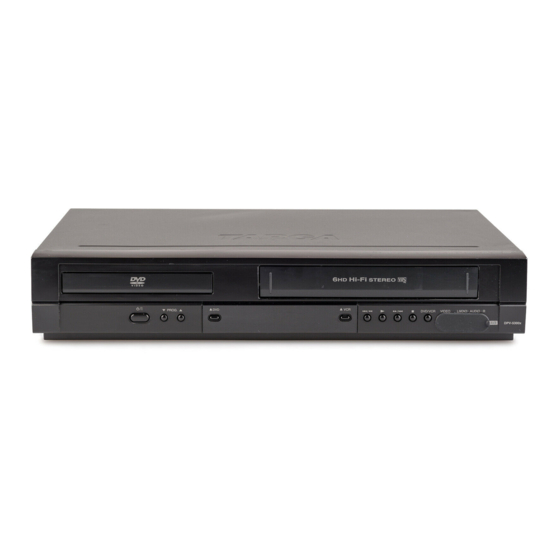
- Page 1 DVD-PLAYER WITH VCR COMBO User manual and service information TARGA GmbH Lange Wende 41 D-59494 Soest www.targa-online.com DPV-5300x...
- Page 2 Frontpanel 6 7 8 9 10 11 12 13 14 Rear Panel AERIAL Connect the aerial using this jack. VIDEO/AUDIO OUT(Left/Right) (DVD/VCR OUT) Connect to a TV with video and audio inputs. COMPONENT/PROGRESSIVE SCAN VIDEO OUT (Y Pb Pr) (DVD EXCLUSIVE OUT) Connect to a TV with Y Pb Pr inputs.
- Page 3 Remote Control...
-
Page 4: Important Safety Instructions
Important Safety Instructions Please read the following instructions carefully. Do not place any fire sources (such as candles) onto the device. Please keep this User's Guide for later use. Do not use any extension cords. Follow all warnings. The wall outlet must be easily accessible. Proceed exactly as described in the instructions. -
Page 5: Safety Precautions
Safety Instructions SERIAL NUMBER: You'll find the serial number on the back of CAUTION the device This number is for this device only and not known by anyone else. You should annotate the respective informa- RISK OF ELECTRIC SHOCK tion below and also keep your User’s manual as a future proof DO NOT OPEN of purchase. -
Page 6: Table Of Contents
Table of Contents Introduction Operation Safety Precautions......3 Operation with tape ..... . 21-24 Table of Contents . -
Page 7: Before Use
Before Use To ensure proper use of this product, please read this Notes on Discs owner’s manual carefully and retain for future reference. Handling Discs This manual provides information on the operation and Do not touch the playback side of the disc. Hold the maintenance of your DVD player. -
Page 8: Types Of Playable Discs
Before Use (Continued) Types of Playable Discs Notes on Copyrights: It is forbidden by law to copy, broadcast, show, broad- cast via cable, play in public, or rent copyrighted materi- al without permission. This product features the copy (8 cm / 12 cm disc) protection function developed by Macrovision. -
Page 9: Front Panel
Front Panel 6 7 8 9 10 11 12 13 14 1. Disc Tray 6. Remote Sensor Insert a disc here. Point the remote control here. 7. Tape Compartment 2. 1/I Switches the unit to ON or OFF. Tape Eject 3. -
Page 10: Remote Control
Select DVD camera angle if available Mark any point during playback. ZOOM SEARCH Enlarge video image. Display MARKER SEARCH menu. DPV-5300x A-B/LP TITLE Repeats a programmed scene. Display the title menu of the Select the recording speed of the disc if available. -
Page 11: Rear Panel
Rear Panel AERIAL Connect the aerial using this jack. VIDEO/AUDIO OUT(Left/Right) (DVD/VCR OUT) Connect to a TV with video and audio inputs. COMPONENT/PROGRESSIVE SCAN VIDEO OUT (Y Pb Pr) (DVD EXCLUSIVE OUT) Connect to a TV with Y Pb Pr inputs. AUDIO OUT (Left/Right) (DVD EXCLUSIVE OUT) Connect to an amplifier, receiver or stereo system. -
Page 12: Connections
Connections Caution: DVD exclusive out connection Make sure this unit is connected directly to the TV. Component Video connection Set the TV to the correct video input channel. 1. Connect the COMPONENT/PROGRESSIVE SCAN Do not connect the AUDIO OUT socket of your DVD VIDEO OUT jacks on the DVD Player to the player to the Phono input socket of your Hifi equip- corresponding in jacks on the TV using the Y Pb Pr... -
Page 13: Connecting To Optional Equipment
Connections (Continued) Connecting to Optional Equipment Rear of this unit Connecting to an amplifier equipped with two chan- nel analog stereo or Dolby Pro Logic II/Pro Logic Connect the Left and Right DVD/VCR AUDIO OUT or AUDIO OUT (DVD EXCLUSIVE OUT) jacks on this unit to the audio left and right in jacks on your amplifier, receiver or stereo system, using the audio cables. -
Page 14: Before Operation-Vcr Part
Before Operation-VCR part Tuning in a video channel on your Using your VCR for the very first time Video channel (RF output channel) is the channel on Following picture will display on the TV screen when which your TV receives picture and sound signals from you have just connected your video recorder for the the DVD+VCR through the RF cable. -
Page 15: Setting The Clock Manually
Before Operation-VCR part Setting the clock Manually To set the colour system The clock in your DVD+VCR controls time and date set- 1. Press i. tings for your DVD+VCR. 2. The main menu will appear on the TV screen. The clock is set automatically during ACMS (Automatic Channel Memory System) when your DVD+VCR 3. -
Page 16: How To Use The Main Menu
Before Operation-VCR part How to use the main menu Tuning in TV Stations Automatically This DVD+VCR can easily be programmed by using the If the TV broadcast signal is weak your DVD+VCR may menus displayed on screen. not detect the necessary information and will not be able The menus are controlled by the Remote Control to store them correctly. -
Page 17: Tuning In Tv Stations Manually
Before Operation-VCR part Tuning in TV Stations Manually In certain areas of the country broadcast signals may STATION be too weak for your DVD+VCR’s automatic tuning process to find or assign TV stations correctly. You must tune in these weaker broadcast stations man- CHANNEL/CABLE : AV P SET ually in order for your DVD+VCR to store them. -
Page 18: Changing The Order Of Tv Stations
Before Operation-VCR part Changing the order of TV Stations Deleting TV Stations After tuning TV stations into your DVD+VCR you may After tuning TV stations into your DVD+VCR you may wish to change the order in which they are stored with- wish to delete a station. -
Page 19: Before Operation-Dvd Part
Before Operation-DVD part Displaying Disc Information Initial Settings on-screen By using the DVD Setup menu, you can make various adjustments to items such as picture and sound. You can You can display various information about the disc also set a language for the subtitles and the Setup menu, loaded on-screen. -
Page 20: Language
Progressive Scan feature ON and the picture disap- Progressive Scan TV Output Select pears, connect the DPV-5300x to the TV set by using the supplied Scart or video cable (see page 10, cable S1 or cable V). Then enable the corresponding signal input on your TV’s OSD menu to obtain a picture and... -
Page 21: Audio
Before Operation-DVD part AUDIO LOCK (Parental Control) Each DVD disc has a variety of audio output options. LOCK Set this unit’s AUDIO options according to the type of Rating Unlock audio system you use. Password Area Code AUDIO Dolby Digital Bitstream Bitstream MPEG... -
Page 22: Area Code
Before Operation - DVD part DivX(R) VOD Area Code We provide you the DivX ® VOD (Video On Demand) Enter the Area Code whose standards were used to registration code that allows you to rent and purchase rate the DVD video disc, based on the list in the videos using the DivX ®... -
Page 23: Operation With Tape
Operation with tape Playing a tape , Shuttle : 6. Slow motion playback During playing back or still picture press You will only be able to load and eject video cassettes You can reach the following playback speeds. when your DVD+VCR is plugged into the mains. REV = fast backward search Your DVD+VCR may also playback recordings from PB5-=backward search (5x speed) -
Page 24: Instant Timer Recording
Operation with tape Instant Timer Recording (ITR) 7. To pause recording (e.g. to skip undesired scenes or commercials), press PAUSE/STEP. On the TV screen you’ll see “REC PAUSE” for a few seconds. Your DVD+VCR allows you to make recordings using a To resume recording, press the PAUSE/STEP but- variety of simple methods: ton again. -
Page 25: Video Plus+ Programming
Operation with tape VIDEO Plus+ Programming 6. Press to select the recording speed. in Timer menu = VPS activated; no in Timer VIDEO Plus+ greatly simplifies entering the date, menu = VPS deactivated) channel, start and end times of a Timer Recording by Press to select the desired tape speed simply entering PlusCode Programming numbers. -
Page 26: Timer Recording Using On Screen Display
Operation with tape Timer recording using On Screen DATE T I M E Display PR-03 - - - - - - - - - - - - - - - - - - - - - - - - - - - - - - - - You may set up to seven timer record events - - - - - - - - - - - - - - - -... -
Page 27: Timer Recording Using On Screen Display
Operation with tape Timer recording using On Screen Programme Delivery Control (PDC) The Programme Delivery Control (PDC) system Display (Continued) adjusts the start and end times of a timer record event. This can be particularly useful with sports 9. Press i to set another timer record event and follow events which may run over into extra time. -
Page 28: Additional Operation - Vcr Part
Additional Operation - VCR part Hi-Fi Stereo Sound System Tape Counter Memory Stop Your VCR will record and playback Hi-Fi stereo sound. The Digital Tape Counter can be displayed on the dis- In addition it has a stereo NICAM digital stereo sound play window instead of the time by pressing CLK/CNT decoder. -
Page 29: Video Doctor (Self-Diagnosis)
Additional Operation - VCR part Video Doctor (Self-Diagnosis) Wide Screen Compatibility 16:9 This feature informs you that there is a problem with your Your DVD+VCR can record and play back wide screen DVD+VCR. These error messages will appear on the TV aspect ratio programmes (16:9). -
Page 30: Recording From External Components
Additional Operation - VCR part Recording from External Components Copying from DVD to VCR You can record from an external component, such as a You can copy the contents of a DVD to a VHS tape. camcorder or VCR, connected to any of the 1. -
Page 31: General Playback Features - Dvd Part
General Playback features - DVD Part Buttons Operations Discs Z (OPEN / CLOSE) Opens or closes the disc tray. X (PAUSE) During playback, press X to pause playback. Press X repeatedly to play Frame-by-Frame. DivX . / > During playback, press . or > to go to the next chapter/track or to return to the beginning of the current chapter/track. -
Page 32: Playing A Dvd Or Video Cd
Playing a DVD or Video CD Notes on general features: Marker Search DivX • On a Video CD with PBC, you must set PBC to Off To enter a Marker on the setup menu to use the repeat function (See You can start playback from up to nine memorized “PBC”... -
Page 33: Playing An Audio Cd Or Mp3/Wma File
Playing an Audio CD or MP3/WMA file This unit can play Audio CDs or MP3/WMA files record- Programmed Playback ed media. The programme function allows you to store your MP3/ WMA/ Audio CD favourite tracks of a disc. Once you insert an MP3/WMA files recorded media or You can program up to 30 tracks. -
Page 34: Viewing A Jpeg File
Viewing a JPEG file This unit can play JPEG files recorded media. Moving to another File 1. Insert a JPEG files recorded media. The PHOTO Press . or > or cursor (b or B) once while view- menu appears on the TV screen. ing a picture to advance to the next or previous file. -
Page 35: Playing A Divx Movie File
Playing a DivX Movie file Using this DVD Player you can play DivX file. DivX disc compatibility with this player is limited 1. Insert a DivX file recorded media. The MOVIE menu as follows: appears on the TV screen. • Available resolution size of the DivX file is under 720x576 (W x H) pixel. -
Page 36: Playing A Dvd Vr Format Disc
Playing a DVD VR format Disc This unit will play DVD-R/RW discs that are recorded using the DVD-Video format that have been finalized using a DVD-recorder. This unit will play DVD-RW discs that are recorded using the Video Recording (VR) format. •... -
Page 37: Additional Operation
Additional Operation Maintenance and Service Refer to the information in this chapter before contacting a service technician. Handling the Unit When shipping the unit Please save the original shipping carton and packing materials. If you need to ship the unit, for maximum protection, re-pack the unit as it was originally packed at the factory. -
Page 38: Language And Area Code List
Language and Area Code List Language Code List Use this list to input your desired language for the following initial settings: Disc Audio, Disc Subtitle, Disc Menu. Language Code Language Code Language Code Language Code Abkhazian 6566 Fiji 7074 Lingala 7678 Singhalese 8373... -
Page 39: Troubleshooting
Troubleshooting Check the following guide for the possible cause of a problem before contacting service. Symptom Cause Correction No power. The power cord is disconnected. Plug the power cord into the wall outlet securely. The power is on, but No disc is inserted. Insert a disc. -
Page 40: Specification
2.0 V rms (1 KHz, 0 dB), 600 Ohm, Cinch (left [L ], right [R]) x 2/SCART (to TV) Outputs (VCR) Audio -6.0 dBm, < 1 kOhm (SCART) Video 1.0 Vp-p, 75 Ohm, unbalanced (SCART) Design and specifications are subject to change without notice. P/NO : MFL37329859 TARGA GmbH Lange Wende 41 59494 Soest Germany www.targa-online.com...
Need help?
Do you have a question about the DPV-5300x and is the answer not in the manual?
Questions and answers