Table of Contents
Advertisement
Quick Links
Advertisement
Table of Contents

Related Manuals for Dynacord MP7


Summary of Contents for Dynacord MP7
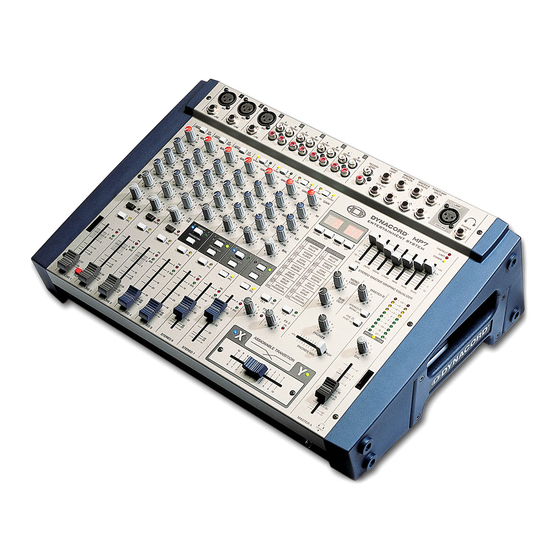
- Page 1 OWNER’S MANUAL ENTERTAINMENT SYSTEM...
-
Page 2: Important Safety Instructions
IMPORTANT SAFETY INSTRUCTIONS The lightning flash with arrowhead symbol, within an equilateral triangle is intended to alert the user to the presence of uninsulated “dangerous voltage” within the product’s enclosure that may be of sufficient magnitude to constitute a risk of electric shock to persons. The exclamation point within an equilateral triangle is intended to alert the user to the presence of important operating and maintance (servicing) instructions in the... -
Page 3: Table Of Contents
Besides, if you want to include your MP7 in a 19" rack system, the only thing you have to do is to exchange the side panels for metal rack ears. -
Page 4: Input/Mono
INPUT/MONO 1. MIC Electronically balanced XLR-type inputs (identical to the ones found on major studio and live sound mixing consoles) for connecting low-impedance microphones. The input stage provides extremely low noise and low hum signal processing at an outstandingly low distortion rate (<0.002% typically) even in the high frequency range. - Page 5 Cautious adjusting offers the benefits of an improved S/N-ration and provides you with the full bandwidth of the MP7’s outstanding sound capabilities. On the XLR-type connectors an amplification of +10dB is achieved when the control is set all the way to the left and +60dB when the control is set to its maximum position to the right.
- Page 6 INPUT/MONO 6. PAN The setting of the PAN control defines the input signal’s position within the stereo image. When set to its center position, the audio signal is fed with equal levels to the left and right master busses. The PAN section’s design ensures that the overall relative level of an audio signal is maintained, no matter to what position within the stereo image the PAN control is set.
- Page 7 INPUT/MONO 11. VOLUME The channel fader is used to set the volume of a single channel and to establish an accurately proportioned mix of all input signals. The channel faders should be positioned within the range of -5dB to 0dB, leaving you with a sufficient degree of control to allow precise matching of relative big differences in the channel’s level settings.
-
Page 8: Input/Stereo
INPUT/STEREO 13. STEREO INPUT A (CD/MD): Unbalanced stereo inputs for connecting LINE level devices like for example: CD-Players, MD-Players, Tape Decks, PC Soundcards, etc. B (phono): only channels 4/5 - stereo inputs with RIAA equalization for the connection of magnetic turntable pickups. Caution: Make sure to connect magnetic turntable pickup systems only. - Page 9 “Kill”-function is meant to be used as special effect providing you with the opportunity to produce mixes that are as creative and entertaining as possible. In this way and when using the MP7 for Karaoke, the MID-control lets you effectively mute the lead vocals of the original recording.
- Page 10 INPUT/STEREO 21. SIGNAL / PEAK indicator The Signal / Peak indicator provides optical information of a channel’s actual signal level at all times. As already mentioned in the chapter “GAIN”, the “signal present” LED should blink in the rhythm of the incoming signal. If this is not the case, increasing the input level using the gain control is necessary.
-
Page 11: Effect 1/2
During the initializa- tion of the FX-units, when turning the MP7’s power on, the preset 05 (Large Hall 3 Bright) is selected for the FX1 while the FX2 unit is set to preset 55 (Delay Mono 250ms). - Page 12 7. Now, using the FX-return controls lets you alter the percentage of the effect signal in the main mix. It is good advice to keep an eye on the peak indicators when operating your MP7 to be able to quickly interact when the signal levels exceed the normal range and enter clipping.
-
Page 13: Transition/Phones
This control lets you adjust the headphones’ volume. Caution: Depending on the type of headphones connec- ted to the phones jack, the MP7 is capable of producing very high output levels via the phones output. Therefore, make sure to turn the control all the way to the left (minimum setting) before connecting the headphones. -
Page 14: Master
MASTER 34. MASTER B This control allows setting the output level of the MASTER B, which is a second universal stereo output carrying the stereo-sum audio signal iden- tical to the MASTER A. It is extremely useful in accomplishing sound reinforcement in a neighboring room or monitoring purposes using a second power amplifier. - Page 15 POWER ON lights whenever the MP7’s power is set to ON. If, after switching the MP7 on, the LED does not light, the first thing to do is to make sure that the mains plug is plugged in correctly. If that is the case and the LED still stays dimmed, please contact your dealer.
- Page 16 MASTER The frequency ranges as well as the characteristics of the EQ-faders are designed to meet your day-in-day-out requirements. In case you intend to have a clear and highly intelligible sound, you might want to increase the level setting of the 8kHz or 16kHz band a bit. If the mid-range sounds a bit nasal, try attenuating the mid-band by some decibels.
-
Page 17: Rear Panel
DYNACORD accessory assort- ment. POWER Mains switch for switching the MP7’s power ON or OFF. The appliance is operational when the POWER ON-LED lights and the power relays have switched the power amplifier output signal to the speaker outputs. -
Page 18: Standard Installation
CABLING The mains cord is supplied with your MP7. The quality of all other cables is left to your responsibility. Carefully chosen high quality cables are the best precaution to prevent problems from occurring during the later operation. In the following we would like to provide you with some recommendations for the trouble-free operation of your setup. - Page 19 STANDARD INSTALLATION In the following we will explain how to set up a standard PA-system with monitoring facility using the MP7. The equipment list includes: 1 MP7 2 Hi-range speaker system cabinets, e.g. CP 12-2 2 Bass speaker system cabinets e.g. CP 12-1...
- Page 20 Fig. 2) — Employ cables with stereo phone-type plugs to connect the AM12 to the MONO OUT of the MP7. Set the LINE IN-control on the AM12 at its center position. This lets you control the AM12’s volume setting from the MONO OUT-control on the MP7.
- Page 21 Ask your local dealer before extending your system! Example 2: In Fig. 3 you can see how to control larger PA-Systems with your MP7. Simply connect the MASTER A outputs with the external system amplifier and the MASTER B outputs with the POWER AMP INPUTS of the MP7.
-
Page 22: Specifications
Power Consumption at 1/8 maximum output power 4 ohms 450 W Dimensions, (WxHxD), mm 455,5 x 175,8 x 340.6 Weight, including lid 13 kg Optional Rack-Mount-Kit MP7 (NRS 90259) 112 844 Wall-Mount-Kit MP7 (NRS 90242) 112 742 Transition Fader MP7 (NRS 90261) 112 853... -
Page 23: Block Diagram
BLOCK DIAGRAM... -
Page 24: Dimensions
A B M E S S U N G E N / DIMENSIONS Abmessungen/Dimensions (in mm) -
Page 25: Warranty
• • • • GmbH Hirschberger Ring 45 94315 Straubing Telefon (09421) 706-0 Telefax (09421) 706-265 Änderungen vorbehalten. Subject to change without prior notice. Printed in Germany 14. 06. 2001 / 360468 Internet: http:// www.dynacord.de...
Need help?
Do you have a question about the MP7 and is the answer not in the manual?
Questions and answers