
Related Manuals for Smeg SAW 816


Summary of Contents for Smeg SAW 816
-
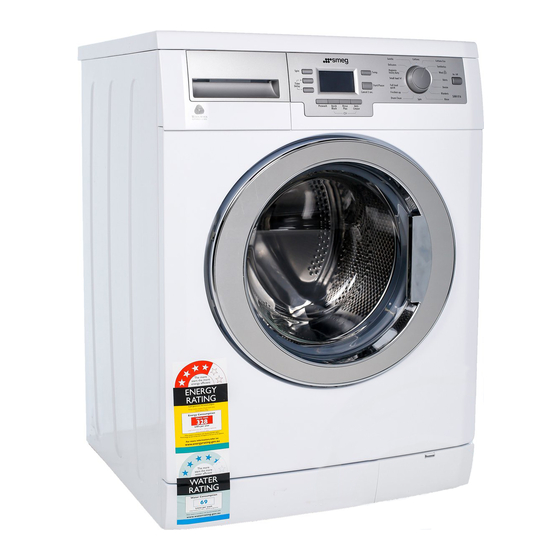
Page 1: Washing Machine
SAW 816 Washing Machine User’s Manual Document Number 2820523397/ 25-02-13.(12:39) -
Page 2: Important Instructions For Safety And Environment
1 Important instructions for safety and person (preferably an electrician) or someone designated by the importer in order to avoid possible risks. environment 1.2 Intended use This section contains safety instructions that will help protect • This product has been designed for domestic use. It is not from risk of personal injury or property damage. Failure to suitable for commercial use and it must not be used out follow these instructions shall void any warranty. of its intended use. -
Page 3: Appropriate Installation Location
2 Installation 2. Remove transportation safety bolts by turning them gently. Refer to the nearest Authorised Service Agent for installation 3. Attach the plastic covers supplied in the User Manual bag of the product. To make the product ready for use, review into the holes on the rear panel. (P) the information in the user manual and make sure that the electricity, tap water supply and water drainage systems are appropriate before calling the Authorized Service Agent. If they are not, call a qualified technician and plumber to have any necessary arrangements carried out. Preparation of the location and electrical, tap water and waste water installations at the place of installation is Keep the transportation safety bolts in a safe place to under customer's responsibility. -
Page 4: Connecting To The Drain
points. If any leaks occur, turn off the tap and remove the 1. Loosen the lock nuts on the feet by hand. nut. Retighten the nut carefully after checking the seal. To 2. Adjust the feet until the product stands level and prevent water leakages and damages caused by them, balanced. keep the taps closed when the machine is not in use. 3. Tighten all lock nuts again by hand. 2.5 Connecting to the drain • The end of the drain hose must be directly connected to the wastewater drain or to the washbasin. Your house will be flooded if the hose comes warning out of its housing during water discharge. Moreover, there is risk of scalding due to high washing temperatures! To prevent such situations and to ensure smooth water intake and discharge of the machine, fix the end of the Do not use any tools to loosen the lock nuts. -
Page 5: Initial Use
3 Preparation 3.4 Initial use Before starting to use the product, make sure that all 3.1 Sorting the laundry preparations are made in accordance with the instructions in • Sort laundry according to type of fabric, colour, and sections “Important safety instructions” and “Installation”. degree of soiling and allowable water temperature. To prepare the product for washing laundry, perform first • Always obey the instructions given on the garment tags. operation in Drum Cleaning programme. If your product 3.2 Preparing laundry for washing is not equipped with Drum Cleaning programme, perform the Initial Use procedure in accordance with the methods • Laundry items with metal attachments such as, underwired bras, belt buckles or metal buttons will described under “5.2 Cleaning the loading door and the damage the machine. Remove the metal pieces or wash drum” section of the user manual. -
Page 6: Using Detergent And Softener
Adjusting detergent amount The loading door is locked while a programme is running. The amount of washing detergent to be used depends The door can only be opened a while after the programme on the amount of laundry, the degree of soiling and water comes to an end. hardness. In case of misplacing the laundry, noise and warning • Do not use amounts exceeding the dosage quantities vibration problems may occur in the machine. recommended on the detergent package to avoid 3.7 Using detergent and softener problems of excessive foam, poor rinsing, financial savings and finally, environmental protection. When using detergent, softener, starch, fabric dye, bleach • Use lesser detergent for small amounts or lightly soiled or limescale remover read the manufacturer's instructions... -
Page 7: Tips For Efficient Washing
Using starch • Use just a little amount (approx. 50 ml) of bleaching agent and rinse the clothes very well as it causes skin irritation. • Add liquid starch, powder starch or the fabric dye into the softener compartment. Do not pour the bleaching agent onto the clothes and do • Do not use softener and starch together in a washing not use it for coloured clothes. cycle. • When using oxygen based bleaches, select a programme • Wipe the inside of the machine with a damp and clean that washes at a lower temperature. cloth after using starch. • Oxygen based bleaches can be used together with Using bleaches detergents; however, if its thickness is not the same... -
Page 8: Operating The Product
4 Operating the product 4.1 Control panel 1 - Spin Speed Adjustment button 5 - On / Off button 2 - Display 6 - Delayed Start buttons (+ / -) 3 - Temperature Adjustment button 7 - Auxiliary Function buttons 4 - Programme Selection knob 8 - Start / Pause / Cancel button 4.2 Display symbols 4.3 Preparing the machine Make sure that the hoses are connected tightly. Plug in your machine. Turn the tap on completely. Place the laundry in the machine. -
Page 9: Main Programmes
4.5 Main programmes • Small load 14 Use this programme to wash your little amount of lightly Depending on the type of fabric, use the following main soiled cotton clothes in a short time. programmes. • Shirts • Cottons Use this programme to wash the shirts made of cotton, Use this programme for your cotton laundry (such as bed synthetic and synthetic blended fabrics together. sheets, duvet and pillowcase sets, towels, bathrobes, • Denim underwear, etc.). Your laundry will be washed with vigorous Use this programme to wash clothes such as trousers, washing action for a longer washing cycle. jackets, vests, etc., made of denim. Lower mechanical • Synthetics movement in washing cycles and lower rpm in spinning Use this programme to wash your synthetic clothes (shirts, cycles are used to prevent washing damages on stoned blouses, synthetic/cotton blends, etc.). It washes with a... -
Page 10: Special Programmes
Do not run the programme when there is something in the machine. If you try to do so, the machine detects that there is a load inside and aborts the programme. 4.7 Special programmes For specific applications, select any of the following programmes. • Rinse Use this programme when you want to rinse or starch separately. • Spin Use this programme to apply an additional spin cycle for your laundry or to drain the water in the machine. Before selecting this programme, select the desired spin speed and press Start / Pause / Cancel button. The machine will spin the laundry with the set spin speed and drain the water coming out of them. If you wish to drain only the water without spinning your laundry, select the Pump+Spin programme and then select the No Spin function with the help of Spin Speed Adjustment... -
Page 11: Programme And Consumption Table
4.10 Programme and consumption table Auxiliary functions Selectable Programme temperature range °C Cottons 2.60 1600 • • • • 90-Cold Cottons 1.75 1600 • • • • 90-Cold Cottons 0.90 1600 • • • • 90-Cold Hygienic heavy duty 2.25 1600 •... -
Page 12: Auxiliary Function Selection
4.11 Auxiliary function selection If you want to spin the laundry held in water, adjust the Spin Speed and press Start / Pause / Cancel button. Select the desired auxiliary functions before starting The programme resumes. Water is drained, laundry is spun the programme. Furthermore, you may also select or and the programme is completed. cancel auxiliary functions that are suitable to the running programme by pressing the Start / Pause / Cancel button This function helps to remove pet hair that remain on your when the machine is operating. For this, the machine must garments more effectively. be in a step before the auxiliary function you are going to When you select this function, Prewash and Extra Rinse select or cancel. steps are added to the normal programme. Thus, washing Depending on the programme, press a, b, c or d buttons to is performed with more water (30%) and the pet hair is select the desired auxiliary function. Symbol of the selected removed more effectively. -
Page 13: Changing The Selections After Programme Has Started
4.16 Changing the selections after Cancelling the Delayed Start function If you want to cancel the delayed start countdown and start programme has started the programme immediately: Switching the machine to pause mode Press Start / Pause / Cancel button. “:” sign in the middle Press the Start / Pause / Cancel button to switch the of the delayed start time on the display stops flashing. Start machine to pause mode. Pause symbol appears on the symbol disappears. Pause symbol and Delayed Start symbol display indicating that the machine is paused. Start symbol flashes. Decrease the delayed start time by pressing the disappears. Delayed Start - button. Programme duration appears after Changing the speed and temperature settings for 30 minutes. Press Start / Pause / Cancel button to start the auxiliary functions programme. -
Page 14: Maintenance And Cleaning
5 Maintenance and cleaning 4.19 Machine is in Rinse Hold mode Spin symbol flashes and Pause symbol illuminates when the Service life of the product extends and frequently faced machine is in Rinse Hold mode. problems decrease if cleaned at regular intervals. If you want to spin your laundry when the machine is in this 5.1 Cleaning the detergent drawer mode: Clean the detergent drawer at regular intervals (every Adjust the spin speed and press Start / Pause / Cancel 4-5 washing cycles) as shown below in order to prevent button. Pause symbol disappears and Start symbol appears. accumulation of powder detergent in time. Programme resumes, discharges the water and spins the laundry. If you only want to drain the water without spinning: Just press Start / Pause / Cancel button. Pause symbol disappears. Start symbol appears. Programme resumes and discharges the water only. -
Page 15: Cleaning The Body And Control Panel
5.5 Draining remaining water and cleaning the pump filter Repeat Drum Cleaning process in every 2 months. The filter system in your machine prevents solid items such as buttons, coins and fabric fibers clogging the pump Use an anti-limescale suitable for the washing machines. impeller during discharge of washing water. Thus, the water will be discharged without any problem and the service life After every washing make sure that no foreign substance is of the pump will extend. left in the drum. If the machine fails to drain water, the pump filter is clogged. Filter must be cleaned whenever it is clogged or in every 3 months. Water must be drained off first to clean the pump filter. In addition, prior to transporting the machine (e.g., when moving to another house) and in case of freezing of the water, water may have to be drained completely. Foreign substances left in the pump filter may warning damage your machine or may cause noise problem. - Page 16 Discharging the water when the product has an emergency draining hose: a. Pull the emergency draining hose out from its seat b. Place a large container at the end of the hose. Drain the water into the container by pulling out the plug at the end of the hose. When the container is full, block the inlet of the hose by replacing the plug. After the container is emptied, repeat the above procedure to drain the water in the machine completely. c. When draining of water is finished, close the end by the plug again and fix the hose in its place. d. Turn the pump filter to take it out. Discharging the water when the product does not have an emergency draining hose: a. Place a large container in front of the filter to catch water from the filter.
-
Page 17: Technical Specifications
6 Technical specifications Models (EN) SAW 816 Maximum dry laundry capacity (kg) Height (cm) Width (cm) Depth (cm) Net weight (±4 kg.) Electrical input (V/Hz) 220-240 V / 50Hz Total current (A) Total power (W) 2000-2300 Spin speed (rpm/ min., max.) 1600 Main model code Single Water inlet / Double Water inlet • / - Woolmark No: Technical specifications may be changed without prior notice to improve the quality of the product. Figures in this manual are schematic and may not match the product exactly. Values stated on the product labels or in the documentation accompanying it are obtained in laboratory conditions in accordance with the relevant standards. Depending on operational and environmental conditions of the product, these values may vary. -
Page 18: Troubleshooting
7 Troubleshooting Programme cannot be started or selected. • Washing machine has switched to self protection mode due to a supply problem (line voltage, water pressure, etc.). >>> Press and hold Start / Pause button for 3 seconds to reset the machine to factory settings. (See "Cancelling the programme") Water in the machine. • Some water might have remained in the product due to the quality control processes in the production. >>> This is not a failure; water is not harmful to the machine. - Page 19 19 / EN Washing Machine / User’s Manual...
- Page 20 20 / EN Washing Machine / User’s Manual...
Need help?
Do you have a question about the SAW 816 and is the answer not in the manual?
Questions and answers