
Related Manuals for Kawai CL26


Summary of Contents for Kawai CL26
- Page 1 Preparation Before Use Playing the Piano CL26 Internal Songs Owner’s Manual Settings Appendix...
- Page 2 Thank you for purchasing this Kawai digital piano. This owner’s manual contains important information regarding the usage and operation of the CL26 digital piano. Please read all sections carefully, keeping this manual handy for future reference.
-
Page 3: Preface
The Playing the Piano section (page 12) provides an overview of the instrument’s most commonly used functions, allowing the CL26 digital piano to be enjoyed almost immediately after being connected, while the Internal Songs section (page 15) includes information regarding the built-in demonstration songs, and Concert Magic feature. -
Page 4: Important Safety Instructions
Important Safety Instructions SAVE THESE INSTRUCTIONS INSTRUCTIONS PERTAINING TO A RISK OF FIRE, ELECTRIC SHOCK, OR INJURY TO PERSONS WARNING CAUTION TO REDUCE THE RISK OF FIRE OR ELECTRIC SHOCK, DO NOT RISK OF ELECTRIC SHOCK EXPOSE THIS PRODUCT TO DO NOT OPEN RAIN OR MOISTURE. - Page 5 WARNING - When using electric products, basic precautions should always be followed, including the following. WARNING Indicates a potential hazard that could result in death or serious injury if the product is handled incorrectly. The product should be connected to If you are going to use an AC power cord, 120V 230V...
- Page 6 Indicates a potential hazard that could result in injury or CAUTION damage to the product or other property if the product is handled incorrectly. Do not use the product in the following areas. Using the product in such areas may result in product breakdown.
- Page 7 • The power supply cord or the plug has been damaged. • Objects have fallen, or liquid has been spilled into the product. • The product has been exposed to rain. • The product does not appear to operate normally or exhibits a marked change in performance. •...
-
Page 9: Table Of Contents
section Table of Contents Settings Preface ......... Important Safety Instructions . -
Page 10: Part Names And Functions
Demonstration and Concert Magic songs. Function Labels The three function labels included with the CL26 digital piano provide a convenient reference for the instrument’s various functions and can be attached to either the front or the back of the keyboard. -
Page 11: Setting Up The Piano
Grand sound will be selected automatically. * The CL26 features a power saving function that can automatically turn off the instrument after a specified period of inactivity. For more information, please refer to the Auto Power Off setting on page 33. -
Page 12: Selecting Sounds
Selecting Sounds The CL26 digital piano features 8 different instrument sounds, which can be selected in one of two ways. By default the ‘Concert Grand’ sound will be selected automatically when the instrument is turned on. Instrument Sounds Sound name... -
Page 13: Dual Mode
section Dual Mode The Dual Mode function allows two sounds to be layered together, creating a more complex sound. For example, a piano sound layered with strings, or an electric piano combined with a harpsichord, etc. Enabling Dual Mode Press and hold the SOUND SELECT button, then press two of the lowest eight keys simultaneously. The sounds corresponding to the two keys will be layered together. -
Page 14: Metronome
section Metronome The Metronome function provides a steady beat to aid practicing the piano at a consistent tempo. The time signature and tempo of the metronome can be freely adjusted. Turning the metronome on/off Press the METRONOME button. The metronome will start to count and the LED indicator for the METRONOME button will turn on, indicating that the metronome is in use. -
Page 15: Demo Songs
Demo Songs The CL26 digital piano includes a selection of demonstration songs to introduce each internal sound. Demo songs Sound name Song name Composer Concert Grand Golliwogg’s Cakewalk Debussy Studio Grand Kawai original Kawai Electric Piano Kawai original Kawai Church Organ... -
Page 16: Concert Magic
section Concert Magic The Concert Magic function allows complete beginners to enjoy playing the piano by simply selecting one of the 40 pre-programmed songs, then tapping the keyboard with a steady rhythm and tempo. The Concert Magic songs are categorised by group and assigned to the lowest 40 white keys of the keyboard. For a complete listing of available Concert Magic songs, please refer to page 19 of this owner’s manual. -
Page 17: Concert Magic Demo Modes
section Concert Magic demo modes The Concert Magic demo modes allow the Concert Magic songs to be listened to in one of three ways: All Play, Category Play, and One Song Play All Play Press the CONCERT MAGIC button, then press the DEMO button. -
Page 18: Concert Magic Song Arrangement Types
section Concert Magic Concert Magic song arrangement types Concert Magic songs are divided into three different arrangement types: Easy Beat (EB), Melody Play (MP), and Skillful (SK). Each arrangement type requires a different level of skill to be performed correctly. Easy Beat These are the easiest songs to play. -
Page 19: Concert Magic Song List
Concert Magic song list Song Name Type Song Name Type Children’s Songs Classical Selections Twinkle, Twinkle, Little Star William Tell Overture I’m A Little Teapot Andante (Haydn) Mary Had A Little Lamb Für Elise London Bridge Clair De Lune Row, Row, Row Your Boat Skater’s Waltz Frère Jaques Blue Danube Waltz... -
Page 20: Keyboard And Sound Settings
The selected settings will be applied immediately. * It is possible to adjust multiple settings while holding the METRONOME and CONCERT MAGIC buttons. * Use the included Function Labels (page 10) to reference the CL26’s keyboard and sound settings more conveniently. Lowest key... -
Page 21: Touch
Touch As with an acoustic piano, the CL26 digital piano produces a louder sound when the keys are struck with force, and a softer sound when the keys are played gently. The volume and tonal character change in relation to the strength and speed of playing - on a digital piano this system is referred to as ‘touch sensitivity’. -
Page 22: Transpose
Keyboard and Sound Settings Transpose The Transpose setting allows the pitch of the CL26 digital piano keyboard to be raised or lowered in semi- tone steps. This is particularly useful when accompanying instruments with different tones, or when a song learned in one key must be played in another key. -
Page 23: Tuning
Tuning The Tuning setting allows the overall pitch of the CL26 digital piano to be raised and lowered in 0.5 Hz steps, and may therefore prove useful when playing with other instruments. Adjusting the Tuning setting Press and hold the METRONOME and CONCERT MAGIC buttons simultaneously, then press the A1 key to select the Tuning setting. -
Page 24: Reverb
The ‘Off’ and ‘On’ keys can also be used to disable/enable the Reverb setting while retaining the specified type. * When the instrument is turned on, the Reverb setting will return to the default type of ‘Room’. * Use the included Function Labels (page 10) to reference the CL26’s keyboard and sound settings more conveniently. Lowest key... -
Page 25: Concert Magic Mode
* When the instrument is turned on, the Concert Magic Mode setting will return to the default type of ‘Normal’. * Use the included Function Labels (page 10) to reference the CL26’s keyboard and sound settings more conveniently. Lowest key... -
Page 26: Midi Settings
For both receiving and transmitting, channels 1-16 can be used. Recording/playing with a sequencer When connected to a sequencer, the CL26 digital piano can be used to record and playback multi-track songs, with separate sounds playing simultaneously on each channel. -
Page 27: Midi Functions
The changed settings will be applied immediately. * It is possible to adjust multiple MIDI settings while holding the METRONOME and CONCERT MAGIC buttons. * Use the included Function Labels (page 10) to reference the CL26’s MIDI settings more conveniently. -
Page 28: Midi Channel
* The MIDI Channel setting can be set within the range of 01 - 16. * When the instrument is turned on, the MIDI Channel setting will return to the default value of ‘01ch’. * Use the included Function Labels (page 10) to reference the CL26’s MIDI settings more conveniently. Lowest key Example: MIDI Channel 07ch Press key 0 then key 7. -
Page 29: Local Control
Local Control The Local Control setting determines whether the instrument will play an internal sound when the keys are pressed. This setting is useful when using the CL26 digital piano to control an external MIDI device. Local Control settings Local Control Explanation The instrument will play an internal sound and transmit information to an external MIDI device. -
Page 30: Multi-Timbral Mode
MIDI Settings Multi-timbral Mode The Multi-timbral Mode setting determines whether or not the CL26 digital piano is able to receive MIDI information on more than one MIDI channel simultaneously. This allows the instrument to play back multi- track, multi-timbral performance data sent from an external MIDI device. -
Page 31: Transmit Midi Program Change
Transmit MIDI Program Change The Send Program Change Number setting determines whether or not the CL26 digital piano will transmit program change information when sounds are changes. It is also possible to transmit a program change number (ranging from 1 to 128) in order to change the sound of an external MIDI device. -
Page 32: Program Change Number List
The inputted Program Change Number will be sent when the key for the third digit number is pressed. * Program Change Numbers are specified as three digits within the range of 001 - 128. * Use the included Function Labels (page 10) to reference the CL26’s MIDI settings more conveniently. Lowest key Example: PGM# 120 Press key 1, key 2, then key 0. -
Page 33: Power Settings
Power Settings Auto Power Off The CL26 features a power saving function that can be used to automatically turn off the instrument after a specified period of inactivity. Auto Power Off settings Auto Power Off setting Explanation Disabled The Auto Power Off function is disabled. -
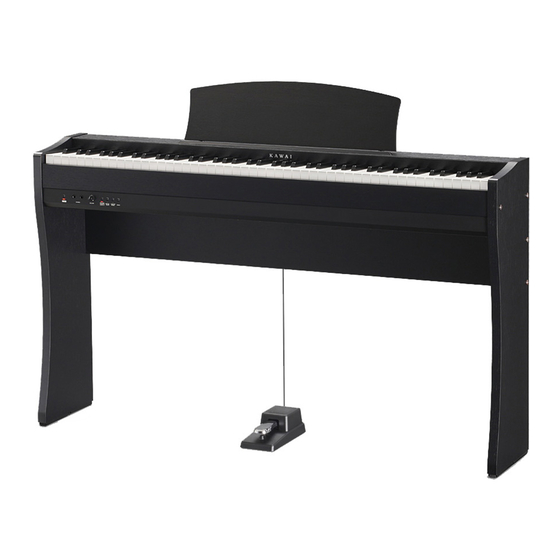
Page 34: Assembly Instructions
Please ensure that two or more people work on assembling the CL26 digital piano. Included parts Before attempting to assemble the CL26 digital piano, please ensure that all parts below are included. A Phillips-head screwdriver (not included) will also be required in order to assemble the instrument. - Page 35 2. Standing the assembly instrument upright Stand the assembled instrument upright by slowly lifting from the back side of the Main Unit. Once again, check that all screws are securely fastened, and that the assembled instrument does not wobble from side to side. 3.
-
Page 36: Connecting To Other Devices
MIDI IN/OUT jacks These jacks are located on the underside of the instrument on the left hand side, and used to connect the CL26 digital piano to external MIDI devices, such as a sound module, or a computer with a MIDI interface. -
Page 37: Specifications
Specifications Kawai CL26 digital piano Keyboard 88 weighted keys Advanced Hammer Action IV-F (AHA IV-F) Sound Source Harmonic Imaging™ (HI), 88-key piano sampling Internal Sounds Concert Grand, Studio Grand, Electric Piano, Church Organ, Harpsichord, Vibraphone, Strings, Choir Polyphony max. 96 notes... -
Page 38: Midi Implementation Chart
Kawai Model CL26 MIDI Implementation Chart Date : March 2011 Version : 1.0 Function... Transmitted Recognised Remarks Basic Default Channel Changed 1 - 16 1 - 16 Default Mode 3 Mode 1 * The default for the OMNI mode is ON. - Page 40 CL26 Owner’s Manual KPSZ-0474 : 817080 OW1054E-J1107 Version 3 Printed in Indonesia Copyright © 2011 Kawai Musical Instruments Mfg. Co., Ltd. All Rights Reserved.
Need help?
Do you have a question about the CL26 and is the answer not in the manual?
Questions and answers