Table of Contents
Advertisement
Quick Links
Advertisement
Table of Contents

Related Manuals for Hotpoint VWSR4100


Summary of Contents for Hotpoint VWSR4100
- Page 1 Owner’s Manual VWSR4100 Part No. 175D1807P216 Pub. No. 39-9362...
- Page 2 Congratulations! You Are Now Part of the Hotpoint Family. Welcome to the Hotpoint family. We’re proud of our quality products and we are committed to providing dependable service. You’ll see it in this easy-to-use Owner’s Manual and you’ll hear it in the friendly voices of our customer service department.
-
Page 3: Table Of Contents
Control Settings ...8, 9 Washer Features ..10, 11 Loading and Using the Washer ... .12, 13 Troubleshooting Tips Before You Call For Service . -
Page 4: Water Heater Safety
IMPORTANT SAFETY INFORMATION. READ ALL INSTRUCTIONS BEFORE USING. WARNING! For your safety, the information in this manual must be followed to minimize the risk of fire or explosion, electric shock, or to prevent property damage, personal injury, or loss of life. WATER HEATER SAFETY Under certain conditions hydrogen gas may be produced in a water heater that has not been used for two weeks... -
Page 5: Proper Installation
PROPER INSTALLATION This washer must be properly installed and located in accordance with the Installation Instructions before it is used. If you did not receive an Installation Instructions sheet, you can receive one by calling us toll-free at the ®... -
Page 6: Important Safety Instructions
READ ALL INFORMATION BEFORE USING. Use this appliance only for its intended purpose as described in this Owner’s Manual. WHEN USING THE WASHER Never reach into washer while it is moving. Wait until the machine has completely stopped before opening the lid. -
Page 7: Save These Instructions
5 years. Before discarding a washer, or removing it from service, remove the washer lid to prevent children from hiding inside. REMEMBER… Your continued health and safety are important to us. -
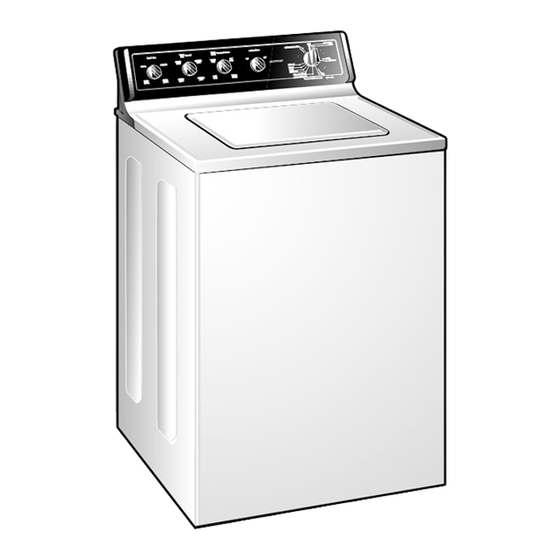
Page 8: About The Washer Control Panel
The water level should just cover the clothes. Adjust the load size accordingly. Loosely load clothes no higher than the top row of holes in the washer tub. Wash/Spin Speed The agitator moves clothes around for a cleaner wash; the basket spins later in the cycle to release water from the load. - Page 9 Select the water temperature for the wash and rinse cycles. Always follow fabric manufacturer’s care label or instructions when laundering. Follow the water temperature guide on washer lid. Wash Cycle The wash cycle controls the length of the washing process.
-
Page 10: About The Washer Features
RINSE option. This option provides a second deep cold rinse in the Regular cycle. Turn the EXTRA RINSE knob to SET. The washer will pause for a few minutes before the EXTRA RINSE option begins. Liquid Bleach Dispenser The dispenser dilutes liquid chlorine bleach before it reaches into your wash load. - Page 11 Add water to dispenser until it reaches the maximum fill line. Do not stop the washer during the first spin. This will cause the dispenser to empty too soon. Do not use the Fabric Softener Dispenser with AUTO SOAK or EXTRA RINSE.
-
Page 12: Proper Use Of Detergent
When loading wet items make sure you set the load/water level high enough to allow the items to move freely. Water level should just cover the clothes. To add items after washer has started, push in Cycle knob and submerge additional items next to the agitator. -
Page 13: Care And Cleaning Of The Washer
Try not to hit surface with sharp objects. Moving and Storage: Ask the service technician to remove water from drain pump and hoses. Do not store the washer where it will be ® exposed to the weather. Call the GE Answer Center , 800.626.2000... -
Page 14: Troubleshooting Tips
Turn off the water source • and remove the water connection hoses from the upper back of the washer. Use a brush or toothpick to clean the screens in the machine. Reconnect the hoses and turn the water back on. - Page 15 Clothes too wet Incorrect cycle selected What To Do Straighten drain hose and • make sure washer is not sitting on it. Top of drain outlet should • be less than 8 ft. above floor. Make sure hose •...
- Page 16 Try a liquid detergent. • Use warmer water • temperature. Load clothes no higher • than the top row of holes in the washer tub. Make sure load size • selector matches clothes load size. Check fabric softener • package for instructions and follow directions for using dispenser.
- Page 17 Avoid mixing heavy items • (like work clothes) with light items (like blouses). Try a fabric softener. • Load your washer so • clothes have enough room to move freely. Match Cycle selection to • the type of fabric you are washing (especially for easy care loads).
- Page 18 Washer is overloaded Detergent is not dissolving Dye transfer What To Do While this is not caused by • the washer, you can slow the pilling process by washing garments inside out. Use more detergent • (especially with larger loads).
-
Page 19: Warranty
The washer basket, if it should fail due to a defect in materials or workmanship. During this twenty-year limited warranty, you will be responsible for any labor or in-home service costs. -
Page 20: Parts And Accessories
Service Telephone Numbers. GE Answer Center The GE Answer Center In-Home Repair Service Expert GE repair service is only a phone call away. Special Needs Service TDD 800-TDD-GEAC (800-833-4322) GE offers, free of charge, Braille controls for a variety of GE appliances and a brochure to assist in planning a barrier-free kitchen for persons with limited mobility.
Need help?
Do you have a question about the VWSR4100 and is the answer not in the manual?
Questions and answers