
Related Manuals for Eagle Consus W-Series

Summary of Contents for Eagle Consus W-Series
-
Page 1: User Manual
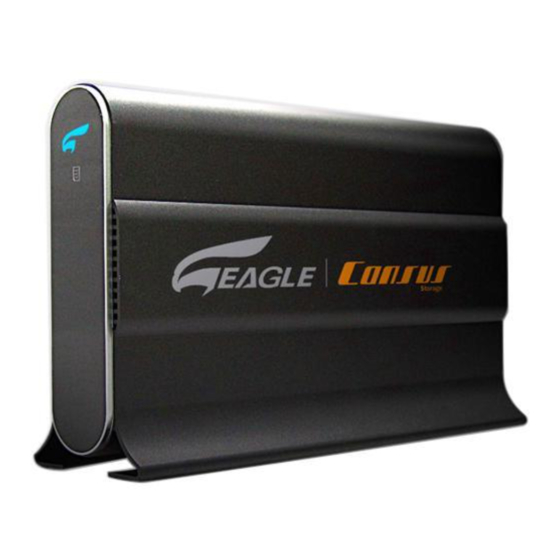
[ ET-CSWESU2-BK ] Eagle | Consus W-Series SATA to USB2.0 & eSATA External Storage System User Manual www.eagle-techusa.com... -
Page 2: Table Of Contents
………………………………………………… Disconnecting the Hard Drive Windows …………………………………………………………….. …………………………………………………………….. Troubleshooting FAQ – USB, Firewire & RAID Information ………………………. FAQ – Installation ………………………………………….…….. Appendix Regulatory Compliance …………………………………………… Warranty Information …………………………………………… EAGLE | CONSUS Service and Support ……...………………… Understand EAGLE TECH Sub-Brand ……...…………………... -
Page 3: Getting Started
Getting Started Thank you for purchasing EAGLE | CONSUS W-SERIES product. Eagle | Consus W-Series SATA to USB2.0 & eSATA External Storage System. It will not only save you money, but also space and time. This user manual provides step-by-step installation instructions and other important information regarding your EAGLE | CONSUS product. -
Page 4: System Requirements
Handling Precautions EAGLE | CONSUS products are precision instruments and must be handled with care during unpacking and installation. Drives may be damaged by rough handling, shock, or vibration. Be aware of the following precautions when unpacking your Eagle | Consus external storage kit: Do not unpack the product until you are ready to install it. -
Page 5: Setting Up
You will need a 3.5 inch SATA Hard Drive. Carefully follow the procedure to install the hard drive into the enclosure. Note: For pre-installed Hard Drive EAGLE | CONSUS enclosure, please skip this chapter and proceed to Chapter 3: Connecting the Drive. -
Page 6: Hard Drive Installation
Hard Drive Installation 1. Remove 2 screws from the rear. 2. Unplug (D1A, Red-Black cable) HDD Access LED Connector and unplug (D2A, Blue-Black cable) Power LED Connector from controller board. - Page 7 3. Pull out the Disk Mounting Tray and slice in the SATA hard drive to the SATA connector on the controller board. 4. Tighten up Hard Drives with 4 screws.
- Page 8 5. Plug in the (Red-Black Cable) “HDD Access LED” Connector to D1A and (Blue-Black Cable) “Power LED” Connector to D2A on the controller board. 6. Slide the Disk Mounting Tray into the Enclosure...
- Page 9 7. Put the bezel back and tighten up with 2 screws at the rear. 8. External Hard Drive Installation Process Completed!
-
Page 10: Connecting The External Hard Drive
Connecting the External Hard Drive Attention: Make sure power switch is OFF when attempt to connect DC power supply socket to the external hard drive. Connect the USB or eSATA cable from the desktop / laptop to the external hard drive properly before turn on the power switch. DO NOT connect USB and eSATA cable to the device at the same time. -
Page 11: Powering Up The Hard Drive
Note: Eagle | Consus does not provide any tech supports for Windows98 platform since Microsoft has discontinued Windows 98SE. 1. Connect Eagle | Consus External Storage to your Computer. Turn on the power. 2. Windows 98SE will detect a new device and activate Hardware Wizard, then Click Next. -
Page 12: Partition & Format The Hard Drive
Partition & Format the Hard Drive Windows XP/2000/2003 Note: For formatted Hard Drive, proceed to step 2. 1. Click the Start button and click on Control Panel, double-click the Administrative Tools, and then double-click the Computer Management. 2. Click the Disk Management under Storage. Your new Hard Drive should have the right capacity shown. - Page 13 4. On the next page, choose your partition size then click Next. 5. After that, please assign a drive letter for the new Hard Drive, and go to Next. 6. To format a Hard Drive. Choose the NTFS as File System. Leave the...
- Page 14 Allocation unit size as default. Assign a name in Volume label. Check the Perform a quick format to reduce format time. Click Next. 7. Confirm your setting and click Finish. 8. It would show the status as Formatting. 9. When the status change to Healthy, your new Hard Drive is ready to use.
-
Page 15: Mac Os X
10. Go to My Computer, your new drive should be listed there and ready to use. Mac OS X Note: If the warning does not show up, start at step 2. 1. A warning window will pop up for new and unformatted hard drive. Click Initialize. - Page 16 3. Under the Disk Utilities, choose the new hard drive (1) and click Partition (2). Click Options to choose format other than Mac Extended (3) refer to Figure 1 at page 16. Choose the number of partition you want by clicking on the scroll bar (4). Name the new hard drive (5). Choose the Format (6) refer to Figure 2 at page 16.
- Page 17 Figure 1: Options… Choose the partition for you hard drive. Click OK. Figure 2: Format: Choose the format for your hard drive. 4. After the partitioning is done, an icon with the Name you assigned should appear on your Desktop. Just double click the icon to access the hard drive.
-
Page 18: Disconnecting The Hard Drive
Important: If other USB devices (such as a portable flash drive) are connected to your computer, there may be multiple for USB Mass Storage Device. Be sure to select the Eagle | Consus device! 4. Click Close and turn the Power switch to OFF the devices. -
Page 19: Mac
Windows 98SE 1. Close all the application on Windows. 2. Be sure the drive isn’t running, press Power switch to shutdown the devices. 3. Disconnect the USB cable from your computer. 1. Find the Removable Disk icon associated with drive you to disconnect, and drag it to the Trash icon on your desktop (it would turn to Eject icon). -
Page 20: Troubleshooting
Troubleshooting To search the EAGLE | CONSUS technical support knowledge base and to view a complete list of FAQs for your operating system, visit our support Web site at www.eagle-techusa.com. Frequently Asked Questions – USB, FireWire, JBOD, and RAID Information Q: What is High-Speed USB? A: Hi-Speed USB is another name for USB 2.0, which provides transfer... -
Page 21: Faq - Installation
See “Formatting the Drive” A: If your system has USB 2.0 or FireWire PCI adapter card, be sure that the appropriate drivers are installed before connecting your EAGLE | CONSUS external storage product. The drive is not recognized correctly unless USB 2.0 or FireWire root hub and host controller drivers are installed. - Page 22 reporting the drive is busy or in use. A: This is usually caused by a program that is trying to read from the drive. Be sure to close all application before removing the drive. Q: Why there is delayed write failure on my Windows XP? A: Delayed write failure errors have many causes, most of which are specific to individual computers.
- Page 23 If there is a pop-up when trying to transfer data, then click on allow option for requests from the USB or 1394 port. That will open the USB / 1394 ports. Be sure to pay close attention to what you are allowing through your firewall, you may not want to allow some programs access to your computer or the internet.
- Page 24 Q: Why my Hard Drive isn’t showing the same space as it listed according to hard drive manufacturer? A: This is very common question by everybody. The answer is because there are two different definition of capacity of hard drive between hard drive manufacturer and Operating System company.
- Page 25 This formula calculates a number representing the total number of bytes (characters) that can be stored on the hard drive. This is a decimal number, to convert this number to the decimal equivalent of the binary Megabytes (MB) or Gigabytes (GB), this value must be divided by the decimal value of a binary MB or GB.
-
Page 26: Appendix
Appendix Regulatory Compliance FCC Class B Information This equipment has been tested and found to comply with the limits for a Class B digital device, pursuant to Part 15 of FCC Rules. These limits are designed to provide reasonable protection against harmful interference in a residential installation. -
Page 27: Warranty Information
Product placed in its possession. One Year Limited Warranty Eagle Tech warrants that the Product, in the course of its normal use, will be free from defects in material and workmanship for a period of one (1) year and will conform to Eagle Tech specification therefore. This limited warranty period shall commence on the purchase date appearing on your purchase receipt. - Page 28 Product, even if EAGLE | CONSUS has been advised of the possibility of such damages. This warranty gives you specific legal rights, and you may also have other rights which vary from state to state.
-
Page 29: Eagle | Consus Service And Support
Downloads - Download installation software and drivers. Contact- Contact a support representative by email or phone. When contacting Eagle Tech for support, have your Eagle Tech product serial number, model number, system hardware, and system software version available. -
Page 30: Understand Eagle Tech Sub-Brand
Understand Eagle Tech Brand...
Need help?
Do you have a question about the Consus W-Series and is the answer not in the manual?
Questions and answers