Table of Contents
Advertisement
Advertisement
Table of Contents

Related Manuals for VideoHome XTV2.0

Summary of Contents for VideoHome XTV2.0
- Page 1 TV2.0 Unique USB 2.0 TV box User's Manual...
- Page 2 ________________________________________________________________________________ FEDERAL COMMUNICATIONS COMMISSION This device complies with Part 15 of the FCC Rules Operation is subject to the following two conditions: this device may not cause harmful interference, and (2) this device must accept any interference received, including interference that may cause undesired operation. This equipment has been tested and found to comply with the limits for a Class B Digital Device, pursuant to part 15 of the FCC Rules.
-
Page 3: Table Of Contents
Table of Contents Chapter 1. Overview ---------------------------------------------------------- Introduction ----------------------------------------------------------------- Features --------------------------------------------------------------------- Specifications --------------------------------------------------------------- Package Contents --------------------------------------------------------- Minimal System Requirements ----------------------------------------- Chapter 2. Installation ------------------------------------------------------- Hardware device description ------------------------------------------- Application Software(TV Jukebox) Installation --------------------- Driver Installation ---------------------------------------------------------- Chapter 3. Basic Function Operating ---------------- --------------- Starting ----------------------------------------------------------------------- Preview -----------------------------------------------------------------------... -
Page 4: Chapter 1. Overview
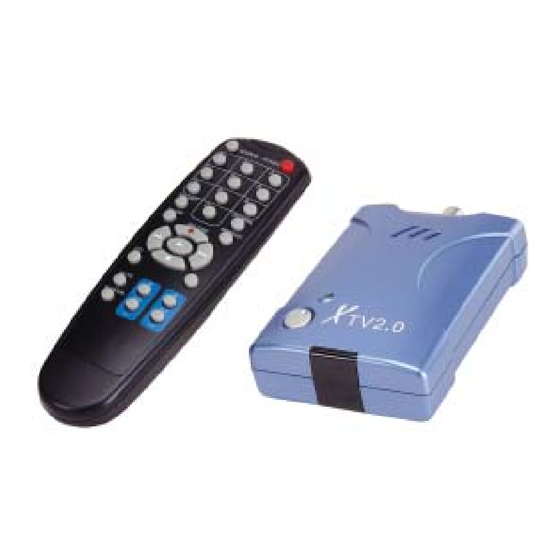
Chapter 1. Overview 1.1 Introduction Congratulations on your purchase of “XTV20”. The “XTV20” bring a home entertainment system and video-editing studio to your PC and Notebook. Using the latest USB2.0 technology, you can now watch and record TV/Video in DVD quality. XTV20 with both video and audio captured through USB, there is no need to use audio cable connect audio card in XP environment. -
Page 5: Specifications
Chapter 1. Overview Effects/ background music/ color background/ Transitional Effects Bi-lingual function available for different model 1.3 Specifications TV : 75 ohm coaxial TV Antenna/Cable input Analog video in : One S-video and one composite video input Audio in :Two L/R RCA audio input Audio output : in XP audio go through USB, in Win2000 audio though Sound card, Video system : NTSC, PAL, SECAM multi system support... -
Page 6: Chapter 2. Installation
Chapter 2. Installation Please make sure your computer has USB2.0 port correctly installed and functioning !! ( We strongly recommend updating your WinXP to SP1 or Win2000 to SP4 and updating USB2.0 host driver before installation to make sure computer’s USB2.0 port is correctly functioning ) Steps: (1) Install AP software (see 2.2) (2) Install Driver (see 2.3) -
Page 7: Application Software(Tv Jukebox) Installation
Chapter 2. Installation 2.2 Application Software (TV Jukebox) Installation ※ Do not connect XTV to computer USB port before software installation 2.2.1. Please insert "Multimedia Installation Kit" CD-ROM into your CD-ROM drive; Run " E:\XTV20\SETUP.EXE "; (assuming CD-ROM drive in E drive) Please type in serial No., (see Serial No. -
Page 8: Driver Installation
Chapter 2. Installation 2.3. Driver Installation 2.3.1. Please insert "Multimedia Installation Kit" CD-ROM into your CD-ROM drive; Run " E:\XTV20\Driver\SETUP.EXE "; (assuming CD-ROM drive in E drive) Click "Next" 2.3.2. Complete Setup Wizard; Click "Finish" 2.3.3. Plug the XTV device into computer’s USB2.0 port; System will detect new Video device as below. - Page 9 Chapter 2. Installation 2.3.4. When Windows XP show message about this software didn’t pass windows logo, please click “Continue Anyway” (though XTV driver did not apply for windows logo approval, it is thoroughly tested by engineers, and it will not cause harm to your system) 2.3.5.
- Page 10 2.3.8. Complete the Audio driver installation Click “Finish” 2.3.9. Please check XTV driver was install successful in your computer; (Go to My Computer->Control Panel->System ->Hardware->Device manager”) There are XTV2.0 and USB EMP Audio Device _____________________________________________________________...
-
Page 11: Chapter 3. Basic Function Operating
Chapter 3. Basic Function Operating 3.1. Starting : Please click the “TV Jukebox” icon on your windows screen After starting application, you can see control panel as below also one preview window as below 3.2. Preview : Please move mouse cursor into Preview window and right , function menu will appear as below _____________________________________________________________... -
Page 12: Close
Chapter 3. Basic Function Operating 3.2.1. Resolution : there are 4 resolution video preview you can select NTSC mode : 352x240, 640x480, 720x480, Full Screen PAL mode : 352x288, 640x480, 720x576, Full Screen 3.2.2. 4:3 / 16:9 : Display ratio selection 3.2.3. -
Page 13: Stop
Chapter 3. Basic Function Operating you can select a file and select “Delete” or “Save” function. 3.6. Record : When you click “Record ”, it starts to record video, the recording video resolution depend on preview resolution, but MPEG4 file(ASF) resolution is 320x240 in NTSC and 352x288 in PAL. -
Page 14: Setting
Chapter 3. Basic Function Operating 3.10. Setting : After you click “Setting”, the screen appear as below 3.10.1. Tuner : Setting input video system and then click “OK” 3.10.1.1. Tuner Control : Please choose TV input correctly 3.10.1.2. Fine Tune : Adjust signal quality 3.10.1.3. - Page 15 Chapter 3. Basic Function Operating 3.10.3. Capture : Setup capture function 3.10.3.1. Time limit : Setup recording period 3.10.3.2. Saving video recording files / Saving snapshot photos : Change recording/capturing location 3.10.3.3. Video format : Choose which format you will record ※...
-
Page 16: Minimize
Chapter 3. Basic Function Operating 3.10.4. Schedule : Schedule recording function set up 3.10.4.1. Add : Add schedule recording time 3.10.4.2. Delete / Modify : Choose one schedule and delete or modify setting 3.10.5. System : Show your computer information 3.11. -
Page 17: Color Control
Chapter 3. Basic Function Operating 3.12.1 Fast Forward : During Time shift, click it to view fast forward video 3.12.2. Stop : Click to stop Time Shift function 3.12.3. Pause : During Time Shift, Click to pause video playback 3.12.4. Play : Playback time shift video 3.12.5. -
Page 18: Mute
Chapter 3. Basic Function Operating 3.20. Full Screen mode : You can double left click inside video window to switch between full screen and previous screen size ※ In full screen mode, if you didn’t move mouse, the mouse will disappear until you move mouse again. -
Page 19: Chapter 4. Trouble Shooting
Chapter 4. Trouble Shooting Q1 : Why my system can not detect XTV A1 : (a) Make sure you enable USB2.0 in motherboard BIOS setup (b) Please make sure that your system has the latest USB2.0 host driver. For Win XP, please upgrade to Service Pack 1. For Win2000, please upgrade to Service Pack 4. - Page 20 Chapter 4. Trouble Shooting Q7 : How can I get minimum number of dropped frames during video capture ? A7 : The best recording performance depends on your computer system performance, but you can also take some steps as below to improve performance (a) Try lowering the resolution format you record.
Need help?
Do you have a question about the XTV2.0 and is the answer not in the manual?
Questions and answers