
Related Manuals for Fujitsu Siemens Computers SCENICVIEW A17-2


Summary of Contents for Fujitsu Siemens Computers SCENICVIEW A17-2
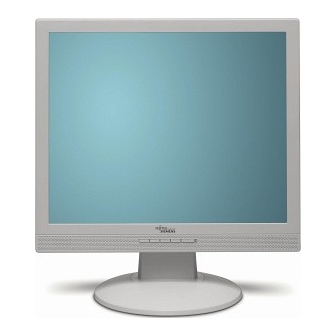
- Page 1 Monitor English Operating Manual SCENICVIEW A17-2 / A19-1 / A17-2 DVI / A19-1 DVI / RE17-1 DE / RE19-1 DE...
- Page 2 Are there ..any technical problems or other questions which you would like to be clarified? Please contact our help desk (see Warranty Booklet). The latest information on our products, tips, updates, etc., can be found on the internet at: www.fujitsu-siemens.com...
- Page 4 This manual was produced by cognitas. Gesellschaft für Technik-Dokumentation mbH – www.cognitas.de Published by Fujitsu Siemens Computers GmbH Order No.: A26361-K1063-Z121-1-7619 Edition 1 AG 0106 01/06...
- Page 5 SCENICVIEW A17-2 / A19-1 / A17-2 DVI / A19-1 DVI / RE17-1 DE / RE19-1 DE Operating Manual January 2006 edition...
- Page 6 All rights, including rights created by patent grant or registration of a utility model or design, are reserved. Delivery subject to availability. Right of technical modification reserved. This manual was produced by cognitas. Gesellschaft für Technik-Dokumentation mbH www.cognitas.de Copyright © Fujitsu Siemens Computers GmbH 2006...
-
Page 7: Table Of Contents
Contents Introduction............................1 Notational conventions ......................... 2 Important notes............................. 2 Safety notes..........................2 Cleaning ............................3 Transport ............................4 Power cable..........................4 Energy Star Guidelines......................... 4 CE marking........................... 4 FCC Class B Compliance Statement ................... 5 Declaration of Conformity ......................5 Disposal and recycling ......................... -
Page 9: Introduction
This operating manual contains important information you require to start up and run your LCD monitor. A screen controller with VGA interface is required to control the SCENICVIEW A17-2 / A19-1 / A17-2 DVI / A19-1 DVI / RE17-1 DE / RE19-1 DELCD monitor. The monitor processes the data supplied to it by the screen controller. -
Page 10: Notational Conventions
Notational conventions The meanings of the symbols and fonts used in this manual are as follows: Pay particular attention to text marked with this symbol. Failure to observe this warning endangers your life, destroys the device, or may lead to loss of data. Supplementary information, remarks, and tips follow this symbol. -
Page 11: Cleaning
● Lay all cables so that nobody can stand on them or trip over them. When attaching the device, observe the relevant notes in the "Connecting the monitor" chapter. ● No data transfer cables should be connected or disconnected during a thunderstorm. ●... -
Page 12: Transport
20 million tons of carbon dioxide into the atmosphere - the equivalent of 5 million automobiles. As an Energy Star Partner, Fujitsu Siemens Computers GmbH has determined that this product meets the Energy Star guidelines for energy efficiency. -
Page 13: Fcc Class B Compliance Statement
Fax No.: (408) 746-8299 We, Fujitsu Siemens Computers Inc., hereby declare that the equipment bearing the trade name and model number specified above was tested confirming to the applicable FCC Rules under the most accurate measurement standards possible, and that all the necessary steps have been taken and are in force to assure that production units of the same equipment will continue to comply with the Commissions requirements. -
Page 14: Disposal And Recycling
Any components not reclaimed will be disposed of in an environmentally acceptable manner. If you have any questions on disposal, please contact your local office, our help desk, or: Germany Belgium Switzerland Fujitsu Siemens Computers RECUPEL SWICO GmbH Boulevard Reyers, 80... -
Page 15: Installing An Ergonomic Video Workstation
Installing an ergonomic video workstation Before you set up your equipment, you should select a suitable position for working at the monitor. Please observe the following advice when installing a video workstation. Avoid glare from electric Windows approx. 90° and more lighting. -
Page 16: Mounting And Removing The Monitor Base
Mounting and removing the monitor base Mounting monitor base On delivery the monitor base is removed. A26361-K1063-Z121-1-7619, edition 1... -
Page 17: Removing Monitor Base
Removing monitor base Before you can use a swivel arm or a wall bracket, you must remove the entire monitor base: ► Switch off the monitor and pull the power plug out of the power socket. The display surface is susceptible to scratching! ►... -
Page 18: Connecting The Monitor
Connecting the monitor Observe the "Safety notes" in the "Important notes" chapter in this operating manual. CE conformance and optimum picture quality are guaranteed only if you use the data cable supplied. Do not cover the ventilation openings of the monitor. The computer power plug must be pulled out! ►... -
Page 19: Connecting Cables To The Computer
► Insert one plug of the audio line in the AUDIO IN (5) socket on the monitor and make sure it is properly engaged. ► Plug the power cable supplied into the power connector (1) of the monitor. ► Mount the cover over the connections. A lock (Kensington Lock) can be mounted in the security slot (1) to protect the monitor from theft. -
Page 20: Operation Of The Monitor
Operation of the monitor The monitor offers the following possibilities that enable it to be optimally adjusted for the respective user and the respective situation. Adjusting rake The rake of the monitor can be adjusted by -5° (forward) and +20° (back) from its vertical position. ►... -
Page 21: Notes On Power Management
Notes on power management If your computer is equipped with power management, the monitor can support this function fully. Here the monitor does not distinguish between the individual energy-saving modes of the computer (standby mode, suspend mode and OFF mode), as it is capable of immediately switching into the mode with the highest energy-saving effect. -
Page 22: Changing The Monitor Settings
Changing the monitor settings When putting the monitor into operation for the first time, the screen display should be optimally adapted to the screen controller used and adjusted in accordance with your needs. Basic monitor settings If one of the operating systems Windows 95/98, Windows NT, Windows Me, Windows 2000, Windows XP or OS/2 (with Windows emulation installed) is used, the basic monitor settings can be set with the CD supplied. -
Page 23: Monitor Settings Using The Osd Menu
Monitor settings using the OSD menu With the buttons on the control panel, call up and use the integrated OSD (On-Screen display) menu. The OSD menu is available in different languages. The English menu names are used in the following description (default setting). With the OSD function Language in the menu you can select another language. - Page 24 Adjusting the brightness and contrast Calling the setting window Setting the brightness of the display Brightness With this function you change the brightness of the background lighting. Setting the contrast of the display Contrast With this function you modify the contrast of bright colour tones. If the contrast is set too high, bright surfaces can no longer be distinguished from very bright surfaces.
- Page 25 Setting colour temperature and colours Calling the setting window Selecting the colour temperature The "warmth" of the screen colours is set using the colour temperature. The colour temperature is measured in K (= Kelvin). You can select from 6500 K, 9300 K, Customer Colour and sRGB.
- Page 26 Setting advanced options Calling the setting window Language Setting language for the OSD menu With this function you select the language for the OSD menu. The following languages are offered: English (default setting) French Polish Spanish Dutch German Italian Russian Selecting input signal Input (only for monitors with digital input)
-
Page 27: Notes On Ergonomic Colour Adjustment
Notes on ergonomic colour adjustment If you select colours for the display in your application programmes, take note of the information below. The primary colours blue and red on a dark background do not produce the minimum required contrast of 3:1 and are therefore not suitable for continuous text and data entry. When using several colours for characters and background and giving the primary colours full modulation, you can obtain very suitable colour combinations (see the following table): Background... -
Page 28: Troubleshooting
Troubleshooting Should an error occur, first check the following points. If the distortion is still not eliminated, the monitor should, if possible, be checked on another computer. If you are unable to solve the problem, please inform our help desk. Having this problem? Check the following points: No screen display... - Page 29 Having this problem? Check the following points: Picture is shaking ► Check whether the data cable for the monitor is correctly attached to the monitor port on the computer. ► Press the AUTO button to conduct the auto- adjustment of the screen. Picture is wrongly adjusted ►...
-
Page 30: Notes Regarding The Din En Iso 13406-2 Standard
Notes regarding the DIN EN ISO 13406-2 standard Permanently unlit or lit pixels The standard of production techniques today cannot guarantee an absolutely fault-free screen display. A few isolated constant lit or unlit pixels (picture elements) may be present. The maximum permitted number of pixels faults is stipulated in the stringent international standard ISO 13406-2 (Class II). -
Page 31: Technical Data
Technical data 17" LCD Monitor 19" LCD Monitor Dimensions and weight Visible diagonals: 43 cm 48 cm Dot pitch: 0.264 mm 0.294 mm Maximal resolution: 1280 x 1024 1280 x 1024 Dimensions Width: 380 mm 426 mm incl. Height: 400 mm 436 mm monitor base: Depth:... -
Page 32: Vesa-Ddc-Compatible Vga Interface
If the monitor is not yet displayed in the list of monitors, you can select the following monitor instead: Fujitsu Siemens 4311 FA, 4312 FA, B17-2, P17-2, A17-1, S17-2, B19-2, P19-2 Preset operating modes The picture position and size have been set to optimum values at the factory for the operating modes listed above. -
Page 33: Pin Assignment D-Sub
Pin assignment D-SUB Meaning Meaning Video input red +5 V (DDC) Video input green Sync. earth Video input blue not assigned not assigned DDC-Data Earth H. sync Red video earth V. sync Green video earth DDC Clock Blue video earth Monitor port DVI-D (only for monitors with digital input) Pin Meaning...