
Related Manuals for TwinEagles TXBQ-26R-T


Summary of Contents for TwinEagles TXBQ-26R-T
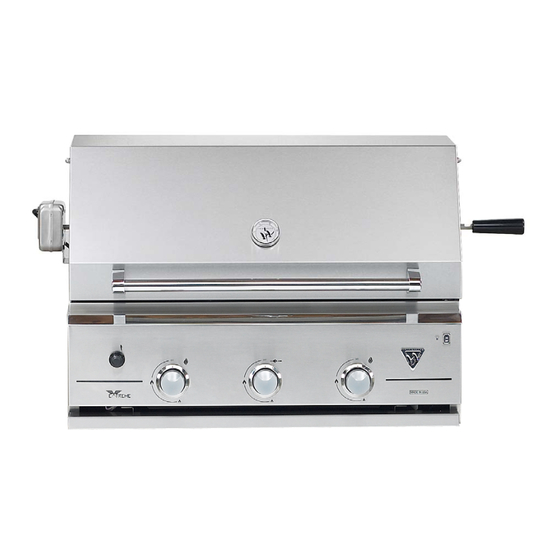
- Page 1 XTREME RILL INSTALLATION, USE & CARE MANUAL MODELS TXBQ-26R-T, TXBQ-26G-T TXBQ-32R-T, TXBQ-32G-T P/N: 18557C 3-07...
- Page 2 FOR YOUR RECORDS Please record the following information and refer to them when contacting the company or an authorized service agent. This information is found on the data plate, located on the panel behind the control panel of the grill. Remove the drip tray to visually access the nameplate label from the front of the grill.
-
Page 3: Table Of Contents
– E TABLE OF CONTENTS XTREME RILL IMPORTANT SAFETY INFORMATION GAS REQUIREMENTS o LP GAS SAFETY REQUIREMENT o LP GAS HOOKUP o PORTABLE LP CONNECTION o PLUMB-IN LP INSTALLATION (LP SYSTEM) o NATURAL GAS INSTALLATION LOCATING THE GRILL o CLEARANCE TO COMBUSTIBLE CONSTRUCTION o CLEARANCE TO NONCOMBUSTIBLE CONSTRUCTION CABINET CUT-OUT DIMENSIONS FOR BUILT-IN APPLICATION LEAK TESTING... -
Page 4: Important Safety Information
– E IMPORTANT SAFETY INFORMATION XTREME RILL IMPORTANT: PLEASE READ MANUAL CAREFULLY BEFORE USING YOUR GRILL TO ENSURE PROPER OPERATION AND TO REDUCE THE RISK OF FIRE, BURN HAZARD AND OTHER INJURY. General Safety Requirements: 1. The installation of this appliance must conform with local codes or, in the absence of local codes, either the National Fuel Gas Code, ANZI Z223.1/NFPA 54, or CAN/CGA-B149.1, Natural Gas Installation Code or CAN/CGA-B149.2, Propane Installation Code. -
Page 5: Gas Requirements
– E GAS REQUIREMENTS XTREME RILL Each appliance is set and tested at the factory for the type of gas supply to be used. Identify the type of gas, either natural gas or L.P. gas and make sure that the marking on the data plate (rating plate) matches the gas supply. -
Page 6: Lp Gas Hookup
– E LP GAS HOOKUP XTREME RILL Install the factory-supplied hose and regulator assembly as shown. Connect the ”-flare end of the hose to the grill coupling using a ¾” open wrench. Do not apply pipe sealant to the 3/8-flare connection. Connect the regulator to the LP cylinder. -
Page 7: Portable Lp Connection
– E FOR PORTABLE LP CONNECTION XTREME RILL The cylinder used must include a collar to protect the cylinder valve. The cylinder supply system must be arranged for vapor withdrawal. TO CONNECT LP CYLINDER Make sure the gas valve, on top of the cylinder, is closed. -
Page 8: Plumb-In Lp Installation (Lp System)
– E PLUMB-IN LP GAS INSTALLATION (LP-SYSTEM) XTREME RILL 2 1/2" MINIMUM CLEARANCE TO ALLOW LID TO FULLY OPEN The installation must conform with local codes or, in the absence of local codes, with either the national Fuel Gas Code, ANSI Z223.1/NFPA 54, or CAN/CGA-B149.1, Natural Gas Installation Code or CAN/CGA- B149.2, Propane Installation Code. -
Page 9: Natural Gas Installation
– E NATURAL GAS INSTALLATION XTREME RILL A typical natural gas installation is shown below. Make sure that the factory-supplied regulator is used and installed with the arrow mark on the regulator pointing towards the gas grill. Do not use any replacement regulator other than that specified by Twin Eagles, Inc. -
Page 10: Locating The Grill
– E LOCATING THE GRILL XTREME RILL This gas appliance is design and certified for outdoor use only. Do not operate the grill inside a building, garage, recreation vehicle or any enclosed area. When choosing an area, consider exposure to wind, proximity to traffic paths and length of gas supply line. -
Page 11: Cabinet Cut-Out Dimensions For Built-In Application
CABINET CUT-OUT DIMENSIONS FOR BUILT-IN APPLICATION DIMENSIONS IN INCHES... -
Page 12: Leak Testing
– E LEAK TESTING XTREME RILL General: DO NOT USE GRILL UNTIL ALL CONNECTIONS HAVE BEEN CHECKED AND DO NOT LEAK ALWAYS CHECK FOR LEAKS AFTER EVERY L.P. TANK CHANGE Although all gas connections on the grill are leak tested at the factory prior to shipment, a complete gas tightness check must be performed at the installation site due to possible mishandling in shipment, or excessive pressure unknowingly applied to the unit. -
Page 13: Assembly Instructions
– E ASSEMBLY INSTRUCTIONS XTREME RILL The Extreme Grill is fully assembled and tested at the factory and requires no major assembly in the field. For the purpose of shipping and handling, some parts such as the rotisserie components, grill grates, radiants, etc. are strapped inside the grill and require minor assembly. MAKE SURE ALL PACKAGING MATERIALS GET REMOVED PRIOR TO ASSEMBLY. -
Page 14: To Secure Power Transforer
TO SECURE POWER TRANSFORMER All models with interior lights have a power transformer which is concealed in a stainless steel box with an attached power supply cord. This transformer must be secured in a dry location and away from excessive heat. 1a. -
Page 15: Rotisserie Assembly
TO INSTALL THE ROTISSERIE: Note: The warming rack must be removed prior to rotisserie installation. * There are two placement options for the rotisserie; the Rear Position is for normal to smaller loads and the Front Position is for larger loads. For Larger Loads: 1. -
Page 16: Lighting Instructions
– E OPERATING INSTRUCTIONS XTREME RILL Lighting Instructions: Your Extreme Grill is equipped with an electronic spark ignition system ignition system. The ignition module uses one AAA battery. The spark ignition button is located at the control panel. The same button is used to light the grill burners and the rotisserie burner. -
Page 17: Replacing Battery
Replacing the Battery: 1. Unscrew the ignition button and remove the old battery. 2. Replace with a new AAA battery. Air Shutter Adjustments: Each grill air shutter is tested and adjusted at the factory prior to shipment; however, variations in the local gas supply may make it necessary to adjust the air shutters. -
Page 18: Rotisserie
OPERATING INSTRUCTIONS – ROTISSERIE 1. When using the rotisserie, the hood must be closed except when basting. 2. Important: Always light rotisserie burner with the hood in the full open position. 3. It is important to evenly balance the meat on the spit rod. Proper balancing will lead to more even cooking and prolong the life of the rotisserie motor. -
Page 19: Cleaning And Maintenance
– E CLEANING AND MAINTENANCE XTREME RILL STAINLESS STEEL The Extreme Grill is made of stainless steel. Never clean the stainless steel when it is hot. After the initial grilling use, certain areas of the grill may discolor. This is a normal discoloration caused by the intense heat given off by the burners. -
Page 20: Radiants
RADIANTS: It is not necessary to remove and clean the radiants from the tray after every grilling. They burn themselves clean during the next cooking operation. If desired, you can burn clean them by lighting the grill and letting it burn on high for about 30 minutes. Periodically, the radiants need to be cleaned. -
Page 21: Troubleshooting Guide
– E TROUBLESHOOTING GUIDE XTREME RILL PROBLEM WHAT TO DO Grill will not light. 1. Push-in the igniter button and check for sparks. If no sparks or sparks are weak, replace the battery. 2. If there is a spark, check if gas is supplied to the burner. 2-1) Purge the line of any trapped air. -
Page 22: Exploded View
EXPLODED VIEW – E XTREME RILL 5, 6 7, 8 30, 31 10, 11 25, 26 23, 24 17, 18... -
Page 23: Parts List
– E PARTS LIST XTREME RILL Item No. TEI Part Number Description TXBQ-26R-T TXBQ-32R-T TXBQ-26G-T TXBQ-32G-T 13838 12" Stainless Steel Grate 13837 6" Stainless Steel Grate 13811 Spit Handle (Phenolic) 13812 Stainless Steel Meatholder (pair) 13839 Spit Rod, 26 (Stainless Steel) -
Page 24: Warranty
TWIN EAGLES EXTREME GRILLS Limited Product Warranty Model: ________________________ Serial No.: ____________________________________ Date Of Purchase: ________________ Selling Dealer: _________________________________ Name and address performing all necessary repairs. All field service costs are not Thank you very much for purchasing a high quality grill covered in any way by this warranty. -
Page 25: Warranty Registration
Here Warranty Registration Customer Name Model # Address Serial # City Date Purchased Dealer’s Name Phone # Dealer’s Address e-mail: This Warranty Registration card must be returned within thirty days of purchased to properly activate your warranty. This information is for our internal use only. - Page 26 Fold Here Place Postage Here Here Customer Service ATTN: Warranty Department 13231 East 166 Street Cerritos, CA 90703 Fax no. (562) 802-3391...
Need help?
Do you have a question about the TXBQ-26R-T and is the answer not in the manual?
Questions and answers