NETGEAR EX6200 Instructions Manual
Hide thumbs
Also See for EX6200:
- User manual (121 pages) ,
- Product manual (20 pages) ,
- Datasheet (4 pages)
Table of Contents
Advertisement
Advertisement
Table of Contents

Related Manuals for NETGEAR EX6200


Summary of Contents for NETGEAR EX6200
- Page 1 Do More Learn more about your EX6200...
-
Page 2: Table Of Contents
Contents Experience Next-Generation WiFi ........3 Optimize Your WiFi ..........4 Share Files Across Your Network . -
Page 3: Experience Next-Generation Wifi
WiFi networking standards. Your extender is backward compatible with prior WiFi standards. However, to get the benefits of 802.11ac, your router must support the 802.11ac WiFi networking standard. To learn more about the 802.11ac WiFi networking standard, visit http://www.netgear.com/landing/80211ac/... -
Page 4: Optimize Your Wifi
Optimize Your WiFi The NETGEAR WiFi Analytics app provides detailed information to help you optimize your WiFi home network. To install the app, visit the Google Play store or scan the QR code. The WiFi Analytics app provides the following: Network status. -
Page 5: Share Files Across Your Network
Share Files Across Your Network You can share data that is stored on most common USB storage devices across your network with ReadySHARE® USB Storage Access. USB 3.0 port... - Page 6 To access data from a Windows device: 1. Connect a supported USB storage device to the USB port on your extender. 2. Select Start > Run, enter \\readyshare in the pop-up window, and click the OK button. To access data from a Mac OS X device: 1.
- Page 7 To change the ReadySHARE folder name on the extender: If you have a NETGEAR router that supports ReadySHARE, the router’s default ReadySHARE folder name is \\readyshare. The extender’s default ReadySHARE folder name is also \\readyshare. You can change the extender’s default ReadySHARE folder name so that you can tell the folders apart.
-
Page 8: Boost Your Video Streaming
Boost Your Video Streaming Get the most out of your HD entertainment with FastLane™ Technology. FastLane Technology connects to your router using one band and connects to your devices using another band. Because a band is dedicated to each function, performance is enhanced. ... - Page 9 4. Select Advanced > Operating Mode. The Operating Mode screen displays. 5. Select the FastLane Technology radio button. 6. Review the two FastLane Technology options and choose the band–either 2.4 GHz or 5 GHz–that is compatible with most of your devices. If you are not sure which band your devices use, check your user manuals or search the Internet.
-
Page 10: Connect Ethernet-Enabled Devices
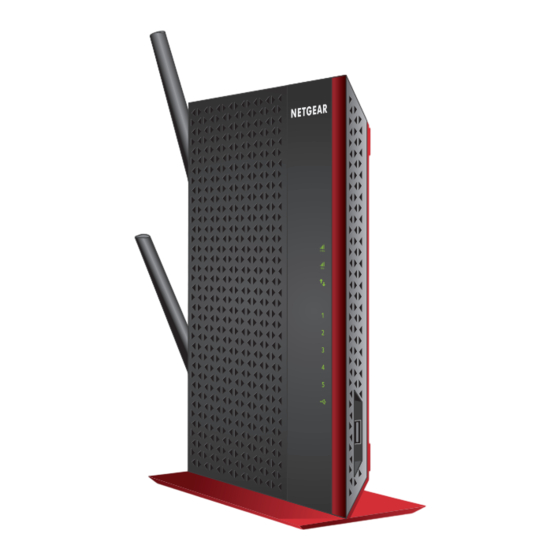
Connect Ethernet-Enabled Devices You can use your extender to wirelessly connect as many as five Ethernet-enabled devices, such as smart TVs, game consoles, and Blu-ray players, to your WiFi router or access point at gigabit speeds. After your set up your extender, plug the Ethernet cable from a device directly into the extender’s gigabit Ethernet port. -
Page 11: Connect A Printer
Connect a Printer To connect a printer to your extender and enjoy wireless printing from your laptop and other devices, use your extender’s ReadySHARE Printer feature. To set up your printer: 1. See if your computer already has the printer driver software installed. - Page 12 Printer utility for Windows or Mac. 4. Install the ReadySHARE Printer utility. After you install it, the utility displays as NETGEAR USB Control Center on your computer. 5. Launch the NETGEAR USB Control Center. A list of available printers displays. If this is the first time you are running the utility, you are asked to select a default printer.
- Page 13 NETGEAR USB Control Center utility, disable the firewall temporarily to allow the utility to work. • The NETGEAR USB Control Center utility must be running in the background for printer sharing to work. If you exit the utility, you cannot access the printer on your WiFi network.
-
Page 14: Change Your Settings
Change Your Settings To change your password or other settings: 1. Connect to the extender’s WiFi network. 2. Open a browser on your laptop, tablet, or smartphone and visit www.mywifiext.net. 3. Log in using the following credentials: User name. admin •... -
Page 15: Faq
Here is where you can find answers for difficulties you might experience. NETGEAR genie keeps asking me for my WiFi password and I am sure I entered the correct password. What can I do? It is likely that your extender is placed at the borderline of the signal range covered by your main WiFi router. - Page 16 What are the default user name and password to log in to the extender? If you are online at http://www.mywifiext.net, you can use the following to log in: User name. admin • Password. password • My router security is WEP, and I entered the wrong passphrase or security key on the extender.
- Page 17 I am connected to NETGEAR_EXT and launched a browser. Why am I unable to see NETGEAR genie? Try these troubleshooting steps: • Make sure that your computer is set up to use DHCP (most are). • Make sure that the Client Link LED is green and that you have a valid IP address.
- Page 18 I enabled a wireless MAC filter (wireless access control or ACL) on my router. What should I do when installing the extender? When the wireless device connects through the WiFi booster to your router, the MAC address of the wireless device shown on the router is translated to another MAC address.
- Page 19 I completed the NETGEAR genie smart setup, but my wireless devices cannot get the IP address from the extender. What should I do? Make sure that the passphrase you entered on your wireless device is correct, and power cycle the extender and your router. If your device is still not able to get the IP address, try these tips: •...
-
Page 20: Technical Support
NETGEAR, the NETGEAR logo, and Connect with Innovation are trademarks and/or registered trademarks of NETGEAR, Inc. and/or its subsidiaries in the United States and/ or other countries. Information is subject to change without notice. © NETGEAR, Inc. All rights reserved.
Need help?
Do you have a question about the EX6200 and is the answer not in the manual?
Questions and answers