Sony VPL-ES3 Service Manual
Sony vpl-es3 data projector service manual
Hide thumbs
Also See for VPL-ES3:
- Quick reference manual (100 pages) ,
- Operating instructions manual (53 pages) ,
- Instruction & operation manual (16 pages)
Table of Contents
Advertisement
Advertisement
Table of Contents
Troubleshooting

Related Manuals for Sony VPL-ES3


Summary of Contents for Sony VPL-ES3
- Page 1 DATA PROJECTOR VPL-ES3 REMOTE COMMANDER RM-PJ4 SERVICE MANUAL 1st Edition...
- Page 2 à moins d’être qualifié pour en effectuer d’autres. Pour toute réparation faire appel à une personne compétente uniquement. CAUTION RISK OF EXPLOSION IF BATTERY IS REPLACED BY INCORRECT TYPE. DISPOSE OF USED BATTERIES ACCORDING TO THE RULE IN REGION. VPL-ES3...
-
Page 3: Table Of Contents
2-1. Initial Values of Adjustment Items ......... 2-1 2-2. Memory Structure ............2-5 3. Troubleshooting 3-1. Electric Troubleshooting ..........3-1 3-2. Power Board Troubleshooting ........3-3 3-2-1. No Power ............... 3-3 3-2-2. Failure of Turn on Lamp ........3-4 VPL-ES3... -
Page 5: Service Information
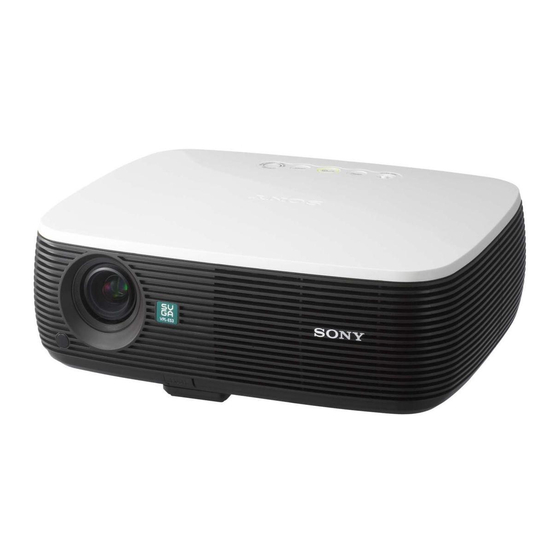
Section 1 Service Information 1-1. Appearance Figure 1-2. Board Locations Main Lamp power supply Thermal sennsor IR sensor Power Detection switch VPL-ES3... -
Page 6: Disassembly
(M 3 x 6) 3 Shield 6 Flat head screw (M 3) 5 Six hexagon 8 Two claws screws Main board 0 Front case assembly 1 Lens cap 4 Two screws (+K 3 x 12) 9 Sub rear case assembly VPL-ES3... -
Page 7: Main Board
Harnesses 4 Main board Harnesses clamp section Lamp box assembly When re-assembling, give an appropriate amount of extra slack J24 J16 J18 of this harnesses. Main board VPL-ES3... -
Page 8: Tunnel Outlet Section
1-3-5. Main Board Bracket Section Remove the Main board before starting the removal work 2 Three tapping screws (PAN 3 x 7) 1 Two screws (M 3 x 6) Power board 4 Main board bracket section 3 Screw (M 4 x 6) VPL-ES3... -
Page 9: Power Board And Lamp Power Supply
(+PWH 3 x 8) 1 Two stands assembly 9 Cushion CN603 8 Lamp power From the Main board CN602 (Red and Black wires) supply connector 2 Power board 7 Lamp 6 Loosen two screws. 4 loosen screw. 5 Lamp door VPL-ES3... -
Page 10: Optics Section
7 After installation is completed, verify that the Optics shown until it is stopped. section can rotate from the position A to the position B smoothly. 4 Rotate the Focus/Zoom Adjust Assembly counter-clockwise until it is stopped. VPL-ES3... -
Page 11: Dc Fan
(PAN 3 x 7) 7 Two tapping screws (PAN 3 x 7) 2 Duct LCD assembly 8 Duct lamp 3 Two tapping screws 5 Two tapping screws (+PWH 3 x 10) (M 3 x 25) 4 DC fan 6 DC fan VPL-ES3... -
Page 12: Warning On Power Connection
Cord type H05VV-F H05VV-F N13237/CO-228 VCTF Rated Voltage/Current 10A/125V 10A/125V 10A/250V 10A/250V 10A/250V 7A/125V Safety approval UL/CSA UL/CSA DENAN Cord length (max.) 4.5m (14 feet 9 inches) (1) Use an appropriate rating plug which is applied to local regulations. VPL-ES3... -
Page 13: Electrical Adjustments
Section 2 Electrical Adjustments VPL-ES3... - Page 14 VIDEO COLOR TEMP Hi USC_GAIN_G USC_GAIN_B USC_BIAS_R USC_BIAS_G USC_BIAS_B USC_GAIN_R VIDEO COLOR TEMP Lo USC_GAIN_G USC_GAIN_B USC_BIAS_R USC_BIAS_G USC_BIAS_B DELUT SW DEUF SW Display only ROM Version Display only LAMP TIMER Display only OPERATION TIMER Display only PREV.LAMp TIMER VPL-ES3...
- Page 15 130 130 130 PbPr R Offset PbPr R Offset PbPr R Offset PbPr R Gain PbPr G Gain PbPr B Gain Page7 Test-Pattern 2 PW filter RGB_320T_1.PWF RGB_320T_3.PWF RGB_320T_1.PWF Color Space REC601_YCBCR REC601_YCBCR Interpolation 1-Field 1-Field 1-Field Gray Value Blue Value VPL-ES3...
- Page 16 RS232 Debug Info 1 RS232 Debug Info 2 RS232 Debug Info 3 RS232 Debug Test String SogThreshold Page10 Uniformity R Uniformity G Uniformity B Burn-In Cycle Burn-In Cycle On Time Burn-In Cycle Off Time Burn-In Hour Burn-In Lamp Mode Burn-In VPL-ES3...
-
Page 17: Memory Structure
Input- A RGB Input-A Component Input-A Component Image Flip Up/Down inversionis impossible Image Flip Image Flip Memory Up/Down inversionis impossible Memory Memory Up/Down inversionis possible Up/Down inversionis possible CPU RA M External NVM CPU ROM Memory Initialize Active memory cop y VPL-ES3... - Page 18 The adjustment items (W/B, Device Adjust) that can be adjusted in the Service Mode or in the Special Service Mode, are memorized in the NVM at the time when the user performs adjustment and performs the memory operation. Note that the factory adjustment data will be lost at this moment. VPL-ES3...
-
Page 19: Troubleshooting
LCD driver on the main board. Picture quality 1. The picture a little green, blue, red, please check the LCD panel connector. No good ? 2. The picture has dust, please check the lens. 3. The picture flicker, please alignment again. VPL-ES3... - Page 20 LCD panel connector. Then check the pin of connector. IR remote control 1. Please check the OSD setting No good ? 2. Check the front IR board. Audio function is 1. P1. Check the OSD setting. No good ? 2. Check the speak wire. VPL-ES3...
-
Page 21: Power Board Troubleshooting
Check if D602 or IC602 is Voltage outputs shut broken. down and built if yes,replace it with now repeatly ? one. Check LED circuit of Check CN701 and find main board. out if some points are shorted to gound. VPL-ES3... -
Page 22: Failure Of Turn On Lamp
3-2-2. Failure of Turn on Lamp Failure of turn on ballast. Check if the input voltage of ballast is 380V DC Replace lamp with new Lamp one. Broken ? Control Check main board. Pin (SCI) is normal ? Replace ballast with new one. VPL-ES3... - Page 23 PFC_On/Off signal. Check Q701 IC604, Check if 18V Q604, Q603 or ZD603, exists at c-terminal and then replace broken of Q603. parts. Replace F602 with new F602 Open ? one. Q602 works normally ? Check ZD602, R655 and R656. VPL-ES3...
-
Page 25: Spare Parts
Ne les remplacer que par une pièce portant le numéro spécifié. 2. Standardization of Parts Some repair parts supplied by Sony differ from those used for the unit. These are because of parts common- ality and improvement. Parts List has the present standardized repair parts. -
Page 26: Exploded Views
Overall 4-2. Exploded Views +PWH +PSW 3x25 +P 2.5x8 +PWH 3x10 +K 3x12 E-2.5 +K 3x12 +BVTP 3x6 VPL-ES3... - Page 27 4-672-839-11 s HEAD, M3 FLAT 7-682-903-21 s SCREW, +PWH 3X8 7-682-954-01 s SCREW, +PSW 3X25 7-624-118-04 s RING, RETAINING E-2.5 7-685-645-91 s SCREW +BVTP 3X6 7-621-262-40 s SCREW, +P 2.5X8 7-682-250-09 s SCREW, +K 3X12 7-682-903-31 s SCREW, +PWH 3X10 VPL-ES3...
-
Page 28: Electrical Parts List
1-479-775-11 s REMOTE COMMANDER (RM-PJ4) 1-832-428-11 s CABLE, VGA 2-672-631-01 s GUIDE QS MANUAL (JAPANESE, ENGLISH, FRENCH, SPANISH, GERMAN, ITALIAN, SIMPLIFIED CHINESE) 2-679-319-01 s BAG, CARRY VPLES3 2-679-320-01 s CD MANUAL VPL-ES3 ------------ s CORD POWER (See 1-4. Warning on Power Connection) VPL-ES3... -
Page 29: Block Diagram
+3.3V QA14,17,19,20, V18V FAN4 RESET P5V_F Q14,17-20 DRIVER GEN. SWITCH D607 +3.3V LED1-7 AVCC TEMP/FAN SW1-4 IC603 IC602 FAN5 LAMP COVER +3.3V PVDD ISOLATOR SWITCHING THERMAL POWER SAVING SENSOR MENU Eco_mode +3.3V AVDD PUSH ENTER INPUT P3P3A +3.3V P3P3D VPL-ES3... -
Page 31: Diagram
LCD G INPUT S VIDEO LCD B SPEAKER FAN1 (FRONT RIGHT) FAN2 (FRONT LEFT) OUTPUT AUDIO FAN3 (REAR BOTOM) FAN4 (REAR TOP) INPUT AUDIO FAN5 (FRONT BOTOM) REMOTE RS-232C HALOGEN BALLAST UNIT LAMP CN602 CN603 CN601 CN701 POWER BOARD VPL-ES3... - Page 33 20 V AC range are suitable. (See Fig. A) To Exposed Metal Parts on Set 0.15 µ F 1.5 k Z voltmeter (5.25V) Earth Ground Fig A. Using an AC voltmeter to check AC leakage. VPL-ES3...
- Page 34 English Sony EMCS Corporation VPL-ES3 (SY) E 2006BR16-1 Ichinomiya Tec 9-872-784-01 ©2006...
Need help?
Do you have a question about the VPL-ES3 and is the answer not in the manual?
Questions and answers