Table of Contents
Advertisement
TO RECEIVE DIGITAL/ANALOG SIGNAL,
YOU MUST CONNECT ANTENNA.
IF YOU NEED ADDITIONAL ASSISTANCE WITH SETUP OR OPERATING AFTER
READING OWNER'S MANUAL, PLEASE CALL TOLL FREE 1-800-968-3429, OR
VISIT OUR WEB SITE AT http://www.SylvaniaConsumerElectronics.com
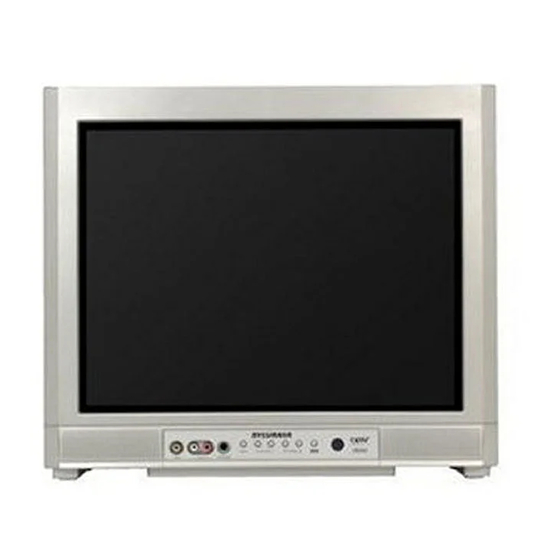
20" Digital / Analog
Television
Owner's Manual
CR202SL8
MENU
VOLUME
CHANNEL
POWER
VIDEO
L
AUDIO
R
HEADPHONE
Advertisement
Table of Contents

Related Manuals for Sylvania CR202SL8


Summary of Contents for Sylvania CR202SL8
- Page 1 20” Digital / Analog Television Owner’s Manual CR202SL8 TO RECEIVE DIGITAL/ANALOG SIGNAL, YOU MUST CONNECT ANTENNA. MENU VOLUME CHANNEL POWER VIDEO AUDIO HEADPHONE IF YOU NEED ADDITIONAL ASSISTANCE WITH SETUP OR OPERATING AFTER READING OWNER’S MANUAL, PLEASE CALL TOLL FREE 1-800-968-3429, OR...
-
Page 2: Introduction
NTRODUCTION WARNING: TO REDUCE THE RISK OF FIRE OR ELECTRIC SHOCK, DO NOT EXPOSE THIS APPLIANCE TO RAIN OR MOISTURE. CAUTION THIS SYMBOL INDICATES THAT DANGEROUS RISK OF ELECTRIC SHOCK VOLTAGE CONSTITUTING A RISK OF ELECTRIC DO NOT OPEN SHOCK IS PRESENT WITHIN THIS UNIT. CAUTION: TO REDUCE THE RISK OF ELECTRIC SHOCK, THIS SYMBOL INDICATES THAT THERE ARE... -
Page 3: Precautions
15. POWER LINES - An outside antenna system should not be located c. If the TV has been exposed to rain or water. in the vicinity of overhead power lines or other electric light of d. If the TV does not operate normally by following the operating power circuits, or where it can fall into such power lines or circuits. -
Page 4: Supplied Accessories
NTRODUCTION LOCATION For safe operation and satisfactory performance of the unit, keep the following in mind when selecting a place for its installation: • Shield it from direct sunlight and keep it away from sources of intense heat. • Avoid dusty or humid places. •... -
Page 5: Table Of Contents
Features Contents INTRODUCTION • DTV/TV/CATV - You can use your remote control to select channels Important Safeguards ..........2 which are broadcast in digital, conventional analog, Precautions . -
Page 6: Remote Control Function
NTRODUCTION Remote Control Function POWER button (p10) DTV/TV button (p13) Press to turn the unit on and off. Press to switch between the digital Number buttons (p12) mode (DTV) and analog (TV) POWER • Press to select channels. mode. -/ENT button INFO button (p13) AUDIO INFO... -
Page 7: Control Panel
Control Panel Infrared Sensor Window Receives infrared rays transmitted from the remote control. POWER button (p10) Press to turn the unit on and off. CHANNEL K / L buttons (p12) Press to select channels or move up/down through the main menu items. VOLUME X / Y buttons (p12) Press to adjust the volume or move right( X )/left( Y ) through the main menu items. -
Page 8: Connection
ONNECTION Cables not included. Please purchase the necessary cables at your local store. Basic Connection This section describes how to connect the unit to an antenna, cable/satellite box, etc. Note: • Be sure your antenna or other device is connected properly before plugging in the power cord. [Antenna Cable Connection] When connecting the unit to an antenna or cable TV company (without cable/satellite box) Connect the RF coaxial cable on your home outlet to the antenna input jack of this unit. -
Page 9: External Device Connection
Cables not included. Please purchase the necessary cables at your local store. External Device Connection [S-video or Video Cable Connection (Rear)] S-video connection offers good picture quality for video devices connected to the unit. Video connection offers standard picture quality for video devices connected to the unit. Make the connection as illustrated below. -
Page 10: Initial Setting
NITIAL SETTING These operations are accessible by remote control. Some may also be accessible by controls on the main unit. Initial Setup Note: • If you connect the cable system directly, contact the CATV This section will guide you through the unit’s initial setting which includes installer. -
Page 11: Auto Channel Scan
Auto Channel Scan Note: • If you connect the cable system directly, contact the CATV If you switch wires (e.g., between antenna and CATV) or if you move the TV installer. to a diff erent area after the initial setting, or if you recover the DTV channel •... -
Page 12: Watching Tv
ATCHING TV Channel Selection Volume Adjustment Select channels by pressing [CH K /L] or [the Number buttons]. This section describes how to adjust the volume. The mute function, which turns the sound off and on, is also described. • To select the memorized channels, Use [VOL X / Y ] to adjust the audio volume. -
Page 13: Switching Digital / Analog Mode
Switching Digital / Analog Mode You can easily switch the DTV (ATSC) and TV (NTSC) with the remote control In the digital mode, the detailed broadcasting information for the current and enjoy viewing the TV programs with simple operation. channel such as program title, the program guides are displayed. Press [DTV/TV] repeatedly to change the input mode. -
Page 14: Tv Screen Display Mode
ATCHING TV TV Screen Display Mode Sleep Timer 2 types of display modes can be selected in the digital mode. The sleep timer can be set to automatically turn off the unit after an incremental period of time. Press [SLEEP] to set the sleep timer. Press [MENU] to display the main menu. -
Page 15: Optional Setting
PTIONAL SETTING Channel Add/Delete The channel add/delete function lets you add the channel that was not Press [MENU] to exit. added by the auto channel scan due to the reception status at the initial setting. You can also delete the unnecessary channels. MENU Press [MENU] to display the main menu. -
Page 16: Picture Adjustment
PTIONAL SETTING Picture Adjustment Closed Caption You can adjust brightness, contrast, color, tint and sharpness. You can view closed captioning (cc) for TV programs, movies and news. Closed caption refer to text of dialogue or descriptions displayed on-screen for the hearing impaired. Press [MENU] to display the main menu. -
Page 17: Dtv Closed Caption
DTV Closed Caption Press [MENU] to exit. In addition to the basic closed caption described on page 16, DTV has its own closed caption called DTVCC. Use this menu to change the settings for DTVCC. MENU Note: Press [MENU] to display the main menu. •... - Page 18 PTIONAL SETTING [CAPTION SERVICE] [FONT STYLE] Font style of the displayed caption can be switched as below. [OFF] [STYLE1/8] [SERVICE1/6] [STYLE2/8] [SERVICE2/6] [STYLE3/8] [SERVICE3/6] [STYLE4/8] [SERVICE4/6] [STYLE5/8] [SERVICE5/6] [STYLE6/8] [STYLE7/8] [SERVICE6/6] [STYLE8/8] OFF: Select if you do not want DTVCC. This is the default. SERVICE 1 to SERVICE 6: [CHARACTER EDGE] Select one of these before changing any other item in...
-
Page 19: V-Chip
[FORE COLOR] V-chip Font color of the displayed caption can be switched as V-chip reads the ratings for programs, then denies access to the programs below. which exceed the rating level you set. With this function, you can block certain programming inappropriate for children. [TRANSPARENT] Press [MENU] to display the main menu. - Page 20 PTIONAL SETTING A. TV Rating Selection Rating Category Explanations LOWER Use [CH K /L] to select “TV RATING“, TV-Y Appropriate for all children then press [VOL X]. Appropriate for all children 7 and TV-Y7 e.g.) analog TV mode older - V - CHIP SETUP - TV-G General audience TV RATING...
- Page 21 B. MPAA Rating C. Change Password MPAA Rating is the rating system created by MPAA (Motion Picture Although the default code “0000” is supplied with the unit, you can set Association of America). your own password. Use [CH K /L] to select “MPAA RATING”, Use [CH K /L] to select “CHANGE PASSWORD”, then press [VOL X].
-
Page 22: Troubleshooting
ROUBLESHOOTING Troubleshooting Guide If the unit does not perform properly when operated as instructed in this owner’s manual, check the following chart once before calling for service. Symptom Remedy No power • Be sure the power cord is plugged in. •... - Page 23 Symptom Remedy The entered channel number • Many digital channels have alternate channel numbers. The unit changes the changes automatically numbers automatically to the ones signifying the broadcasting stations. These are the numbers used for analog broadcasts. Remote control does not work •...
-
Page 24: Glossary
NFORMATION Glossary ATSC Dolby Digital SDTV (standard definition TV) Acronym that stands for Advanced Television The system developed by Dolby Standard digital format that is similar to the Systems Committee and the name of the Laboratories to compress digital sound. It NTSC picture quality. -
Page 25: General Specifications
General Specifications Electrical Specification Television system: ATSC / NTSC-M TV standard Sound output: 1W, 8 ohm x 2 Closed caption: Other Specifications System: §15.122/FCC (Digital CC) §15.119/FCC (Analog CC) Remote control: Digital encoded infrared light system Channel coverage (ATSC/NTSC): VHF: 2 ~ 13 Operating temperature: UHF: 14 ~ 69... -
Page 26: Limited Warranty
LIMITED WARRANTY FUNAI CORP. will repair this product, free of charge in the USA in the event of defect in materials or workmanship as follows: DURATION: PARTS: FUNAI CORP. will provide parts to replace defective parts without charge for one (1) year from the date of original retail purchase.
Need help?
Do you have a question about the CR202SL8 and is the answer not in the manual?
Questions and answers