Honeywell CT2800 Installation And Programming Instructions
Weekday/weekend (5-day/2-day) programmable heat and/or cool low voltage (20 to 30 vac) thermostat and mounting plate
Hide thumbs
Also See for CT2800:
- Installation instructions addendum (1 page) ,
- Programming and installation instructions (20 pages) ,
- Programming and installation instructions (19 pages)
Table of Contents
Advertisement
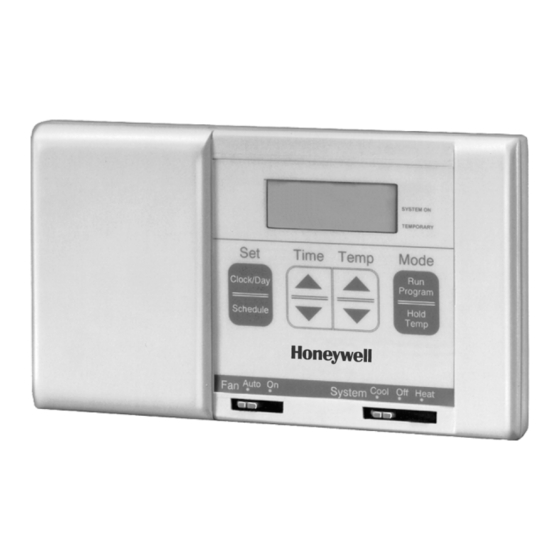
CT2800 Programmable Thermostat
INSTALLATION AND PROGRAMMING INSTRUCTIONS
Welcome to the world of comfort and energy savings with your
new Honeywell Programmable Thermostat. Your new thermostat
will automatically control the temperature in your home, keeping
you comfortable while saving energy.
Weekday/Weekend (5-day/2-day)
Programmable Heat and/or Cool
Low Voltage (20 to 30 Vac)
Thermostat and Mounting Plate
Model CT2800
Table of Contents
Installation ..................................................................................................................................................................
2
Programming.............................................................................................................................................................. 12
Operation.................................................................................................................................................................... 18
Frequently Asked Questions ...................................................................................................................................... 22
Customer Assistance ................................................................................................................................................. 23
Limited Warranty ........................................................................................................................................................ 24
® U.S. Registered Trademark
Copyright © 2003 Honeywell International Inc.
All Rights Reserved
69-1638-1
Advertisement
Table of Contents

Related Manuals for Honeywell CT2800


Summary of Contents for Honeywell CT2800
-
Page 1: Table Of Contents
CT2800 Programmable Thermostat INSTALLATION AND PROGRAMMING INSTRUCTIONS Welcome to the world of comfort and energy savings with your new Honeywell Programmable Thermostat. Your new thermostat will automatically control the temperature in your home, keeping you comfortable while saving energy. Weekday/Weekend (5-day/2-day) -
Page 2: Mercury Notice
If your system is not compatible with the CT2800, the table recommends an alternate Honeywell model. If you are unsure what type of thermostat is right for your system, visit us on the Web at www.honeywell.com/yourhome or call Honeywell Customer Care at 1-800-468-1502. -
Page 3: Step 1. Prepare For Installation
Multistage Conventional A heating or cooling system with more than one stage. Step 1. Prepare for Installation Carefully unpack your new thermostat. Save your receipt and make sure you have the following parts: • Thermostat and mounting plate •... -
Page 4: Step 2. Remove Old Thermostat
Using enclosed labels, mark wires with letter of terminal it is attached to on the old thermostat (Fig. 3). Do not label using colors. If labels do not match letters on old thermostat terminals, see wiring cross ref- erence table in Special Wiring Instructions section. -
Page 5: Install The Mounting Plate
Fig. 5. Fig. 6. Fig. 7. a. Separate the mounting plate from the thermostat using a coin, as shown in Fig 5. b. Position the mounting plate on the wall. Be sure the mounting plate is flush against the wall and none of the wires are trapped behind it. - Page 6 Celsius (°C), turn DIP Switch 3 to Off position. d. You can install the batteries and program your thermostat now, or you can wait until the thermostat is mounted on the wall. To install the batteries, see Step 7. To program the thermostat, see the Programming section.
-
Page 7: Step 5. Wire Thermostat Terminals
M20126 Type of System a. Hold thermostat as shown in Fig. 9. b. Using the labels on the wires, match letter of your old thermostat wire with the corresponding terminal on the back of your new thermostat. NOTE: If letters on old thermostat terminals do not match letters on new thermostat terminals, all old wires may not need connect- ing to new thermostat. -
Page 8: Step 6. Mount Thermostat
Fig. 12. M20130 69-1638—1 e. Align the tabs at the top of the thermostat with the tabs at the top of the mounting plate (Fig. 11). Press the lower edge of the case to latch the bottom of the thermostat (Fig. 12) -
Page 9: Step 7. Install The Batteries
A clock thermostat has one or two extra wires attached to the C or C1 terminals that allow the clock to operate. These wires are not used during the installation of your new CT2800 Thermostat and must be insulated from each other to avoid damaging your electrical circuit. - Page 10 Three thermostat wires If you have three wires for heating only and can operate the fan using the fan ON switch, the CT2800 Thermostat will work with your system. Continue the installation procedure.
- Page 11 Old thermostat terminals that do not match new thermostat terminals Use the table below to wire the new thermostat. Connect to New Old Thermostat Thermostat Terminal Terminal R, RH, 4, V Rc, R W, W Y, Y G, F Do not continue...
-
Page 12: Programming
System Cool Off Heat M20664 Descriptions Fan switch–Selects automatic fan operation or fan on. Set Schedule–Puts the thermostat into programming mode. Set Clock/Day–Sets the clock and day. Time Ahead and Back–Sets the time ahead and back. Program periods–Current program period or period being programmed. -
Page 13: Step 1. Set Current Time And Day
(Fig. 19). Step 2. Learn About Programming Features Your CT2800 Thermostat allows you to program schedules for both a heating season and a cooling season. • During the heating season, you will want to set the normal room temperature higher and the energy-saving temperature lower. -
Page 14: Programming Tips
• You do not need to program times and temperatures for all program periods. If you decide not to program your thermostat, it automatically controls heating at 68°F (20°C), and cooling at 78°F (26°C), 24 hours a day. If you decide not to program weekend schedules, the temperature that is programmed for the weekday SLEEP schedule remains in effect until the next program period, which begins on Monday morning. - Page 15 Step 3. Program Heating Schedule a. Write in the times and temperatures that you want to program for your heating schedule. Program Heating Schedule Period Suggested Time Settings Temp Weekday (Mon–Fri) Time Temp Weekend (Sat–Sun) Time Temp b. Set the System switch to HEAT. Schedule Press once.
- Page 16 Press to display a blank schedule for the next pro- Schedule gram period (Fig. 22) and repeat steps d. through f. for each weekday program period. Schedule g. Press until the weekend schedule is displayed (Fig. 23). h. Set the Saturday and Sunday WAKE time by pressing Time until the desired time is displayed.
- Page 17 Step 4. Program Cooling Schedule a. Write in the times and temperatures you want to program for your cooling schedule. Program Cooling Schedule Period Suggested Time Settings Temp Weekday (Mon–Fri) Time Temp Weekend (Sat–Sun) Time Temp b. Set the System switch to COOL. Repeat steps 3c.
-
Page 18: Operation
10°F (6°C) below room temperature (Fig. 26). Your cooling system and fan should start. NOTE: When cooling setting is changed, thermostat can delay up to five minutes before turning on air conditioner. This delay protects the compres- sor. -
Page 19: Set Fan And System Switches
Set Fan and System Switches The switches on the bottom of the thermostat faceplate control the operation of your fan and the heating and cooling system. Set the Fan switch first and then set the System switch. Switch Setting Auto A single-speed fan turns on automatically with the air conditioner or furnace. - Page 20 Then reprogram. IMPORTANT: Replace batteries once a year to prevent heating/cooling system from shutting down due to lack of battery power in thermostat. If leaving home for longer than a month, change batteries before leaving. Override program settings NOTE: Make sure the System switch is set to either HEAT or COOL before making any changes to the schedule.
-
Page 21: Check Programs
Hold a temperature indefinitely Use the Hold Temp feature when you want to maintain a constant temperature indefinitely, such as when you go on vacation. Hold Temp a. Press . “HLd” is displayed (Fig. 28). b. Press Temp until the desired temperature is dis- played. -
Page 22: Frequently Asked Questions
Make sure the batteries are fresh and installed correctly. • Set System switch to Off. Remove batteries and insert backward for 5-10 seconds to reset thermostat. Replace batteries correctly; display should come on. • Temperature limit setting is reached; range is 45°F to 88°F (7°C to 31°C). -
Page 23: Customer Assistance
1° CUSTOMER ASSISTANCE Visit us on the Web at www.honeywell.com/yourhome or call Honeywell Customer Care at 1-800-468-1502. Before you call, please have the following information available: — Thermostat model number and serial code (located under the battery cover) —... -
Page 24: Limited Warranty
Golden Valley, MN 55422-3992 This warranty does not cover removal or reinstallation costs. This warranty shall not apply if it is shown by Honeywell that the defect or malfunction was caused by damage which occurred while the product was in the possession of a consumer.
Need help?
Do you have a question about the CT2800 and is the answer not in the manual?
Questions and answers