Table of Contents
Advertisement
Advertisement
Table of Contents

Subscribe to Our Youtube Channel
Related Manuals for Night Owl Tiger-4500


Summary of Contents for Night Owl Tiger-4500
-
Page 3: Table Of Contents
User’s Manual TABLE OF CONTENTS FCC RADIATION NORM: ............................3 PACKAGE CONTENTS: ............................4 SYSTEM REQUIREMENTS: ............................4 CHAPTER 1: DVR FEATURES ..........................5 CHAPTER 2: LAYOUT ............................... 6 2.1 F ..............................6 RONT ANEL 2.1.1 Front Panel Buttons ..........................6 2.2 R .............................. - Page 4 User’s Manual 4.10.9 Miscellaneous Setup – Video Loss Sound ..................17 4.11 N ............................17 ETWORK ETUP 4.11.1 Network Setup – Intranet (Internal Access) ..................17 4.11.2 Network Setup – Global Access (Connected Directly to Modem) ............19 4.11.3 Network Setup – Global Access (Connected through a Router or Firewall) ........22 4.12 L ..............................
-
Page 5: Fcc Radiation Norm
User’s Manual FCC RADIATION NORM: This equipment has been tested and found to comply with limits for Class B digital device pursuant to Part 15 of Federal Communications Commission (FCC) rules. FCC Compliance Statement These limits are designed to provide reasonable protection against frequency interference in residential installation. -
Page 6: Package Contents
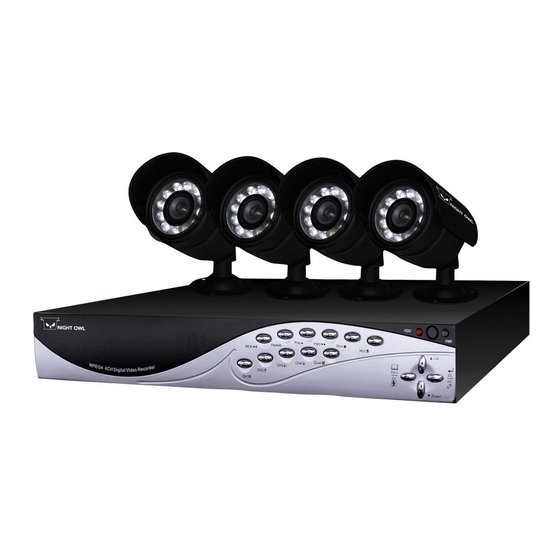
User’s Manual PACKAGE CONTENTS: Your new Security Camera and DVR Kit will ship with the following items. SYSTEM REQUIREMENTS: Please be sure the computer that you install the included software with complies with the following specifications: IBM PCs or 100% Compatibles ®... -
Page 7: Chapter 1: Dvr Features
User’s Manual CHAPTER 1: DVR FEATURES MPEG4 Compression 4-CH Video Input- 1-CH Video Output Audio Input / Output: 1-CH Audio Input / 1-CH Audio Output; System Format: NTSC Linux operation System Supports Multi recording Modes ... -
Page 8: Chapter 2: Layout
User’s Manual CHAPTER 2: LAYOUT 2.1 Front Panel 2.1.1 Front Panel Buttons HDD: Will light up Red when Recording PWR: Will light up green when powered on : Select to view CH 1 only CH2 : Select to view CH 2 only CH3 : Select to view CH 3 only CH4 : Select to view CH 4 only Quad... -
Page 9: Rear Panel
User’s Manual 2.2 Rear Panel 2.2.1 Rear Panel Inputs AUDIO OUTPUT AUDIO INPUT: Input from an audio enabled device (not included) LAN: Ethernet Port VIDEO OUTPUT: Output to your TV CH1: Video Input 1 (Camera 1) CH2: Video Input 2 (Camera 2) CH3: Video Input 3 (Camera 3) CH4: Video Input 4 (Camera 4) DC: DC Power Input Jack... -
Page 10: Chapter 3: Initial Setup
User’s Manual CHAPTER 3: INITIAL SETUP 3.1 Connecting the DVR to a TV or Monitor Using the supplied BNC to RCA connector 1. Connect the BNC to RCA connector to the back of the DVR labeled Video Output ( refer to Chapter 2.2 Rear Panel Picture) 2. -
Page 11: Chapter 4: Dvr Main Menu
User’s Manual CHAPTER 4: DVR MAIN MENU 4.1 Browsing the Main Menu After completing the initial setup, press the “Menu” MAIN MENU button on the remote control to enter the DVR’s Main CAMERA SETUP RECORD SETUP Menu as shown. RECORD FRAMERATE VIDEO QUALITY HIGH RECORD SCHEDULE... -
Page 12: Camera Setup
User’s Manual 4.3 Camera Setup Camera setup allows you to turn cameras on or off for 2 on viewing and recording. Record setup allows you to set CAMERA SETUP which channels will record. After you have selected the Camera Setup Option, press [▲,▼,◄◄ and ►►] button to select a channel, and then press [SEL] to 3 on 4 on... -
Page 13: Video Quality
User’s Manual Note: The higher the frame rate, the smoother the recorded images will be, but more disc space will be required. If leaving for an extended period of time (over 1 month), please lower the frame rate per channel, use a low frame rate and set to motion activated to prolong the recording time of your Hard Disk Drive. -
Page 14: Motion Detector Setup
User’s Manual 4.8 Sensor Setup SENSORED RECORD TIME indicates how long the DVR will continue to record after the motion or sensor is SENSOR SETUP triggered. SENSORED RECORD TIME ALARM ON TIME indicates whether the audio buzzer ALARM ON TIME will sound, and for how long, when motion is detected. -
Page 15: Hard Drive Setup
User’s Manual 4.9 Hard Drive Setup OVERWRITE ENABLED: HARD DRIVE SETUP ON: overwrite oldest video when hard drive is full OVERWRITE ENABLED [ ON] (recommended). MAXTOR STM250310AS MASTER HDD SIZE 250203MB OFF: Stop recording when hard drive is full. MASTER HDD USED 124931MB MASTER HDD FORMAT SLAVE HDD SIZE... -
Page 16: Formatting Hard Drive
User’s Manual 4.9.3 Formatting Hard Drive When detecting a new hard drive, the DVR will automatically prompt you to format the hard drive before using. CHECKING HDD…… Please press the [SEL] button to format, or [MENU] –NEW–DVR MASTER [MAXTOR STM3250310A] button to cancel. -
Page 17: Miscellaneous Setup - Set Time
User’s Manual 4.10.2 Miscellaneous Setup – Set Time The system date and time format is YYYY/MM/DD and SET TIME HH:MM:SS. Press the [◄] or[►] buttons to select a data point then press the [SEL] button to modify the data. Press the 2008/11/11 17:50:01 [MENU] button to save. -
Page 18: Miscellaneous Setup - Password Enable
User’s Manual Contrast CON: Brightness BRI: HUE: Saturation SAT: Press the [▲] or [▼] button to select the item and press the [◄] or [►] buttons to adjust the parameter. 4.10.6 Miscellaneous Setup – Password Enable When Password Enable is set to “ON”, the password will MISCELLANEOUS SETUP be required to enter the Main Menu of the system or CHANGE PASSWORD... -
Page 19: Miscellaneous Setup - Video Loss Sound
User’s Manual 4.10.9 Miscellaneous Setup – Video Loss Sound This option allows your DVR to emit a high pitch MISCELLANEOUS SETUP notification sound when the signal between the camera and the DVR is loss. Press the [SEL] buttons to Select CHANGE PASSWORD SET TIME “on”... - Page 20 User’s Manual IP Address: Enter the IP Address that you have NETWORK SETUP reserved at the beginning of this section into this field to <00:11:22:33:44:55> MAC ADDRESS [STATIC] be the unique address of your DVR in your local IP ALLOCATION [192.168.1.100] IP ADDRESS [255.255.255.0]...
-
Page 21: Network Setup - Global Access (Connected Directly To Modem)
User’s Manual HTTP Port:This port number is used to communicate NETWORK SETUP with your PC client. The default value is 80 (can be <00:11:22:33:44:55> MAC ADDRESS changed to between 1024 to 49151) [STATIC] IP ALLOCATION [192.168.1.100] IP ADDRESS [255.255.255.0] SUBNET MASK [192.168.1.1] GATEWAY [0.0.0.0]... - Page 22 User’s Manual 2. Write down the: IP Address provided by your ISP (if your ISP is using Static IP), Subnet Mask, Gateway Address, DNS Address(es) provided by your ISP of your DVR for future reference when configuring the DVR. MAC Address: is the unique ID of your DVR. Your NETWORK SETUP router or other computer in your network can use the <00:11:22:33:44:55>...
- Page 23 User’s Manual Gateway: Set this to the IP Address of your router. You NETWORK SETUP do not need to configure this field if your ISP uses <00:11:22:33:44:55> MAC ADDRESS [STATIC] DHCP. IP ALLOCATION [192.168.1.100] IP ADDRESS [255.255.255.0] SUBNET MASK [192.168.1.1] GATEWAY [0.0.0.0] DNS1 ADDRESS...
-
Page 24: Network Setup - Global Access (Connected Through A Router Or Firewall)
User’s Manual DDNS SETUP :If your ISP is using DHCP or Dynamic IP DDNS SETUP Address, you will need to apply for a Dynamic DNS [WWW.DynDNS.com ] account and register a Domain Name with one of the DDNS PROVIDER DDNS USER NAME DDNS PASSWORD known DDNS provider. - Page 25 User’s Manual IP Allocation: Set this option to STATIC IP. NETWORK SETUP <00:11:22:33:44:55> MAC ADDRESS [STATIC] IP ALLOCATION [192.168.1.100] IP ADDRESS [255.255.255.0] SUBNET MASK [192.168.1.1] GATEWAY [0.0.0.0] DNS1 ADDRESS [0.0.0.0] DNS2 ADDRESS HTTP PORT USER SETUP DDNS SETUP (HTTP PORT) 80, 1024-49151 ) MOVE (SEL) SELECT (MENU) EXIT IP Address: Enter the IP Address that you have NETWORK SETUP...
- Page 26 User’s Manual DNS Address:Set the DNS (Domain Name Server) NETWORK SETUP Address to the IP Address of your router <00:11:22:33:44:55> MAC ADDRESS [STATIC] IP ALLOCATION [192.168.1.100] IP ADDRESS [255.255.255.0] SUBNET MASK [192.168.1.1] GATEWAY [0.0.0.0] DNS1 ADDRESS [0.0.0.0] DNS2 ADDRESS HTTP PORT USER SETUP DDNS SETUP (HTTP PORT) 80,...
- Page 27 User’s Manual Port Forwarding To access the DVR from a remote computer over the internet via internet browser (Internet Explorer). 1. Forward Port 80 and Port 9000 on the router attached to the DVR, to the IP address of the DVR. *If you can’t use HTTP Port 80 due to use or your Internet Service Provider is blocking it, use a different port like 1024 as the HTTP PORT.
- Page 28 User’s Manual Accessing the DVR through Internet Explorer Browser (IE): Once the network settings on the DVR match the settings of your router, and you have forwarded the ports needed by the DVR (for remote access over the internet), you need to modify your browser controls.
- Page 29 User’s Manual 3. Enabling all Active X Controls On this page scroll down to the ActiveX Controls and Plug Ins, and set all to either PROMPT or ENABLED. To connect to the DVR from a remote computer, you would then open an Internet Explorer browser window and enter the Internet IP of your router that you received by going to www.myipaddress.com.
-
Page 30: Language
User’s Manual 4.12 Language You can change the OSD language from the default MAIN MENU English to other languages. CAMERA SETUP RECORD SETUP RECORD FRAMERATE VIDEO QUALITY HIGH RECORD SCHEDULE SENSOR SETUP HARD DRIVE SETUP MISCELLANEOUS SETUP NETWORK SETUP LANGUAGE ENGLISH RESET MENU MOVE (SEL)SELECT (MENU)EXIT... -
Page 31: Chapter 5: Record
User’s Manual CHAPTER 5: RECORD 5.1 Start Recording Press the [●REC] button to start the recording according to the record schedule you have set. You will see text in the bottom left portion of the screen indicating that you have started the record feature. -
Page 32: Stop Recording
User’s Manual 5.3 Stop Recording Press the [■STOP] button to stop recording. If password protection function is enabled the system will prompt you to input your password. You must input the correct password to stop the recording function 5.4 Estimated Recording Length Estimated record time based on 160GB HDD Standard Quality... -
Page 33: Chapter 6: Playback
User’s Manual CHAPTER 6: PLAYBACK 6.1 Playback Control 1. To enter playback control, ensure that you have stopped recording by pressing the stop button on the remote or DVR. 2. Press the [►] PLAY button to go into PLAYBACK mode. The newest record will begin playing immediately 3. -
Page 34: Chapter 7: Usb Programming
User’s Manual CHAPTER 7: USB PROGRAMMING 7.1 Software Installation 1. Insert driver CD to your CD-ROM drive 2. Open CD directory 3. Double Click “DxClient2.7.1-ENG” 4. Follow the setup wizard to complete the installation. 7.2 Program Interface 1、PTZ Control 11、Convert Streams to AVI file Function) 2、Zoom in,Zoom out 12、Fast Rewind - 60s... -
Page 35: Program Running
User’s Manual 5、NET Play Mode 15、Stop 6、Event List 16、Playback 7、Program Local 17、Fast Forward - 10s Setting 8、Remote DVR 18、Fast Forward - 60s Control 9、 Shift Storage Device 19、Playback Slider 10、Capture Image 20、Audio Slider 7.3 Program Running 7.3.1 HDD Play Mode System will detect HDD automatically when you connect DVR to your PC with USB cable. - Page 36 User’s Manual Press the “ ” button to proceed the program local settings. E.g.: Save route settings for capture image and AVI record files Press the “ ” button to play video.
-
Page 37: File Play Mode
User’s Manual 7.3.2 FILE Play Mode (Only when you insert a USB memory stick into your PC.) Press the “ ” button to open a folder, select the file which you want to Play and double click to play video. -
Page 38: Net Play Mode
User’s Manual 7.3.3 NET Play Mode This mode allows you to remote control your DVR via internet or Intranet. Press the “ ” button to pop up a login window. Fill in Host name, Host Port, User Name and Password of the DVR that you want remotely access and then click Login to enter the main page. - Page 39 User’s Manual Note: If accessing your DVR for the first time, please allow to install IE software package.( All the selection relative to the package installation should be set to “on” after entering the below steps: Tools” ---> “Internet Option” ---> “Security” ---> “User- defined Level” ---> “Security Setting”). Enter the IP address, Port number, user name and password of remote DVR to login in.
-
Page 40: Chapter 8: Specifications
User’s Manual CHAPTER 8: SPECIFICATIONS Items Descriptions Video Standard NTSC Video Input / 4-Channels /1-Channel Output Audio Input / 1-Channel/1-Channel Output NTSC:720X480@30fps(Each CH) Resolution Pre-view PAL:720X576@25fps(Each CH) Full-D1, 1-Channel/4-Channel/1-Channel Features Playback display NTSC:720X240@60fps(Total) Resolution PAL:720X288@50fps(Total) Recording Features Variable Frame Rate Quality 4 Level (Highest, High, Normal, Low) Audio... - Page 41 Purchaser’s cost (no CODs) to the address below, with the original proof of purchase receipt. In its sole discretion, Night Owl will either repair or replace the Product at no additional cost to the Purchaser. Any replacement Product (or parts) will be covered by the same warranty as the original Product through the expiration date of the original warranty period.
- Page 42 User’s Manual salespeople, retailers, dealers or distributors to the contrary are not authorized by Night Owl, and do not affect this provision of this warranty. Returns under this Warranty In order to obtain service, please make sure that you have registered your product on-line no later than thirty (30) days after purchase at www.NightOwlSP.com...
- Page 43 User’s Manual...
- Page 44 User’s Manual...
Need help?
Do you have a question about the Tiger-4500 and is the answer not in the manual?
Questions and answers