
Related Manuals for Fujitsu PlasmaVision P42HHA30WS


Summary of Contents for Fujitsu PlasmaVision P42HHA30WS
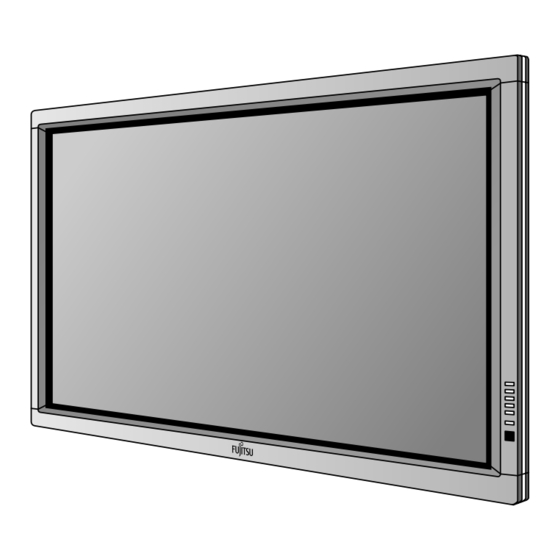
- Page 1 P42HHA30WS F U J I T S U G E N E R A L P r o p r i e t a r y C o p y P r o h i b i t e d...
-
Page 2: Table Of Contents
C O N T E N T S IMPORTANT INFORMATION ........2 SPECIFICATIONS . -
Page 3: Important Information
IMPORTANT INFORMATION WARNING : TO REDUCE THE RISK OF FIRE AND ELECTRIC SHOCK, DO NOT EXPOSE THIS PRODUCT TO RAIN OR MOISTURE. Please use a screen saver to prevent burning of an after-image on the screen. Electrical energy can perform many useful functions. This unit has been engineered and manufactured to assure your personal safety. - Page 4 Do not attempt to service this unit yourself as opening or removing covers may expose you to dangerous voltages and other hazards. Have all service done by qualified service personnel. Unplug this unit from the wall outlet and have it serviced by qualified service personnel in the following cases: a) If the power supply cord or plug is damaged.
-
Page 5: Specifications
SPECIFICATIONS 110-240V, 50/60Hz 2 User's manual Power requirement Accessories Remote controller Current drain 4.0-1.95A Batteries (Type AA x 2) Display panel UC type Power cord Screen size 92.2(W) X 52.2(H) [cm] Ferrite core big (2) 36.3(W) X 20.6(H) [inch] Ferrite core small (2) Aspect ratio 16 : 9 Number of pixels... -
Page 6: Setting Signals
SETTING SIGNALS This display can store parameter settings for eight additional signals for RGB. To do this, select the desired signal and follow "RGB MODE ADJUSTMENT" in the manual to adjust the parameters. When you finish, the settings will be automatically stored. FACTORY SET SIGNALS (RGB MODE) Main corresponding signals (RGB mode) Display (dots x lines) - Page 7 FACTORY SET SIGNALS (Component video mode) FACTORY SET SIGNALS (Video, S-video mode) Horizontal Vertical Horizontal Vertical Signal Signal frequency (kHz) frequency (Hz) frequency (kHz) frequency (Hz) 15.73 59.94 SDTV 480i 15.73 59.94 NTSC 15.63 50.00 SDTV 576i 15.63 50.00 31.47 59.94 SDTV 480p 15.63...
- Page 8 SCART TERMINAL Pin No. Input Signal Pin No. Input Signal Pin No. Input Signal Red/chrominance Right audio Green ground Audio ground Green Composite video ground Blue ground Left audio Red ground Composite video/Y Blue Ground - 7 -...
-
Page 9: Connection
CONNECTION EXAMPLE OF CONNECTION TO EXTERNAL COMPONENTS Speaker (optional) Speaker Display Remote control Satellite tuner DVD player - 8 -... - Page 10 Model : P42HHA30W Connect the video signal cable to either the S-video input terminal or the video input terminal. To video output To S-video output To S-video input To audio outputs To audio inputs To video input Bottom of Display - 9 -...
-
Page 11: Dvd Player
DVD PLAYER Connect the video signal cable to the component video input terminal, S-video input terminal, or the video input terminal. If the component to be connected is equipped with component video output terminal, it is recommended to connect to the component video terminal. - Page 12 As the cable for connecting a PC differs with the PC model, please consult your dealer for information on the right cable to purchase. The PC can be connected to either the front side or the rear side, whichever is most convenient. To RGB output (DVI-D) To RGB output (mD-sub) To audio output...
-
Page 13: Part Names And Functions
PART NAMES AND FUNCTIONS DISPLAY SECTION – FRONT Power indicator lamp (Right section) This lamp shows the state of the power supply. Lit (red): Stand-by Lit (green): Power ON Lit (orange): Power saving (DPMS: Power saving function) mode ON Flashing (red): Malfunction (Flashes differently depending on the type of malfunction.) Remote control signal receiver Receives signals from the remote control. - Page 14 Model : P42HHA30W DISPLAY SECTION – LOWER PART /I power switch When pressed while in the "OFF" state, the power indicator lamp lights and the display is placed in the "ON " state, and the power can be turned "ON" or "OFF" by the remote control or on the control panel of the display. When pressed while in the "ON "...
- Page 15 S-Video input terminal (VIDEO2 INPUT) Connect this terminal to the S-video output terminal of your VCR. Audio3 input terminal (AUDIO3 INPUT) Audio2 input terminal (AUDIO2 INPUT) Audio1 input terminal (AUDIO1 INPUT) Connect this terminal to the audio output terminal of your VCR, etc. External speaker output terminal (EXT SP) Connect this terminal to the optionally available speaker.
-
Page 16: Remote Control
Model : P42HHA30W/E REMOTE CONTROL button MUTE button Switches between power ON and standby Temporarily mutes the sound. state. PICTURE MEMORY button DISPLA Y OFF button Recalls the PICTURE MEMORY. For showing on-screen-information. WIDE button PICTURE MODE button Switches the screen over to a desired wide Switches the picture mode. -
Page 17: Video Mode Adjustment
VIDEO MODE ADJUSTMENT REMOTE CONTROLLER Position Horizontal "-" {-30 to +30} MENU PICTURE Contrast VIDEO 1 Brightness {-60 to +60} ENTER VIDEO 2 Color {-60 to +60} VIDEO 3 Tint {-30 to +30 (Comp. video -60 to +60)} RGB 1 Horizontal "+"... -
Page 18: Rgb Mode Adjustment
RGB MODE ADJUSTMENT REMOTE CONTROLLER Size Width "-" {-30 to +30} MENU PICTURE Contrast VIDEO 1 Brightness {-60 to +60} ENTER VIDEO 2 Color {-60 to +60} VIDEO 3 {-60 to +60} Tint RGB 1 Sharpness {-4 to +4} Width "+" RGB 2 Natural Picture Mode... -
Page 19: Troubleshooting Using Led And Osd
TROUBLESHOOTING USING LED AND OSD 1. Display (1) OSD Three kinds of error messages are displayed on the screen, and the power is turned off 10 sec later. (2) LED LED error is displayed continuously after the power is turned off. 2. -
Page 20: Troubleshooting Flowchart
TROUBLESHOOTING FLOWCHART LED lamp blinking Note : 1. Since a voltage is applied to the Main Power PCB heat sinks while the set is operating, do not touch the heat sinks. 2. If the Main Power PCB insulation sheet is not Turn power on and check installed when assembling, the Main Power state of lamp. - Page 21 Check 1 Power supply protector operated Power lamp : Flashing 1 time in Red. Start Flashing 1 time in Green. (1) Pull out Power Cord Plug and disconnect connectors CN6, CN23, CN33, CN42 and CN52 on Main Power PCB. Connect pin 1 and pin 13 of CN352 through a 1/4W, 1K Ω resistor. Connect pin 1 of CN352 and pin 5 of CN509 through a 1/4W, 1K Ω...
- Page 22 - 21 -...
- Page 23 Check 4 OSD is not displayed Power lamp : Lighted green. (10 sec or more) Start Is picture Signal processing Replace Main/Digital displayed on-screen circuit faulty. PCB Assy. when signal input? Is voltage at Power Supply Replace Main each connector on circuit faulty.
- Page 24 Check 5 Video 1/ Video 2 input signal are abnormal. Power lamp : Lighted green Start (10 sec or more) Can this unit Microcomputer select only RGB mode? peripheral circuit faulty Is picture displayed on screen Video PCB Assy normal when new video faulty.
- Page 25 Check 6 Video 3 / Video 4 are abnormal. Power lamp : Lighted green Start (10 sec or more) Can this unit select Install Video PCB only RGB mode ? Unit faulty. Is picture displayed on screen Video PCB Unit normal when new faulty.
- Page 26 - 25 -...
-
Page 27: Voltage Of Each Connector
VOLTAGE OF EACH CONNECTOR 1. How to measure the voltages on the Main Power Supply PCB in protect mode. Since a voltage is applied to the Main Power PCB heat sinks while the set is operating, do not touch the heat sinks. After the power cord plug was pulled out, do not pull out the connector on the Main Power PCB until the Green LED (D531: Discharge check LED) turns off. -
Page 28: Sand
AND V ADJUSTMENT When the Main Power Supply PCB and PDP panel are replaced, Vs and V must be adjusted. Within 3 minutes after power on. Preparation Adjustment : Adjust the V and V in the no-signal state. Check points : Refer to the drawing shown below. -
Page 29: General Connection Diagram
- 28 -... - Page 30 - 29 -...
-
Page 31: Disassembly
DISASSEMBLY 1. Removing the Rear Case and layout of Main PCB 1. Remove the 27 screws and Rear Case. * Layout of Main PCB. A: Main Power PCB B: Video/Audio PCB C: Main/Digital PCB - 30 -... - Page 32 2. Removing the Main Power PCB 1. Remove the Rear Case. 2. Take away the insulator. 3. Disconnect the 8 circled connector. 4. Remove the 4 screws and Main Power PCB. * View after Main Power PCB removed. - 31 -...
- Page 33 3. Removing the Video/Audio PCB 1. Remove the 5 circled screws. 2. Slide the module in the direction of the arrow. 3. Remove the 12 circled screws and shield option TOP 4. Remove the 4 circled screws and Video/Audio PCB * View after Video/Audio PCB removed.
- Page 34 4. Removing the Main/Digital PCB 1. Remove the Video/Audio Unit. (Refer to Page 32) 2. Remove the 15 sircled screws and shild main TOP. 3. Disconnect the 9 circled connector. 4. Remove the 4 circled screws and Main/Digital PCB. * View after Main/Digital PCB removed. - 33-...
- Page 35 5. Removing the PDP Unit (1 of 2 ) 1. Remove the Rear Case, Video/Audio Unit and Main/Digital Unit. 2. Disconnect the 1 circled connector. 3. Remove the 6 circled screws and shield main bottom. 4. Disconnect the 1 circled connector. 5.
- Page 36 5. Removing the PDP Unit (2 of 2) 6. Remove the Base Frame from the Front Case together with the panel and PCBs. * View after the Front Case Panel Unit and PCBs were removed. 7. Remove the Main Power PCB. 8.
- Page 37 6. Removing the Bezel Front and Optical Filter (1 of 2) 1. Remove the PDP Unit and 8 circled screws. (To remove the PDP Unit, refer to Page 35) 2. Pull the Bezel Front in the direction of arrow. (Repeat the same procedure on the other 3 locations.) * View after the both top and bottom Bezel Front removed.
- Page 38 6. Removing the Bezel Front and Optical Filter (2 of 2) * View after Bezel Front was removed. - 37 -...
- Page 39 7. Removing the Key Switch PCB 1. Remove the PDP Unit. 2. Disconnect the 1 circled connector. 3. Remove the 2 screws and Key Switch PCB Unit. 4. Remove the 2 screws. 5. Remove the Key Switch PCB. - 38 -...
-
Page 40: Parts List
PARTS LIST Ref.no. Description P42HHA30WS P42HHA30ES Cabinet Bezel Front Top 8114509006 Bezel Front Btm 8114510002 Bezel Front L 8117468003 Bezel Front R 8117469000 Rear Case 8117131006 Badge 8112118002 Gasket Filter L/R 8114537009 Gasket Filter T/B 8114536002 Electric Fan Motor 8900298008... -
Page 41: Transpor Tation And Handling Restrictions
TRANSPOR TATION AND HANDLING RESTRICTIONS Transportation Bad loading Don't load the plasmavision on a truck as shown in the drawing. Handling Never topple. Never drop. Drop Over 30 cm Floor Don't hold the surface of the optical filter. - 40 -... - Page 42 Don't stack the plasmavision over three units high. Example of good transportation and handling Good loading Load the plasmavision as shown above. 3 3 3 3 - 41 -...
- Page 43 FUJITSU GENERAL CUSTOMER SERVICE LIMITED GLOBAL SUPPORT DIVISION OCTOBER 2003...
Need help?
Do you have a question about the PlasmaVision P42HHA30WS and is the answer not in the manual?
Questions and answers