
Related Manuals for Honda TruGear HRC7113


Summary of Contents for Honda TruGear HRC7113
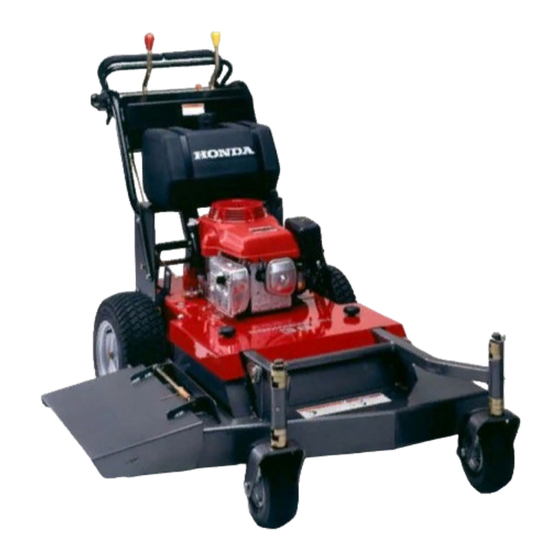
- Page 1 OWNER’S MANUAL ® HRC7113 TruGear Mid-size Commercial Mower © 1998 American Honda Motor Co., Inc. – All Rights Reserved...
- Page 2 The engine exhaust from this product contains chemicals known to the State of California to cause cancer, birth defects, or other reproductive Keep this owner’s manual handy, so you can refer to it at any time, and make sure the manual stays with the commercial mower if you sell it. This owner’s manual is considered a permanent part of the commercial mower and should remain with the mower if resold.
- Page 3 Congratulations on your selection of a Honda commercial you will be pleased with your purchase of one of the finest lawn mowers on the market. We want to help you get the best results from your new mower and to operate it safely.
-
Page 4: A Few Words About Safety
A FEW WORDS ABOUT SAFETY Your safety and the safety of others is very important. And using this lawn mower safely is an important responsibility. To help you make informed decisions about safety, we have provided operating procedures and other information on labels and in this manual. This information alerts you to the potential hazards that could hurt you or others. -
Page 5: Table Of Contents
Contents A Few Words About Safety. CONTENTS. MOWER SAFETY. Safety Information ... Important Message to Employers. Safety Label Locations. CONTROLS & INDICATORS Locations. Controls. Indicators. STORING TRANSPORTING your Mower ... Transporting Storage Preparation. Storage precautions. Removal From Storage BEFORE MOWING ... Check the Mower Check the Lawn ... -
Page 6: Blade Belt Adjustment
INTRODUCTION Sparkplug.. Valve Clearance. Carburetor. Throttle Cable ... Points..Lubrication Control Linkage Adjustment Brake Lining Thickness Tires...3 Cutting Height ... Blades...3 Deck Belt Adjustment And Replacement. Blade Brake Adjustment Blade Belt Adjustment And Replacement Drive Belt Replacement. TROUBLESHOOTING . . . , ......45 Engine...4 Mower...4 SPECIFICATIONS... -
Page 7: Safety Information
SAFETY INFORMATION Most accidents with walk-behind instructions in this manual and on the mower. The most common hazards, according to accident statistics, are discussed below, along with the best way to protect yourself and others. Avoid Rotating Blades A rotating blade can cause serious cuts and even amputate fingers, hands, toes, or feet. -
Page 8: Mower Safety
MOWER SAFETY IMPORTANT MESSAGE TO EMPLOYERS As an employer, you have special responsibilities Before you ask anyone to operate this mower, you need to determine whether the person is old enough, large enough, and strong enough to safely handle and control the mower. -
Page 9: Safety Label Locations
MOWER SAFETY SAFETY LABEL LOCATIONS These labels warn you of potential hazards that can cause serious injury. Read them carefully. If a label comes off or becomes hard to read, contact vour Honda Commercial Mower dealer for a replacement. - Page 10 MOWER SAFETY...
-
Page 11: Locations
Controls & Indicators LOCATIONS ENGINE OIL FILL MOWER DECK SERIAL NUMBER TRANSMISSION SHIFT LEVER BLADE CONTROL- CARBURETOR FUEL VALVE DECK HEI LEVER FUEL FILLER FRONT WHEEL ADJUSTMENT SUPPORT DIRECTION CONTROL SPACERS LEVERS FORWARD PRESENCE LEVERS REVERSE PRESENCE LEVER... -
Page 12: Controls & Indicators
CONTROLS & INDICATORS CONTROLS Fuel Valve This valve is located on the carburetor allows fuel to flow to the engine. Push it toward the engine to to allow fuel to flow, or pull it outward for OFF. The fuel valve located at the fuel tank should be used to shut off the fuel only when changing the fuel filter. -
Page 13: Operator Presence Levers
Operator Presence Levers The three operator presence levers are part of the safety interlock system. There is a lever at each forward direction control lever and one above the reverse support bar. When the blade control is Before shifting into reverse, you must hold the reverse presence lever down. In either case if you don’t hold the appropriate Parking Brake The parking brake locks the brakes... - Page 14 CONTROLS & INDICATORS...
-
Page 15: Transporting And Storing
Transporting TRANSPORTING YOUR MOWER Use a loading ramp to get the mower on and off the vehicle. Be sure both the ramps and vehicle are able to support the weight of the mower and operator. When the mower is in position, turn the fuel valve fuel leaking. - Page 16 TRANSPORTING AND STORING After washing the mower, wipe dry all accessible surfaces. Start the engine outdoors, and let it run until it reaches normal operating temperature to evaporate any water remaining on the engine. While the engine is running, hold an operator presence lever and operate the blade control lever to expel water from the blade pulleys, spindles, and other mower deck areas.
- Page 17 Draining the Fuel Tank and Carburetor 1. Loosen the carburetor drain screw and turn the fuel valve Gasoline is highly flammable and explosive. You can be burned or seriously injured when handling fuel. Keep heat, sparks, and flame away. Handle fuel only outdoors. Wipe up spills immediately.
-
Page 18: Storage Precautions
TRANSPORTING AND STORING STORAGE PRECAUTIONS If your mower will be stored with gasoline in the fuel tank and carburetor, it is important to reduce the hazard of gasoline vapor ignition. Select a well-ventilated storage area away from any appliance that operates with a flame, such as a furnace, water heater, or clothes dryer. -
Page 19: Before Mowing
Before Mowing CHECK THE MOWER For your safety and the service life of your equipment, always inspect your mower before using it. Before beginning your pre-operation The mower is parked on a level surface. The blade control lever is disengaged NEUTRAL. -
Page 20: Check The Lawn
BEFORE MOWING Tire Pressure Check the tires for proper inflation (page 36 ). CHECK THE LAWN For your safety and the safety of others, always inspect the area before mowing. Objects Anything which can be picked up by the blades and thrown is a potential hazard to you and others. -
Page 21: Operating The Mower
Operating The Honda Mid-Size Commercial mower designed to enhance the productivity of a lawn-care professional. need a complete understanding with its controls to safely realize the full potential of this mower. Read this section completely before operating the mower. Take time to familianze yourself with the controls and how they operate. - Page 22 OPERATING THE MOWER Moving Forward Rest your finger tips on the support bar while you squeeze the direction control levers forward. As the levers move forward, they apply tension to the drive belts and power to the wheels. When the levers are fully forward, the belts are fully engaged.
-
Page 23: Starting To Mow
Making an Emergency Stop Grab the forward direction control levers and pull. STARTING TO MOW Objects hidden in the lawn can be thrown by the mower blades. Thrown objects can cause serious injury. . Clear lawn of all debris before mowing. Do not operate the mower without either the dis- charge chute, mulching plug, or the entire grass catcher in place. -
Page 24: Mowing Tips
OPERATING THE MOWER MOWING TIPS Your mower is designed to trim closely on the left hand side and discharge clippings evenly on the right hand side. For best cut quality, run the engine with the throttle lever in Always mow in daylight, or under good artificial light. Mowing on Slopes Mow across slopes, not up and down. -
Page 25: Maintenance & Adjustments
Maintenance THE IMPORTANCE OF MAINTENANCE Good maintenance is essential for safe, economical, will also help reduce air pollution.. Incorrect maintenance, problem before operation, can cause a malfunction in which you can be seriously hurt or killed. Always follow the inspection and maintenance recommendations manual. -
Page 26: Maintenance And Adjustments
MAINTENANCE & ADJUSTMENTS Safety Precautions Make sure the engine is off before you begin any maintenance will eliminate several potential hazards: - Carbon monoxide poisoning from engine exhaust. adequate ventilation whenever you operate the engine. - Burns from hot parts. Let the engine and exhaust system cool before touching. -
Page 27: Replacement Parts
Tampering and Altering Tampering with or altering the emission control system may increase emissions beyond the legal limit. Among those acts that constitute tampering are: Removal or alteration of any part of the intake, fuel, or exhaust systems. Altering or defeating the governor linkage or speed-adjusting cause the engine to operate outside its design parameters. -
Page 28: Maintenance Schedule
MAINTENANCE & ADJUSTMENTS MAINTENANCE SCHEDULE ‘Service more frequently when used in dusty areas 2Replace paper filter element only *First oil change only... -
Page 29: Air Cleaner
AIR CLEANER Check that the air cleaner elements are clean and in good condition. A dirty air cleaner will restrict air flow to the engine, reducing performance. cleaner will allow dirt to enter the engine, causing rapid engine wear. Remove the wing nut to remove the air cleaner cover. If the foam element appears clean over more than half its surface, it does not need cleaning. -
Page 30: Fuel
MAINTENANCE & ADJUSTMENTS FUEL Fuel tank capacity: 24.6 liters, 6.5 gallons Refueling Remove the cap on the tank and check the fuel level. Refuel carefully to avoid overfilling or spilling fuel. There should be no fuel in the filler neck. Gasoline is highly flammable and explosive. -
Page 31: Points
Changing the Fuel Filter Change the fuel filter at the recommended 1. Close the fuel shut-off valve at the fuel tank. 2. Place a container under the filter to catch any spilled fuel. 3. Squeeze the hose clamps and remove the lines from the filter. -
Page 32: Recommended Oil
MAINTENANCE & ADJUSTMENTS Recommended Use a high-detergent, premium quality 4-stroke engine oil certified to meet API Service Classification SJ or equivalent. - 20 - 20 - 10 AMBIENT SAE 1 OW-30 is recommended shown in the chart may be used when the average temperature within the indicated range. -
Page 33: Additional
Changing the Engine Oil Filter 1. Drain the engine oil. 2. Remove the oil filter and let the remaining oil drain out. 3. Correctly dispose of the old oil filter. 4. Clean the filter base with a clean cloth. 5. Coat the O-ring of the new filter with clean engine oil. -
Page 34: Sparkplug
MAINTENANCE & ADJUSTMENTS SPARK PLUG Recommended Types NGKBPRSES NDWlGEPR-U Spark plugs of the wrong size or incorrect heat range can cause engine damage. Checking the Spark Plug For good performance, the spark plug should have the correct gap and be free of deposits. -
Page 35: Valve Clearance
VALVE CLEARANCE Adjust the valves at the recommended Valve clearance inspection and adjustment must be done with the engine cold. 1. Remove the valve cover. 2. Set the piston at top dead center of the compression stroke (both valves will be fully closed). -
Page 36: Carburetor
MAINTENANCE & ADJUSTMENTS CARBURETOR Perform this adjustment if the idle is slow or rough and you’re sure the air cleaner and spark plug are in good condition. 1. Start the engine in an area with adequate ventilation to avoid carbon monoxide poisoning. Allow the engine to warm to normal operating temperature. -
Page 37: Lubrication Points
LUBRICATION POINTS, Grease: NGLI #2 Lithium Base EP Follow the diagram to lubricate these fittings. Caster wheels (2) Caster pivots (2) Pulley pivots (1) . Spindles (2 or 3) Do not over grease the spindle. Use a long narrow screwdriver to check for grease between the pulley and the deck. -
Page 38: Brake Lining Thickness
MAINTENANCE & ADJUSTMENTS 6. To adjust the gap, remove the cotter pin and washer from the brake rod swivel. Screw the swivel in or out on the rod to set the desired gap. (The swivel always goes into the forward hole.) Install the washer and a new cotterpin. -
Page 39: Cutting Height
CUTTING HEIGHT The cutting height of your mower can be easily adjusted from 38 mm to 115 mm (1% to 4% inches). Always shut off the engine and remove the key before adjusting cutting height. Be sure to adjust both the front and rear wheels to the same cutting height to get the best performance and cut quality. -
Page 40: Blades
MAINTENANCE & ADJUSTMENTS BLADES It is important for your safety and the safety of others that you inspect the blades for condition and correct installation before operating the mower. A worn, cracked, or damaged blade can break and pieces of the broken blade can become dangerous projectiles. -
Page 41: Installing The Blades
5. Use a block of wood to prevent the blade from turning and remove the bolt washer, blade, and spacer. picq Do not hold the nut on the top of the spindle. Loosening the nut will affect the spindle bearing preload. 6. -
Page 42: Deck Belt Adjustment And Replacement
MAINTENANCE & ADJUSTMENTS DECK BELT ADJUSTMENT Replace the deck belt if it is worn, frayed, or glazed. You will need to remove the deck belt to replace the transmission belt. Whenever you remove and replace the deck belt, check the adjustment the belt guides, belt tension, and the blade brake. -
Page 43: Replace Belt
Replace Belt 1. Move the blade control cover. 2. Loosen the two nuts on the belt guide at the deck pulley. 3. Starting at the engine pulley, lift the belt out of the pulley grooves. 4. Install the new belt by first setting it in the deck pulley, then the tensioner pulley, and finally the engine pulley. -
Page 44: Blade Belt Adjustment And Replacement
MAINTENANCE & ADJUSTMENTS BLADE BELT ADJUSTMENT Replace the blade belt if it is worn, frayed, or glazed. Moving belts and pulleys can cause serious injuries. Do not operate engine with the belt cover(s) removed. Before removing belt cover(s) for maintenance, remove key from ignition switch and disconnect the spark plug lead. -
Page 45: Drive Belt Replacement
3. From under the deck, remove the nuts from the blade brake pivot brake rod stay [cl. 4. Remove the deck belt from the pulley. 5. Remove the blade belt from the right (discharge side) pulley the remaining pulley(s). 6. The tensioner spring anchor bolt 7. - Page 46 MAINTENANCE & ADJUSTMENTS Install Viewed from above the mower ENGINE PULLEY LEFT TRANSMISSION BELT GUiDE The left-side belt is longer than the right-side. 1. Slip the left-side belt over the engine pulley, then the tensioner pulley, and finally the transmission pulley.
-
Page 47: Fuels
Troubleshooting ENGINE Doesn’t Start The key must be Blade control must be OFF. Transmission must NOT be in Fuel tank should be full of fresh fuel (page 28). Fuel filter should be clean and free of obstructions Both fuel valves should be on (page 10). Throttle should be in CHOKE Spark plug connector should be firmly attached to the spark plug. - Page 48 TROUBLESHOOTING Cuts Poorly Throttle should be in Cutting height must be at the same setting at front and rear (page 37). Blades should be in good condition (page 38). Mower deck should be free of grass accumulation. Deck and blade belts should be in good condition and at correct tension (page 40 &...
-
Page 49: Specifications
Specifications MOWER Mower Deck Length Width (chute folded) Height Dry weight Maximum speed: 1 st Tire Size: Drive wheel Caster wheel Tire Pressure: Drive wheel Caster wheel Mowing Height ENGINE Model Horsepower @ rpm Maximum no-load governed speed Idle speed Ignition system Valve clearance: Intake... -
Page 50: Additional Information
Almost all problems are solved in this way. If you are not satisfied with the decision made by the dealership’s contact Honda Power Equipment Customer Service Office. You can write to: Honda Power Equipment Division Customer Service Off ice... -
Page 51: Current Customer Service Contact Information
When you write or call, please provide the following information: • Model and serial numbers • Name of the dealer who sold the Honda power equipment to you • Name and address of the dealer who services your equipment •... -
Page 52: Oxygenated Fuels
OXYGENATED FUELS Some conventional gasolines are being blended with alcohol or an ether compound. These gasolines are collectively referred to as oxygenated meet clean air standards, some areas of the USA and Canada use oxygenated fuels to help reduce emissions. If you use an oxygenated unleaded and meets the minimum octane rating requirement. -
Page 53: Additional Information
For use at low altitudes, have an authorized servicing dealer return the carburetor to original factory specifications. SPARK ARRESTER SERVICE (OPTIONAL Your lawn mower engine is not factory-equipped areas, it is illegal to operate an engine without a spark arrester. Check local laws and regulations. - Page 54 Index control linkage ..35 adjustment, air cleaner air filter ... for ..50 altitude, modifications belt blade adjustment ..42 blade replacement ..42 deck ..41 deck replacement deck tension adjustment ..40 ..43 drive replacement blade brake ...
- Page 55 INDEX information label locations ... message to employers ... 6 safety maintenence schedule, maintenence ..26 shifting gears ... shop manual slopes, mowing on ... Spanish manuals spark arrester ... specifications speed, adjusting starting the engine steering the mower ... stopping normal stop ...
- Page 57 POM52733CVR 31VG5600 50.2002.04 Kinko’s Printed on PRINTED IN U.S.A. 00X31-VG5-6000 Recycled Paper...
Need help?
Do you have a question about the TruGear HRC7113 and is the answer not in the manual?
Questions and answers