Table of Contents
Advertisement
Quick Links
Unit Serial Number:
_______________________________________
Customer Name:
_______________________________________
Address:
_______________________________________
_______________________________________
Date of Purchase:
_______________________________________
Purchased From:
Dealer Name:
_______________________________________
Address:
_______________________________________
_______________________________________
IMPORTANT NOTE:
In order to receive the full five year product warranty, please mail
this completed form together with a copy of your sales receipt to
WARRANTY REGISTRATION FORM
REX II
1
Advertisement
Table of Contents

Related Manuals for Balanced Audio Technology REX II


Summary of Contents for Balanced Audio Technology REX II
-
Page 1: Important Note
REX II WARRANTY REGISTRATION FORM Unit Serial Number: _______________________________________ Customer Name: _______________________________________ Address: _______________________________________ _______________________________________ Date of Purchase: _______________________________________ Purchased From: Dealer Name: _______________________________________ Address: _______________________________________ _______________________________________ IMPORTANT NOTE: In order to receive the full five year product warranty, please mail... - Page 2 Balanced Audio Technology at the address below, within thirty days of purchase. Failure to do so will result in the product being warrantied for one year from the date of manufacture. 1300 First Stat Blvd. Suite A Wilmington DE 19804 Tel: 302-999-8855 Fax: 302-999-8818...
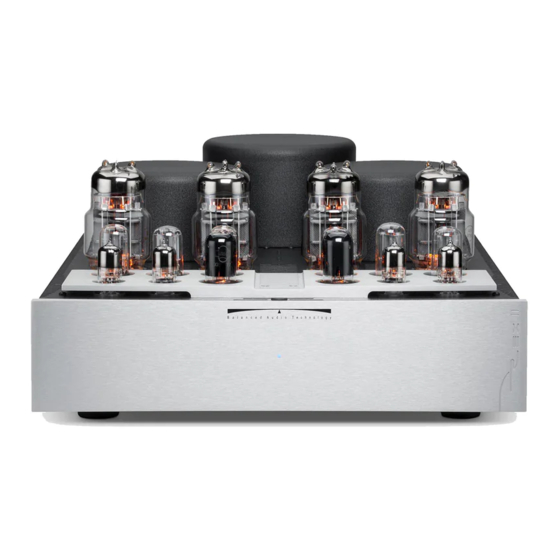
- Page 3 REX II Vacuum Tube Balanced Stereo Preamplifier Owner's Manual 1300 First Stat Blvd. Suite A Wilmington DE 19804 Tel: 302-999-8855 Fax: 302-999-8818...
-
Page 4: Table Of Contents
WARRANTY Vacuum Tube Current Sources in REX II Your REX II incorporates a unique feature that allows you to optimize its sound to tailor it to your individual taste or system requirements. The Vacuum Tube current sources incorporated in the REX II, being part of the signal gain stage, have a direct effect on the unit’s sound. -
Page 5: Current Sources
6C33 tube, and provides, in our view, the best combination of sonic characteristics and electrical performance. However, the unique design of the REX II allows you to also use other tube types in that application. Currently, the user has the following three choices for vacuum tube Current Sources: The standard 6C19 tube current source as installed from the factory. -
Page 6: Ac Shunt Voltage Regulators
6. Turn the unit ON. AC SHUNT VOLTAGE REGULATORS The REX II preamplifier incorporates another feature that allows the user to optimize its sound – the AC Shunt voltage regulators. The AC Shunt voltage regulators perform the final “cleaning” of the REX II power supply rails. -
Page 7: Introduction
Thank you for your purchase of the Balanced Audio Technology REX II preamplifier. Please read this owner's manual to obtain the full benefit of the REX II in your system. It will provide you with the needed safety information and... -
Page 8: Package Content
It is recommended that you provide at least 6" of free space around each module comprising the REX II preamlifier for proper ventilation. Mount the modules on a hard surface with proper ventilation underneath. Do not stack the REX II preamplifier on top of other units, nor vice versa. WARNING... -
Page 9: Configuring The Rex
The two modules are connected by two detachable cables. In addition each module has its own power cord that must be plugged into the power outlet. WARNING Make sure your REX II is powered DOWN before making or changing ANY connections between its two modules, to the source components or power amplifiers. -
Page 10: Front Panel Controls
Pin 3: negative For the REX II, use the Main 1 XLR Output for connection to your balanced power amplifier. The Output 2 is configured as an RCA connector output. Single-Ended Components Single-ended components have RCA connectors. The REX II preamplifier is designed to work with balanced interconnects only. -
Page 11: Rex Ii Power On Sequence
Mute can be changed during this time either from front panel or through the remote control. 2. Normally the REX II will be not muted (Mute LED on the display is OFF) and will begin playing at the end of the 50 second delay. If so desired, the unit... -
Page 12: Mono Button And Led
For example, it is used to set the BALANCE adjustment when the REX II is switched into its Balance mode. More on that in the corresponding sections of this manual. The volume control knob on the REX II is linked to a digital encoder and is of a continuously rotating type (there are no stops). -
Page 13: Display Brightness Function
Function button for about TWO seconds. DISPLAY Brightness Function Changing the Display Brightness: The REX II display can be dimmed or turned completely OFF by simply pressing the DISPLAY button on your VK-R3 remote control transmitter. -
Page 14: Mute Function
The REX II has two mute modes: manual and automatic. The blue LED above the Mute button goes ON when the unit is in MUTE state. To MUTE the REX II, depress the MUTE button located on the right side of the front panel. Depressing this button again will return the unit to its normal operation and turn the mute LED off. -
Page 15: Parameter Definitions
The user may at any time, configure the unit to a particular set of system requirements. For example, input names can be changed to reflect a given system’s source configuration. Parameter Definitions: Every input of the REX II is defined with the following set of parameters. -
Page 16: Programming The Rex Ii
With this flexibility it is possible, for example, to set the CD input to be Stereo and Non-Inverting, while the Phono input would be Mono and Inverting. PROGRAMMING THE REX II NOTE: It is important to note here that all the functions described below are accessible either through the front panel controls or via the VK-R3 remote control. -
Page 17: Volume Offsets
It is quite common to have sources with very different output levels connected to a preamplifier. In this case, switching between different inputs is usually accomplished by a large change in volume. The REX II allows the user to avoid this inconvenience by setting volume offsets between different inputs (using ANY input as a reference). -
Page 18: Mono/Stereo
PHASE programming. Select the desired input. Press the Function button three times. The display will read: PHASE NINV. Use the volume knob to set the condition to NINV, INV or LAST. Exit the programming mode by pressing and holding the Function button . -
Page 19: Fixed Gain
Exit the programming mode by pressing and holding the Function button. DISPLAY MODE programming The volume display of the REX II can be switched to work in any of the following three modes: CNTS: Relative volume counts with the range of 000 to 140 DBU: Decibel readings with respect to unity gain (0dB). -
Page 20: Input Name
INPUT NAME programming: The REX II allows the user to assign any a custom name to any input. Those names may include up to four characters. The default names for the inputs are as follows: TAPE AUX1 AUX2 (It will automatically switch to PH1 if the optional phono card is... -
Page 21: Remote Control Functions
Mute Pressing this button will cause the MUTE function in the REX II to toggle between ON and OFF states. The Mute LED on the REX II front panel will reflect the status of the Mute circuit. Fade Pressing the FADE button on the VK-R3 remote control will cause the volume to smoothly decay over the period of several seconds. -
Page 22: Fuse Protection
VK-R3 remote control transmitter. Fuse Protection: A blown fuse in the REX II is an indication of a serious problem. If a replacement fuse fails as well, no further attempts should be undertaken. Please contact the factory for professional service. -
Page 23: Servicing
Please direct any further service inquiries to the factory. Cleaning To remove dust, occasionally wipe the front and top surfaces of your REX II with a damp soft cloth. If fingerprints appear, you may use a mild, non-alkaline soap solution. Do not use abrasive cleaners, as they may damage the fine finish of the... -
Page 24: Resetting The Rex Ii
RESETTING THE REX II: Under certain conditions it might become desirable to reset the internal microprocessor that controls all the functions of the REX II. Doing so will erase ALL user programmed setpoints, and will return the unit to its factory default state. -
Page 25: Warranty
The warranty is also void if the product has been repaired, modified, or tampered with by anyone other than Balanced Audio Technology or its specifically authorized agents.
Need help?
Do you have a question about the REX II and is the answer not in the manual?
Questions and answers