Table of Contents
Advertisement
Quick Links
Unit Serial Number: _______________________________________
Customer Name:
Address:
Date of Purchase:
Purchased From:
Dealer Name:
Address:
IMPORTANT NOTE:
In order to receive the full five year product warranty, please mail this completed
form together with a copy of your sales receipt to Balanced Audio Technology at the
address below, within thirty days of purchase.
Failure to do so will result in the product being warrantied for one year from the
date of manufacture.
1300 First Stat Blvd. Suite A W ilmington DE 19804 Tel: 302-999-8855 Fax: 302-999-8818
WARRANTY REGISTRATION FORM
_______________________________________
_______________________________________
_______________________________________
_______________________________________
_______________________________________
_______________________________________
_______________________________________
REX
1
Advertisement
Table of Contents

Related Manuals for Balanced Audio Technology REX


Summary of Contents for Balanced Audio Technology REX
-
Page 1: Warranty Registration Form
IMPORTANT NOTE: In order to receive the full five year product warranty, please mail this completed form together with a copy of your sales receipt to Balanced Audio Technology at the address below, within thirty days of purchase. Failure to do so will result in the product being warrantied for one year from the date of manufacture. - Page 2 Vacuum Tube Balanced Stereo Preamplifier Owner's Manual 1300 First Stat Blvd. Suite A W ilmington DE 19804 Tel: 302-999-8855 Fax: 302-999-8818...
-
Page 3: Table Of Contents
TABLE OF CONTENT CURRENT SOURCES CHANGING CURRENT SOURCES AC SHUNT VOLTAGE REGULATORS INTRODUCTION Package Content Physical Placement Configuring the REX Connecting to your system FRONT PANEL CONTROLS REX Power On sequence Turning the REX Off PHASE Button and LED MONO button and LED MUTE button and LED INPUT selection VOLUME knob... -
Page 4: Current Sources
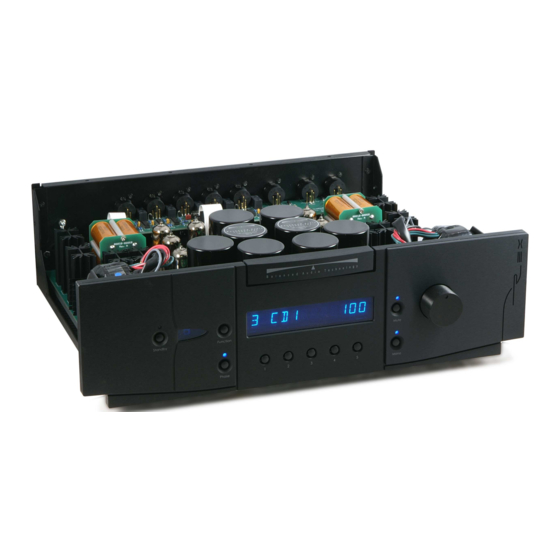
Vacuum Tube Current Sources in REX Your REX incorporates a unique feature that allows you to optimize its sound to tailor it to your individual taste or system requirements. The Vacuum Tube current sources incorporated in the REX, being part of the signal gain stage, have a direct effect on the unit’s sound. -
Page 5: Changing Current Sources
In order to change the tube type the user needs to remove the installed Current Source boards, and replace them with either another type, designed for a particular tube type, or install the 5881 tubes as a direct plug-in. Only the 5881 tubes can be used directly upon the removal of the 6C19 current source board. Please consult the factory regarding options for other tube types that may be available in the future. -
Page 6: Ac Shunt Voltage Regulators
AC SHUNT VOLTAGE REGULATORS The REX preamplifier incorporates another feature that allows the user to optimize its sound – the AC Shunt voltage regulators. The AC Shunt voltage regulators perform the final “cleaning” of the REX power supply rails. They work to reduce the minute fluctuations in the DC voltages that may degrade the sound. -
Page 7: Introduction
INTRODUCTION Thank you for your purchase of the Balanced Audio Technology REX preamplifier. Please read this owner's manual to obtain the full benefit of the REX in your system. It will provide you with the needed safety information and operating procedures for this exceptional unit. -
Page 8: Physical Placement
Save all the packaging material in a safe dry area for the unlikely event that you need to return the REX to the factory for service. PHYSICAL PLACEMENT It is recommended that you provide at least 6" of free space around each module comprising the REX preamlifier for proper ventilation. -
Page 9: Connecting To Your System
Pin 3: negative For the REX, use the Main 1 XLR Output for connection to your balanced power amplifier. The Output 2 is configured as an RCA connector output. Single-Ended Components Single-ended components have RCA connectors. The REX preamplifier is designed to work with balanced interconnects only. -
Page 10: Front Panel Controls
REX FRONT PANEL CONTROLS STANDBY Button and LED The Standby button is used to turn the unit ON and OFF and to switch the preamplifier into its Standby mode. The LED indicates the status of the unit’s power circuitry and has four state: LED OFF Display OFF Unit is in OFF state... -
Page 11: Phase Button And Led
PHASE button and LED This button allows the user to invert the absolute polarity of the signal to compensate for some recordings that are made out-of-phase. The LED indicates whether the unit is in its INVERTING or NONINVERTING mode. This function is also accessible via the VK-R3 remote control. LED OFF Non Inverting operation LED ON... -
Page 12: Display Format
DISPLAY FORMAT: The REX Vacuum Fluorescent Display (VFD) is capable of showing up to twelve alphanumeric characters. Its format depends on the mode of operation. In the normal PLAY mode the display has the following format: 1. One character indicating the selected input number. 2. -
Page 13: Display Brightness Function
DISPLAY Brightness Function Changing the Display Brightness: The REX display can be dimmed or turned completely OFF by simply pressing the DISPLAY button on your VK-R3 remote control transmitter. Each press will reduce the brightness of display and LED indicators in steps from full ON to OFF, and then one press back to full ON. -
Page 14: Rex Programmable Functions
REX PROGRAMABLE FUNCTIONS The REX programming functions allow the user to optimize the unit configuration for any particular system set up. The flexible programming facility defines each signal input with a group of user- selectable parameters that are then stored in the unit’s memory. Every time a particular input is selected, its unique combination of parameters is loaded into the operating memory. -
Page 15: Parameter Definitions
Parameter Definitions: Every input of the REX is defined with the following set of parameters. 1. Input name (Examples include CD1, DVD1, PH-1, VKD5, or any other combination of up to four characters including the Latin, Cyrillic and Greek alphabet as well as digits) 2. -
Page 16: Volume Offsets
RELATIVE Volume adjustment. It is quite common to have sources with very different output levels connected to a preamplifier. In this case, switching between different inputs is usually accomplished by a large change in volume. The REX allows the user to avoid this inconvenience by setting volume offsets between different inputs (using ANY input as a reference). -
Page 17: Phase
PHASE programming. Select the desired input. Press the Function button three times. The display will read: PHASE NINV. Use the volume knob to set the condition to NINV, INV or LAST. Exit the programming mode by pressing and holding the Function button. NOTE: In the LAST mode, the state of the PHASE switch will be the same as used the last time for that particular input. -
Page 18: Fixed Gain
FIXED Gain mode In some systems (some A/V installations, for example) it is desirable to set a particular input to a fixed gain, that is then becomes unaffected by the volume knob. Most often it is required to set the preamplifier gain to Unity (Gain of 1). -
Page 19: Input Name
INPUT NAME programming: The REX allows the user to assign any a custom name to any input. Those names may include up to four characters. The default names for the inputs are as follows: TAPE AUX1 AUX2 (It will automatically switch to PH1 if the optional phono card is installed) Any combination of up to four Latin, Cyrillic, Greek alphabet characters or digits can be used to name the source. -
Page 20: Remote Control Functions
REMOTE CONTROL FUNCTIONS: The optional VK-R3 remote control that comes with your REX has the following functions: Volume Up and Volume Down control Mute function Fade Down/Fade Up function Input Source Selection 1 through 5 Phase switch Function switch Display/POWER switch. The following describes these functions. -
Page 21: Display/Power
1.5A 250V Slow Blow Factory supplied fuses should be only replaced with the same type and rating parts. Servicing The Balanced Audio Technology REX should require no service in normal operation. Please direct any further service inquiries to the factory. Cleaning To remove dust, occasionally wipe the front and top surfaces of your REX with a damp soft cloth. -
Page 22: Resetting The Rex
RESETTING THE REX: Under certain conditions it might become desirable to reset the internal microprocessor that controls all the functions of the REX. Doing so will erase ALL user programmed setpoints, and will return the unit to its factory default state. -
Page 23: Warranty
If this product contains a materials, manufacturing, or workmanship defect that cannot be repaired at the dealership where the product was purchased, it must be packed in original packaging and returned to Balanced Audio Technology via insured freight, at the owners expense. If replacement packaging materials are required, they will be supplied by the factory at a nominal charge.
Need help?
Do you have a question about the REX and is the answer not in the manual?
Questions and answers