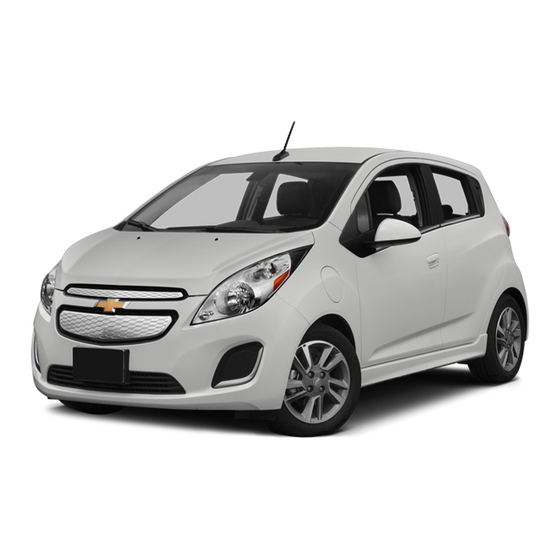
Chevrolet Spark EV 2014 Owner's Manual
Automobile
Hide thumbs
Also See for Spark EV 2014:
- Owner's manual (362 pages) ,
- Specifications (8 pages) ,
- Specifications (2 pages)

Related Manuals for Chevrolet Spark EV 2014


Summary of Contents for Chevrolet Spark EV 2014
- Page 237 Brake Fluid ....10-11 Battery ..... 10-12 Tires .
-
Page 238: Table Of Contents
If a Tire Goes Flat ..10-46 cause cancer and birth defects or Tire Sealant and other reproductive harm. Engine For service and parts needs, visit Compressor Kit ... 10-47 exhaust, many parts and systems, your dealer. - Page 239 handling, emissions systems, aerodynamics, durability, and electronic systems like antilock High voltage components are brakes, traction control, and stability identified by labels. Do not control. These accessories or remove, open, take apart, modifications could even cause or modify these components. malfunction or damage not covered High voltage cable or wiring has by the vehicle warranty.
- Page 240 about how to service the vehicle than this manual can. To order the To open the hood: proper service manual, see This vehicle has an airbag system. Before attempting to do your own service work, see Keep a record with all parts receipts and list the mileage and the date of any service work performed.
- Page 241 To close the hood: 1. Before closing the hood, be sure all filler caps are on properly. Then, lift the hood to relieve pressure on the hood prop. Remove the hood prop from the prop holder in the rear passenger side of the underhood compartment and secure it to the retainer on the underside of the hood.
- Page 243 1. Windshield Washer Fluid Reservoir. See The vehicle must be on a level surface when checking the coolant During vehicle operation and also 2. High Voltage Battery Coolant level. during charging, the high voltage Reservoir. See Cooling System The high voltage battery coolant battery cells in the vehicle are kept following.
- Page 244 coolant level is below the cold fill line, there could be a leak in the The TPIM, APM, and charger cooling system. module coolant reservoir in the vehicle is filled with a 50/50 mixture of DEX-COOL coolant and deionized water. If using this mixture, nothing else needs to be added.
- Page 245 The heater coolant reservoir is in the underhood compartment. See Cabin heating uses a separate When windshield washer fluid is coolant system. needed, be sure to read the manufacturer's instructions before When cabin heating is requested, use. If operating the vehicle in an the heater and heater coolant pump area where the temperature may fall are turned on to circulate warm...
- Page 246 Some driving conditions or climates can cause a brake squeal when the This vehicle has disc brakes. Disc brakes are first applied or lightly Do not use engine coolant brake pads have built-in wear applied. This does not mean (antifreeze) in the windshield indicators that make a high-pitched something is wrong with the brakes.
- Page 247 hydraulic system fixed, since a leak means that sooner or later The braking system on a vehicle is the brakes will not work well. complex. Its many parts have to be Do not top off the brake fluid. of top quality and work well together Adding fluid does not correct a leak.
- Page 248 When the brake fluid falls to a low level, the brake system warning light comes on. See If brake fluid is spilled on the With the wrong kind of fluid in the vehicle's painted surfaces, brake hydraulic system, the the paint finish can be brakes might not work well.
- Page 249 See If a Crash Occurs under TO WARM will display. See for additional information. Battery posts, terminals, and If an airbag has inflated, see A vehicle cover, which can reduce related accessories contain lead sun loading on the vehicle and and lead compounds, chemicals improve high voltage battery life, is known to the State of California to...
- Page 250 5. After the cable has been connected, open the hatch and Discharge the high voltage then tighten the cable. battery until two or three bars charger must be used, with the remain on the battery range After the battery cable is appropriate setting selected.
- Page 251 Allowing the wiper arm to touch the windshield when no wiper blade is installed could damage the windshield. Any damage that occurs would not be covered by your warranty. Do not allow the wiper arm to touch the windshield. 1. Pull the wiper arm (1) a short To replace the windshield wiper distance away from the glass.
- Page 252 Headlamp aim has been preset and For the proper type of replacement should need no further adjustment. bulbs, see If the vehicle is damaged in a crash, the headlamp aim may be affected. For any bulb changing procedure If adjustment to the headlamps is not listed in this section, contact necessary, see your dealer.
- Page 253 2. Remove the connector retaining tab (1). 3. Disconnect the wiring harness connector from the bulb (3) by pressing the connector release (2) and pulling straight back. 4. Remove the bulb (3) from the headlamp assembly by turning counterclockwise and pulling straight back.
- Page 254 7. Reinstall the lamp assembly and To replace a license plate two screws. lamp bulb: 1. Remove the two screws (1) from the license plate lamp assembly. 2. Turn and pull the license plate lamp assembly down. 3. Turn the bulb socket (3) counterclockwise and pull it out of the lamp assembly.
- Page 255 An electrical overload may cause the lamps to go on and off, or in some cases to remain off. Have the Back-Up Lamps headlamp wiring checked right away The vehicle has fuses and circuit if the lamps go on and off or Front Turn Signal/ 7444NA breakers to protect against an...
- Page 256 Spilling liquid on any electrical The wiring circuits in the vehicle are component on the vehicle may protected from short circuits by a damage it. Always keep the combination of fuses, circuit covers on any electrical breakers, and fusible thermal links. component.
- Page 258 The vehicle may not be equipped with all of the fuses, relays, and Auxiliary Heater Front Washer features shown. Pump Fuse Relay ACCM Fuse Antilock Brake TPIM1 Fuse System Oil HPCC Fuse Engine Control Feeding Fuse Module Fuse Wash Fuse OBCM Fuse Not Used PE Coolant...
- Page 259 Front Wiper Speed Rear Defogger Front Wiper Control Relay Relay Relay Front Wiper Fuse Not Used Spare Fuse VICM Fuse Not Used Spare Fuse Electronic Brake Not Used Spare Fuse Control Outside Rearview Spare Fuse Module Fuse Heated Mirror Fuse Spare Fuse Engine Control Back Glass Fuse...
- Page 260 Remove the fuse panel door diagonally. Spilling liquid on any electrical component on the vehicle may damage it. Always keep the covers on any electrical component. Open the fuse panel door by pulling out at the top. The instrument panel fuse block is on the underside of the driver side instrument panel.
- Page 261 Steering Wheel Not Used Controls Not Used Backlighting Heater, Ventilation, Not Used and Air Conditioning Body Control Switch Module 1 Heated Seat Body Control Module 2 Not Used Body Control Not Used Module 3 Body Control Body Control Module 4 Module 6 Body Control Body Control...
- Page 262 Not Used Outside Rearview Mirror Radio Every new GM vehicle has Spare Fuse Heater, Ventilation, high-quality tires made by a Headlamp Leveling and Air leading tire manufacturer. See Conditioning Ultrasonic Park the warranty manual for Assist OnStar information regarding the tire warranty and where to get Instrument Cluster Spare Fuse...
- Page 263 This vehicle was not originally and a serious crash. See Worn or old tires can equipped with winter tires. Winter cause a crash. If the tread tires are designed for increased traction on snow and ice-covered is badly worn, roads. Consider installing winter replace them.
- Page 264 Use only radial ply tires of the same size, load range, and Useful information about a tire is speed rating as the original Original equipment tires. molded into its sidewall. The equipment tires designed to examples show a typical Winter tires with the same speed GM's specific tire performance passenger tire sidewall.
- Page 265 week of the year 2010 would resistance. For more information the tire size means a passenger have a four-digit DOT date vehicle tire engineered to of 0310. standards set by the U.S. Tire and Rim Association. The letters and numbers Maximum load that The three-digit following the DOT code are the...
- Page 266 Diameter of drive unit, power windows, before a tire has built up heat the wheel in inches. power seats, and air from driving. See conditioning. These characters represent the load The relationship The weight of a index and speed rating of the of a tire's height to its width.
- Page 267 Gross Axle Weight outward when mounted on a Rating for the front axle. See The maximum air pressure to vehicle. The side of the tire that which a cold tire can be inflated. contains a whitewall, bears The maximum air pressure is white lettering, or bears molded onto the sidewall.
- Page 268 A pneumatic of a tire when only 1.6 mm tire in which the ply cords that (1/16 in) of tread remains. See Load on an individual tire extend to the beads are laid at due to curb weight, accessory 90 degrees to the centerline of weight, occupant weight, and the tread.
- Page 269 The Tire and Loading Information label on the vehicle Use a good quality pocket-type indicates the original equipment Neither tire underinflation nor gauge to check the tire tires and the correct cold tire overinflation is good. pressure. Proper tire inflation inflation pressures.
- Page 270 of the tire valve to release air. tire inflation pressure label, you not reached the level to trigger should determine the proper tire illumination of the TPMS low tire Re-check the tire pressure with inflation pressure for those tires.) pressure telltale. the tire gauge.
- Page 271 ensure that the replacement or A Tire and Loading Information label alternate tires and wheels allow the shows the size of the original TPMS to continue to function equipment tires and the correct properly. inflation pressure for the tires when they are cold.
- Page 272 rotating the tires. The malfunction light should go off The TPMS will not function properly after successfully completing the if one or more of the TPMS sensors the GM approved tire sealant sensor matching process. See are missing or inoperable. When the available through your dealer or "TPMS Sensor Matching system detects a malfunction, the...
- Page 273 If the TPMS is not functioning There are two minutes to match the 6. Use the SELECT knob to select properly, it cannot detect or signal a first tire/wheel position, and YES with the highlighted low tire condition. See your dealer five minutes overall to match all four selection, and press the for service if the TPMS malfunction...
- Page 274 11. Proceed to the driver side rear Replace the tire if: tire, and repeat the procedure The indicators at three or If the vehicle has non-directional in Step 8. The horn sounds two more places around the tire tires, they should be rotated times to indicate the sensor can be seen.
- Page 275 position it is in. Directional tires Adjust the front and rear tires to will have an arrow on the tire the recommended inflation indicating the proper direction of pressure on the Tire and off and cause an accident. When rotation or will have left or Loading Information label after changing a wheel, remove any right molded on the sidewall.
- Page 276 The rubber in tires ages over time. slow aging. This area should be free This also applies to the spare tire, of grease, gasoline, or other if the vehicle has one, even if it is substances that can deteriorate never used. Multiple factors rubber.
- Page 277 GM's exclusive TPC Spec maintenance have been done, system considers over a dozen all four tires should wear out at critical specifications that impact about the same time. See Only your dealer or authorized the overall performance of the tire service center should vehicle, including brake system However, if it is necessary to mount or dismount the tires.
- Page 278 The Tire and Loading Information Label indicates the original equipment tires on the A tire and/or wheel could fail If different sized wheels are used, vehicle. See suddenly and cause a crash. there may not be an acceptable , for the label level of performance and safety if Use only radial-ply tires with location and more information...
- Page 279 nominal rim diameters of graded 150 would wear one and 10 to 12 inches (25 to 30 cm), one-half (1½) times as well on or to some limited-production the government course as a tire Quality grades can be found tires. graded 100.
- Page 280 straight-ahead braking traction performance on the laboratory surface variations such as troughs or ruts, is normal. If the vehicle is tests, and does not include test wheel than the minimum vibrating when driving on a smooth acceleration, cornering, required by law. Warning: The road, the tires and wheels may need hydroplaning, or peak traction temperature grade for this tire is...
- Page 281 Replace wheels, wheel bolts, wheel nuts, or Tire Pressure Monitor System (TPMS) sensors with new ground clearance, and tire or tire GM original equipment parts. chain clearance to the body and Do not use tire chains. There is chassis. not enough clearance. Tire chains used on a vehicle without the Using the wrong replacement proper amount of clearance can...
-
Page 282: If A Tire Goes Flat
A rear blowout, particularly on a curve, acts much like a skid and This vehicle has a tire sealant and may require the same correction as Lifting a vehicle and getting under compressor kit. See used in a skid. Stop pressing the it to do maintenance or repairs is accelerator pedal and steer to There is no spare tire, no tire... - Page 283 3. Turn off the vehicle. The tire sealant and compressor can be used to temporarily seal 4. Inspect the flat tire. punctures up to 6 mm (0.25 in) in recommended pressure. Do not If the tire has been separated from the tread area of the tire.
- Page 284 The kit includes: There is only enough sealant to seal one tire. After usage, the tire sealant canister must be replaced. When using the tire sealant and compressor kit during cold temperatures, warm the kit in a heated environment for five minutes. This will help to inflate the tire 8.
- Page 285 1. Remove the tire sealant canister (4) and compressor from its storage location. See 2. Remove the air only hose (10) and the power plug (9) from the bottom of the compressor. 3. Place the compressor on the ground near the flat tire. 5.
-
Page 286: Tire Sealant And Compressor Kit
8. Plug the power plug (9) into the pressure will quickly drop and accessory power outlet in the start to rise again as the tire vehicle. Unplug all items from inflates with air only. farther. The tire is too severely other accessory power outlets. - Page 287 13. Unplug the power plug (9) from 23. Stop at a safe location and the accessory power outlet in check the tire pressure. Refer the vehicle. to Steps 1 10 under Using the Tire Sealant and Compressor 14. Turn the sealant/air hose (2) Kit without Sealant to Inflate a counterclockwise to remove it Tire (Not Punctured).
- Page 288 24. Wipe off any sealant from the wheel, tire, or vehicle. 25. Dispose of the used tire sealant canister (4) at a local dealer or in accordance with The kit includes: local state codes and practices. 26. Replace it with a new canister available from your dealer.
- Page 289 1. Remove the compressor from its 6. Plug the power plug (9) into the 9. Inflate the tire to the storage location. See accessory power outlet in the recommended inflation pressure vehicle. Unplug all items from using the pressure gauge (7). other accessory power outlets.
- Page 290 12. Turn the air only hose (10) counterclockwise to remove it from the tire valve stem. If the recommended pressure 13. Replace the tire valve cannot be reached after stem cap. approximately 25 minutes, the vehicle should not be driven 14.
- Page 291 3. Good Battery Negative Terminal 4. Good Battery Positive Terminal For more information about the Ignoring these steps could result The jump start negative grounding vehicle battery, see in costly damage to the vehicle point (1) is a stud on a bracket that would not be covered by the located to the right of the Traction If the 12 volt battery has run down,...
- Page 292 4. Turn the ignition to LOCK/OFF. Turn off all lights and accessories in both vehicles, If the other vehicle does not have Be sure the battery has enough except the hazard warning a 12-volt system with a negative water. You do not need to add flashers if needed.
- Page 293 9. Start the engine in the vehicle with the good battery and run the engine at idle speed for at Fans or other moving propulsion least four minutes. system parts can injure you badly. 10. Try to start the vehicle that had Incorrectly towing a disabled Keep your hands away from the dead battery.
-
Page 294: Towing The Vehicle
Use the tow eye for towing a To tow the vehicle behind another Here are some important things to disabled vehicle or loading it onto a vehicle for recreational purposes, consider before recreational vehicle flatbed car carrier. The tow eye such as behind a motor home, see towing: should not be used to recover a... - Page 295 The vehicle was not designed to be 3. Secure the vehicle to the dolly. towed with all four wheels on the ground. If the vehicle must be towed, a dolly should be used. See Dolly Towing following. Towing the vehicle from the rear If the vehicle is towed with all four could damage it.
- Page 296 washed. This could cause damage that would not be covered by the vehicle warranty. products can be obtained from If using an automatic car wash, your dealer. Follow all follow the car wash instructions. The manufacturer directions regarding windshield wiper and rear window correct product usage, necessary Locks are lubricated at the factory.
- Page 297 calcium chloride and other salts, ice The bright metal moldings on the melting agents, road oil and tar, tree vehicle are aluminum. To prevent sap, bird droppings, chemicals from damage always follow these may damage it. Use only industrial chimneys, etc., can cleaning instructions: non-abrasive waxes and polishes damage the vehicle's finish if they...
- Page 298 Solvents, alcohols, fuels, or other harsh cleaners. Clear debris from the air intakes, Ice scrapers or other hard items. between the hood and windshield when washing the vehicle. Aftermarket appearance caps or Use only lukewarm or cold water, a covers while the lamps are soft cloth, and a car washing soap illuminated, due to excessive to clean exterior lamps, lenses and...
- Page 299 squeak. Lubricate weatherstrips at least once a year. Hot, dry climates may require more frequent Use a soft, clean cloth with mild To avoid surface damage, do not application. Black marks from soap and water to clean the wheels. use strong soaps, chemicals, rubber material on painted surfaces After rinsing thoroughly with clean abrasive polishes, cleaners,...
- Page 300 Visually check constant velocity material to parts repaired or joints, rubber boots, and axle seals replaced to restore corrosion To prevent dirt particle abrasions, for leaks. protection. regularly clean the vehicle's interior. Original manufacturer replacement Immediately remove any soils. Note parts will provide the corrosion that newspapers or dark garments Lubricate all key lock cylinders,...
- Page 301 remain on the surface being 3.8 L (1 gal) of water. Cleaning the windshield with water cleaned for extended periods A concentrated soap solution will during the first three to six months of time. leave a residue that creates of ownership will reduce tendency streaks and attracts dirt.
- Page 302 3. Start on the outside edge of the soil and gently rub toward the Start by vacuuming the surface center. Fold the cleaning cloth to using a soft brush attachment. If a a clean area frequently to rotating brush attachment is being For vehicles with high gloss prevent forcing the soil in to the used during vacuuming, only use it...
- Page 303 these solvents can permanently Wash with warm water and mild detergent. Do not use chlorine change the appearance and feel bleach. Rinse with cold water, and of leather or soft trim and are not then dry completely. recommended. Use a soft microfiber cloth dampened with water to remove dust and loose dirt.
- Page 304 Use the floor mat with the Reinstall by lining up the floor mat correct side up. Do not turn retainer openings over the carpet it over. retainers and snap into position. Do not place anything on top of Make sure the floor mat is properly the driver side floor mat.
- Page 319 Reporting Safety Defects to Procedure ....13-1 Chevrolet. Normally, any concerns General Motors ... 13-13...
- Page 320 If after contacting a When contacting Chevrolet, 40 days. If you do not agree with the member of dealership management, remember that your concern will decision given in your case, you it appears your concern cannot be likely be resolved at a dealer's...
- Page 321 Two, General Motors of Canada Centre, 1-800-263-3777 (English), assistance. However, if a customer Limited wants you to be aware of its 1-800-263-7854 (French), wishes to write or e-mail Chevrolet, participation in a no-charge or write to: the letter should be addressed to: Mediation/Arbitration Program.
- Page 322 1-800-263-3777 (English) 1-800-263-7854 (French) 1-800-263-3830 (For Text Track the vehicle s The Chevrolet online owner Telephone devices (TTYs)) warranty information. experience is a one-stop resource Roadside Assistance: that allows interaction with...
- Page 323 General Motors of Canada also has a Mobility Program. Visit www.gm.ca or call 1-800-GM-DRIVE (463-7483) Take a trip to the Chevrolet Owner for details. TTY users call Centre: 1-800-263-3830. Chat live with online help representatives. Use the Vehicle Tools section.
- Page 324 New Vehicle Limited Warranty. Tow to the chains, or other traction devices. Chevrolet and General Motors of nearest Chevrolet dealer for Canada Limited reserve the right to Towing or services for vehicles warranty service, or if the vehicle...
- Page 325 Must be over 250 kilometers from where your trip was started to qualify. When the vehicle requires warranty To enhance your ownership General Motors of Canada service, contact your dealer and experience, we and our participating Limited requires request an appointment. By dealers are proud to offer Courtesy pre-authorization, original scheduling a service appointment...
- Page 326 original receipts and can only be up insurance coverage, credit card, etc. to the maximum amount allowed by You are responsible for fuel usage Warranty service can generally be GM for shuttle service. In addition, charges and may also be completed while you wait.
- Page 327 vehicles that were total losses in prior crashes. In most cases, the GM also recommends that you If the vehicle is involved in a parts being recycled are from choose a collision repair facility that collision and it is damaged, have the undamaged sections of the vehicle.
- Page 328 recommend that you ensure that the Give only the necessary information Choose a reputable repair facility vehicle will be repaired with GM to police and other parties involved that uses quality replacement parts. original equipment collision parts. in the crash. See Collision Parts earlier in this If such insurance coverage is not section.
- Page 329 required replacement collision parts of the repair and parts choices as Owner Manual includes the be original equipment parts, either long as the cost stays within Maintenance Schedule for all new Genuine GM parts or recycled reasonable limits. models. original GM parts. Remember, In-Portfolio: Includes a Portfolio, recycled parts will not be covered by Owner Manual, and Warranty...
- Page 330 Or write to: However, NHTSA cannot become involved in individual Helm, Incorporated problems between you, your Attention: Customer Service dealer, or General Motors. 47911 Halyard Drive Plymouth, MI 48170 To contact NHTSA, you may call Prices are subject to change without the Vehicle Safety Hotline notice and without incurring toll-free at 1-888-327-4236 (TTY:...
- Page 331 Transport Canada Call 1-800-222-1020, or write: about the vehicle s performance and immediately, and notify General Chevrolet Motor Division how it is driven. For example, the Motors of Canada Limited. Call Chevrolet Customer Assistance vehicle uses computer modules to...
- Page 332 These data can help provide a if the vehicle is leased, with the better understanding of the consent of the lessee; in response This vehicle is equipped with an circumstances in which crashes and to an official request by police or event data recorder (EDR).
- Page 333 OnStar Terms and Conditions and Privacy Statement on the OnStar website. This vehicle has systems that operate on a radio frequency that comply with Part 15 of the Federal Communications Commission (FCC) RFID technology is used in some rules and with Industry Canada vehicles for functions such as tire Standards RSS GEN/210/220/310.
- Page 335 Press Make a call, end a call, or answer an incoming call. Give OnStar Hands-Free Calling OnStar Overview ... . 14-1 voice commands. Give OnStar Turn-by-Turn Emergency ....14-2 Navigation voice commands.
- Page 336 Press the OnStar Emergency button to get a priority connection to an OnStar navigation requires the Emergency Advisor available 24/ Directions and Connections 7 to: service plan. With Automatic Crash Response, Get help for an emergency. the built-in system can automatically Press to receive directions or Be a Good Samaritan or...
- Page 337 2. Say Repeat. System responds After the call ends, press the Go with the last direction given, then button on the navigation screen to responds with OnStar ready, begin driving directions. then a tone. If directions are downloaded to the 1.
- Page 338 Download the OnStar RemoteLink 1. Press . System responds: ® mobile app to select Apple OnStar ready, followed by 1. Press . System responds: ® Android , and BlackBerry devices a tone. OnStar ready. to check vehicle fuel level, oil life, 2.
- Page 339 Automatic Crash Response, Press and say Minutes then Emergency Services, Crisis Assist, Verify to check how many minutes Stolen Vehicle Assistance, Vehicle remain and their expiration date. Diagnostics, Remote Door Unlock, Press to request account transfer Roadside Assistance, Turn-by-Turn eligibility information. The Advisor Navigation, and Hands-Free Calling OnStar Vehicle Diagnostics will can assist in canceling or removing...
- Page 340 to function properly. These systems vehicle, damage to the vehicle in a access to all of the OnStar services, may not operate if the battery is crash, or wireless phone network except Virtual Advisor and OnStar discharged or disconnected. congestion or jamming. Turn-by-Turn Navigation.
- Page 341 change the OnStar PIN, call OnStar Roadside Assistance and a route or may ask for a call back and provide the Advisor with the locksmith to help gain access to the after the vehicle is driven into an current number. vehicle.
- Page 342 FOR A PARTICULAR PURPOSE AND NONINFRINGEMENT OF The OnStar system is integrated THIRD PARTY RIGHTS. IN NO into the electrical architecture of the Certain OnStar components include EVENT SHALL THE AUTHORS OR vehicle. Do not add any electrical libcurl and unzip software. Below COPYRIGHT HOLDERS BE equipment.
- Page 343 should be available at ftp:// Info-ZIP or its contributors be held permitted without inclusion of ftp.info-zip.org/pub/infozip/ liable for any direct, indirect, this license, as long as the license.html indefinitely. incidental, special or consequential normal SFX banner has not damages arising out of the use of or been removed from the binary or Copyright (c) 1990-2005 Info-ZIP.
- Page 344 Zip-Bugs or Info-ZIP e-mail addresses or of the Info-ZIP URL(s). 4. Info-ZIP retains the right to use the names Info-ZIP, Zip, UnZip, UnZipSFX, WiZ, Pocket UnZip, Pocket Zip, and MacZip for its own source and binary releases.
Need help?
Do you have a question about the Spark EV 2014 and is the answer not in the manual?
Questions and answers