Table of Contents
Advertisement
Advertisement
Table of Contents

Related Manuals for SPORTS ART E82


Summary of Contents for SPORTS ART E82
- Page 1 OWNER'S MANUAL PDF created with pdfFactory trial version www.pdffactory.com...
-
Page 2: Table Of Contents
SPORTS ART LIGHT COMMERCIAL GRADE E82 Elliptical Trainer Owner's Manual TABLE OF CONTENTS: 1. SAFETY GUIDELINES ..................2. INTRODUCTION....................3. ASSEMBLING YOUR ELLIPTICAL TRAINER............. List of parts......................Installation Requirements..................Step by step instructions..................Floor leveling adjustment..................4. EXERCISING ON YOUR ELLIPTICAL E82............ -
Page 3: Safety Guidelines
Keep this owner s manual for future use and reference. • Read this owner s manual and follow the instructions. • Assemble and operate the Sports Art E82 Elliptical Trainer on a solid, level surface. • Never allow children on or near the machine. -
Page 4: Introduction
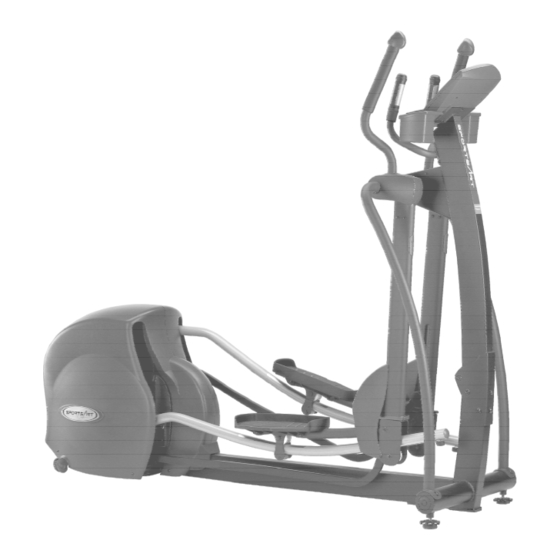
Congratulations on purchasing one of the finest piece of light commercial exercise equipment on the market today, the Sports Art E82. Constructed of high quality materials and designed for years of trouble-free usage, the Sports Art E82 will be an integral part of your fitness regimen. -
Page 5: Assembling Your Elliptical Trainer
ASSEMBLING YOUR ELLIPTICAL TRAINER: Caution: Help is recommended to assemble the E82 elliptical to avoid injury and to ensure safety to the unit. Important: The packing for this unit was designed to protect it during shipment. Please store the original packaging in a safe place in case you need to ship the unit in the future. -
Page 6: Installation Requirements
PDF created with pdfFactory trial version www.pdffactory.com... - Page 7 4. Once the upright is fastened and tightened, place the glide rail over the Rocking Bar Roller. (See Fig 2) Fig.2 5. Then fasten the screws under the glide rail. (See Fig. 3) Fig.3 PDF created with pdfFactory trial version www.pdffactory.com...
- Page 8 6. Attach the adjust linkage into its place on the rocking bar and secure with the screw, then cover with the stride adjust cover. (See Fig. 4) Then remove all the Styrofoam and packing material. Fig.4 7. Attach the support tubes with the 1/4" x L 3/4" bolts to the upper tube mount. Use T-handle wrench to secure 5/16"...
-
Page 9: Floor Leveling Adjustment
8. Finally, insert the power cable plug into its holder. Then attach whole power set into the rear bottom and secure with the screws. (See Fig. 6) Fig.6 Floor Leveling Adjustment If the elliptical is unsteady on your floor, adjust the leveling feet on the front of the machine. -
Page 10: Exercising On Your Elliptical E82
EXERCISING ON THE E82 ELLIPTICAL TRAINER We are pleased to introduce the new SPORTSART E82, an elliptical trainer designed for user comfort and convenience. 1. OVERVIEW OF THE ELECTRONICS PACKAGE PDF created with pdfFactory trial version www.pdffactory.com... - Page 11 WINDOWS 1. Weight Loss (65% HR Target): Using age as a factor, the Personal Cardio Advisor automatically calculates your optimal heart rate for weight loss. The optimal weight loss target heart rate is 65% of the maximum workout heart rate for your age.
- Page 12 ◆ STRIDES/MIN: Indicates workout speed (strides per minutes). ◆ STRIDE LENGTH: Shows stride length. ◆ CAL: Displays overall caloric expenditure of the present workout. ◆ SCAN: Displays STRIDES, STRIDES/MIN, STRIDE LENGTH, CAL, in turn, for user convenience. 10. Program Indicators: Light to indicate the activated program. KEYPAD Window 1 MODE: Switches between TIME, RESISTANCE LEVEL, WATTS,...
-
Page 13: Basic Operation
2. BASIC OPERATION 1. Power Up The Elliptical: 1-1: After you turn on unit power, the "E82" banner message appears on the dot matrix window. Press QUICK START to begin working out immediately, or press START to Select User. USER AGE □... -
Page 14: Quick Start
1-4: PEDAL TO START appears when no one exercises on the unit for over 10 seconds. 1-5: The height of the dots represent the resistance level: the higher the dots, the greater the resistance. The height of the dots automatically changes when resistance settings are changed. - Page 15 3-3: Set the USER ID: Rather than using a USER 1,2,3,4 number, you may input your initials to indentify yourself. If the USER ID has not been set up yet, the letter "A" appears and flashes in the dot matrix window. ▲...
-
Page 16: Select Age
4. Select AGE: The AGE indicator flashes. Age "35" appears in the dot matrix display window. ▲ ▼ 4 1: Press to select your age, and then press ENTER to confirm your choice. 4-2: The Personal Cardio Advisor uses age to automatically calculate target heart rate values for Weight Loss (65% HR Target) and Cardio Training (80% HR Target). -
Page 17: Select Workout Time
USER AGE □ □ □ □ ▓ □ □ □ □ □ □ □ □ □ □ □ □ □ □ □ □ □ □ □ ▓ □ □ □ □ ▓ ▓ □ □ ▓ ▓ ▓ ▓ □ □ □ □... -
Page 18: Pre-Set Programs
3. PRE-SET PROGRAMS 1. MANUAL: Press MANUAL to enter this mode. MANUAL mode operation is the same as "QUICK START" operation; you can adjust the resistance level any time during your workout. 2. CUSTOM: 2-1: Press CUSTOM to enter this mode. There are 8 workout segments, and each segment lasts for one minute. -
Page 19: Random
□ □ □ □ □ □ □ □ □ □ □ □ □ □ □ □ □ □ □ □ □ □ □ □ □ □ □ □ □ □ □ □ □ □ □ □ □ □ □ □ □... -
Page 20: Int 1 Program
□ □ □ □ □ □ □ □ □ □ □ □ □ □ □ □ □ □ □ □ □ □ □ □ □ □ □ □ □ □ □ □ □ □ □ □ □ □ □ □ □... -
Page 21: Int 2 Program
6. INT 2 Program: 6-1: INT 2 consists of two segments: segment 1 and segment 2. Segment 1 lasts for one minute. Segment 2 lasts for two minutes. At the end of each segment, "GOING TO LEVEL XX" scrolls across the display. The display also beeps. An example of an INT 2 program follows. -
Page 22: Wt Loss (Hrc 65%) / Cardio (Hrc 80%) Program
7-3: If no one exercises on the unit for over 10 seconds, "STEP TO START" scrolls across the dot matrix window once, then previous workout information appears. "STEP TO START" scrolls across the window every ten seconds until someone starts exercising on the unit. 8. - Page 23 8-5: The Heart Rate Window displays your current heart rate value. A heart appears in the dot matrix window. An alternating green and red colored heart indicates that your heart rate signal is clear. However, if the display does not detect a heart rate signal, the heart remains green.
-
Page 24: Cool Down Mode
The heart color alternates between green and red to indicate that your heart rate signal is clear. If the display does not detect a heart rate signal, the hea rt color remains green. □ □ □ □ □ □ □ □ □ □ □ □ □ □ □ □ □ □ □ □ □... -
Page 25: Pause / Reset Key Function
4. PAUSE / RESET KEY FUNCTION 1. During a workout, press "PAUSE" to temporarily stop your current workout. (a) The word "PAUSE" scrolls across WINDOW 1 to WINDOW 2 once, and the program indicators extinguish. (b) The previous workout information appears and the dot matrix window prompts "STEP TO START". -
Page 26: System Default Setting
ENTER. When "YES" appears, press ENTER to modify your target heart rate. Then, the starting banner screen, showing "E82", appears. Select "YES" for modification. Select "NO" to reject modification. PDF created with pdfFactory trial version... - Page 27 PDF created with pdfFactory trial version www.pdffactory.com...
-
Page 28: Guidelines For Exercise
GUIDELINES FOR EXERCISE How long should I exercise? The duration of your exercise session is dependent on your fitness level. In general, it is recommended to maintain your heart rate in your training zone for at least 20 minutes to realize an aerobic benefit. It is recommended that before beginning any exercise program, you should consult with your doctor. - Page 29 (d) Follow the steps 3 and 4 to replace the access cap. (Point B is where to press in step 4) (see fig.8-3) step Lubrication valve Fig.8 Fig.8-1 step Fig.8-2 Fig.8-3 2. (a) Remove the access cap. (see fig.9) (b) Refill with the lubrication tube and the lubrication valve. (see fig.9-1) (c) Then, remove the lubrication tube.
-
Page 30: Trouble Shooting
TROUBLE SHOOTING A. BLANK DISPLAY If you turn on the POWER switch and there is no light, please follow steps to resolve the problem. (a) Check if the power cord is plugged securely into the wall socket. (See Fig. 10) (b) Check that the power switch on the rare end of the unit is in the "ON"... -
Page 31: Err 7 Message
If your display has no SPM reading during your workout, please contact your dealer for more details. Caution: Do not attempt to repair or service the Sports Art E82 elliptical trainer, unless you are a factory authorized service professional. Such an attempt will automatically void the factory warranty. -
Page 32: Wiring Schematic
Wiring Schematic: Your Authorized Distributor PDF created with pdfFactory trial version www.pdffactory.com...
Need help?
Do you have a question about the E82 and is the answer not in the manual?
Questions and answers