JVC KW-R500 Instructions Manual
Cd receiver
Hide thumbs
Also See for KW-R500:
- Instructions manual (82 pages) ,
- Instruction manual (56 pages) ,
- Installation manual (4 pages)
Table of Contents
Advertisement
KW-R500
CD RECEIVER / RECEPTOR CON CD / RÉCEPTEUR CD
For canceling the display demonstration, see page 4. /
Para cancelar la demostración en pantalla, consulte la página 4. /
Pour annuler la démonstration des affichages, référez-vous à la page 4.
For installation and connections, refer to the separate manual.
Para la instalación y las conexiones, refiérase al manual separado.
Pour l'installation et les raccordements, se référer au manuel
séparé.
MANUAL DE INSTRUCCIONES
MANUEL D'INSTRUCTIONS
INSTRUCTIONS
ENGLISH
ESPAÑOL
FRANÇAIS
For Customer Use:
Enter below the
Model No. and Serial
No. which are located
on the top or bottom
of the cabinet. Retain
this information for
future reference.
Model No.
Serial No.
GET0791-001A
[J]
Advertisement
Table of Contents

Related Manuals for JVC KW-R500


Summary of Contents for JVC KW-R500
- Page 1 ENGLISH ESPAÑOL FRANÇAIS CD RECEIVER / RECEPTOR CON CD / RÉCEPTEUR CD For canceling the display demonstration, see page 4. / Para cancelar la demostración en pantalla, consulte la página 4. / Pour annuler la démonstration des affichages, référez-vous à la page 4. For installation and connections, refer to the separate manual.
- Page 2 Thank you for purchasing a JVC product. Please read all instructions carefully before operation, to ensure your complete understanding and to obtain the best possible performance from the unit. This equipment has been tested and found to comply with the limits for a Class B digital device, pursuant to Part 15 of the FCC Rules.
-
Page 3: Table Of Contents
Stop the car before operating the unit. Preparation ............4 Canceling the display demonstration Adjust the volume so that you can hear sounds Setting the clock outside the car. Driving with the volume too high may cause an accident. Basic operations ........... 4 Avoid using the USB device or iPod/iPhone if it Radio ................ -
Page 4: Preparation
(Hold) The display demonstration is always turned on unless you cancel it. Select <CLOCK>. (Hold) Select <CLOCK SET>. (Initial setting) Select <DEMO OFF>. Adjust the hour. Press to exit. Adjust the minute. Press to exit. Changes the display information. (Press) Scrolls the current display information. -
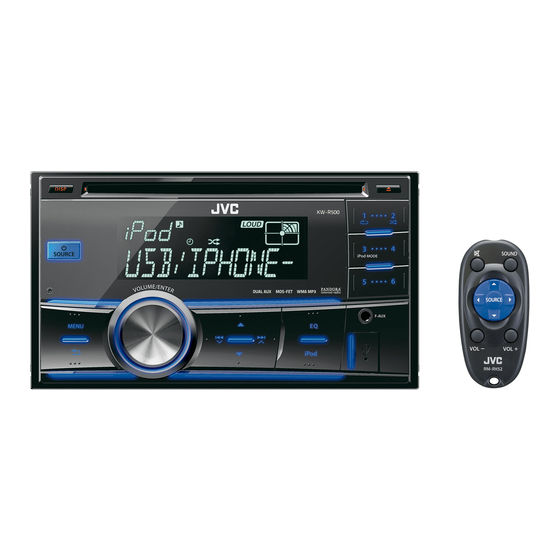
Page 5: Control Panel
Display window Ejects the disc Loading slot Front AUX input jack Control dial USB input terminal Remote sensor Aim the remote controller directly at the sensor. DO NOT expose to bright sunlight. Turns on. Turns off. (Hold) — Press the button on the control panel and turn the control dial within 2 seconds to select the source. -
Page 6: Radio
Select <FM> or <AM>. Auto search. (Press) Manual search. (Hold) “M” flashes, then press the button repeatedly. “ST” lights up when receiving an FM stereo broadcast with sufficient signal strength. You can preset up to 18 stations for FM and 6 stations for AM. -
Page 7: Cd/Usb
Label side USB input terminal USB 2.0 cable (not supplied) The source changes to “USB” and playback starts. The source changes to “CD” and playback starts. This unit can play MP3/WMA files stored in CD-R, CD-RW, and USB mass storage device (such as a USB memory and Digital Audio Player). -
Page 8: Ipod/Iphone
USB input terminal USB 2.0 cable (accessory of the iPod/iPhone) The source changes to “USB” “USB-IPOD” and playback starts. Select the desired track. <HEAD MODE>/<IPOD MODE>/ <EXT MODE> Repeat this step until the desired track is selected. HEAD Controls iPod playback through this If the selected menu contains many tracks, you MODE unit. -
Page 9: Pandora Internet Radio
Search for “Pandora” in the Apple iTunes App Store to find and install the most current version of the Pandora Select the station list display mode. application onto your device. In the application on your device, log in and create an account with Pandora . If you are not a registered user, an account BY DATE According to the registration date... -
Page 10: Playing External Component From Front/Rear Aux
For details, refer also to the instructions supplied with the external components. Connect to F-AUX on the control panel 3.5 mm (1/8") stereo mini plug and/or R-AUX on the rear panel. (not supplied) Set the source as necessary. (Hold) <SRC SELECT> Portable audio <F-AUX>/<R-AUX>... -
Page 11: Illumination Color Adjustments
Display zone Button zone All zone: Includes both Button zone and Display zone. You can select a preset color for <BUTTON You can store your own day and night colors for ZONE>, <DISP ZONE>, and <ALL ZONE> <BUTTON ZONE> and <DISP ZONE> separately. separately. -
Page 12: Brightness Adjustments
You can select your preferred brightness for <BUTTON ZONE>, <DISP ZONE> separately. (Hold) <DIMMER> BUTTON ZONE BUTTON 00 to 31 <BRIGHTNESS> DISP ZONE DISP 00 to 31 <DAY>/<NIGHT> Press to exit. This unit memorizes sound settings adjusted for each individual source. You can select a preset sound mode, for each (Hold) individual source, suitable for the music genre. -
Page 13: Remote Controller
Do not install any battery other than CR2025 or When you use the remote controller for the first its equivalent. time, pull out the insulation sheet. Do not leave the remote controller in places (such as dashboards) exposed to direct sunlight for a long time. -
Page 14: Menu Operations
Repeat step 2 if necessary. (Hold) To return to the previous menu, press To exit from the menu, press If no operation is done for about 60 seconds, the operation will be canceled. For settings, page 4. For settings, page 11. Selects the display and button illumination adjusted in the <BRIGHTNESS>/ <COLOR SETUP>... - Page 15 : Cancels. (Subwoofer) : Turns on the subwoofer output. : Audio signals with frequencies (Subwoofer low- lower than 55 Hz/85 Hz/120 Hz are sent to the subwoofer. pass filter) : Adjusts the subwoofer output level. (Subwoofer level) : Activates the High Pass Filter. Low frequency signals are cut off from (High-pass filter) the front/rear speakers.
-
Page 16: Additional Information
This unit can only play the following CDs: File extensions: MP3(.mp3), WMA(.wma) Bit rate: MP3: 8 kbps - 320 kbps This unit can play back multi-session discs; WMA: 32 kbps - 192 kbps however, unclosed sessions will be skipped Sampling frequency: during playback. -
Page 17: About Usb Device
Operation and power supply may not work as operations may not be performed correctly or intended for some USB devices. as intended. In this case, visit the following JVC The maximum number of characters for: website: – Folder names: 63 characters <http://www3.jvckenwood.com/english/car/... -
Page 18: Troubleshooting
RESET UNIT”/“WARNING CHK with tape before resetting the unit. ( page 3) WIRING THEN RESET UNIT” If the message does not disappear, consult your JVC car audio appears on the display and no dealer or kits supplying company. operations can be done. -
Page 19: Specifications
Power Output 20 W RMS x 4 Channels at 4Ω and ≤ 1% THD+N Load Impedance 4Ω (4Ω to 8Ω allowance) Frequency Response 40 Hz to 20 000 Hz Signal-to-Noise Ratio 80 dBA (reference: 1 W into 4Ω) Line-Out, Subwoofer-Out Level/Impedance 2.5 V/20 kΩ... - Page 20 EN, SP, FR 1211DTSSANJEIN © 2011 JVC KENWOOD Corporation...
- Page 21 KW-R500 GET0791-002A 1211DTSSANJEIN EN, SP, FR © 2011 JVC KENWOOD Corporation...
- Page 23 LINE OUT REAR FRONT Junte los cables del mismo color. Joignez les fils de même couleur ensemble.
- Page 27 Zip Code: Phone Number: E-Mail Address: 1) Would you like to receive the JVC Community e-mail newsletter? 2) Would you like to receive special offers from JVC? 3) Have you purchased an extended warranty for this product? Date of Purchase...
- Page 30 TO OUR VALUED CUSTOMER-- THANK YOU FOR PURCHASING THIS JVC PRODUCT. WE WANT TO HELP YOU ACHIEVE A PERFECT EXPERIENCE. NEED HELP ON HOW TO HOOK UP? NEED ASSISTANCE ON HOW TO OPERATE? NEED TO LOCATE A JVC SERVICE CENTER? LIKE TO PURCHASE ACCESSORIES? JVC®IS...
Need help?
Do you have a question about the KW-R500 and is the answer not in the manual?
Questions and answers