Table of Contents
Advertisement
INDEX
DESCRIPTION . . . . . . . . . . . . . . . . . . . . . . . . . . . . . . . . . . . . . . . . . . . . . . . . . . . . . . .29
HOW TO OBTAIN THE BEST RESULTS FROM YOUR OVEN . . . . . . . . . . . . . . . . . . . . . . . . .30
IMPORTANT SAFEGUARDS . . . . . . . . . . . . . . . . . . . . . . . . . . . . . . . . . . . . . . . . . . . . . .31
TECHNICAL SPECIFICATION . . . . . . . . . . . . . . . . . . . . . . . . . . . . . . . . . . . . . . . . . . . . .32
ELECTRICAL CONNECTIONS . . . . . . . . . . . . . . . . . . . . . . . . . . . . . . . . . . . . . . . . . . . . .32
INSTALLATION . . . . . . . . . . . . . . . . . . . . . . . . . . . . . . . . . . . . . . . . . . . . . . . . . . . . . . .33
MICROWAVE OUTPUT POWER . . . . . . . . . . . . . . . . . . . . . . . . . . . . . . . . . . . . . . . . . . .33
DESCRIPTION AND USE OF THE CONTROLS . . . . . . . . . . . . . . . . . . . . . . . . . . . . . . . . .34
STANDARD ACCESSORIES . . . . . . . . . . . . . . . . . . . . . . . . . . . . . . . . . . . . . . . . . . . . . .34
OVENWARE . . . . . . . . . . . . . . . . . . . . . . . . . . . . . . . . . . . . . . . . . . . . . . . . . . . . . . . .35
TIPS FOR USING MICROWAVES . . . . . . . . . . . . . . . . . . . . . . . . . . . . . . . . . . . . . . . . . .36
USING THE CONTROLS AND PROGRAMMING . . . . . . . . . . . . . . . . . . . . . . . . . . . . . . .37
MICROWAVE ONLY FUNCTION . . . . . . . . . . . . . . . . . . . . . . . . . . . . . . . . . . . . . . . . . .38
COMBI MICROWAVE + GRILL FUNCTION . . . . . . . . . . . . . . . . . . . . . . . . . . . . . . . . . . . .46
GRILL ONLY FUNCTION . . . . . . . . . . . . . . . . . . . . . . . . . . . . . . . . . . . . . . . . . . . . . . . .48
PROGRAMMING A SEQUENCE OF OPERATIONS . . . . . . . . . . . . . . . . . . . . . . . . . . . . . .50
USING THE "AUTOMATIC FUNCTION" BUTTONS . . . . . . . . . . . . . . . . . . . . . . . . . . . . . .51
"QUICK HEAT" PROGRAMME . . . . . . . . . . . . . . . . . . . . . . . . . . . . . . . . . . . . . . . . . . . .52
CHILD SAFETY . . . . . . . . . . . . . . . . . . . . . . . . . . . . . . . . . . . . . . . . . . . . . . . . . . . . . . .52
CLEANING AND MAINTENANCE . . . . . . . . . . . . . . . . . . . . . . . . . . . . . . . . . . . . . . . . .53
28
Advertisement
Table of Contents

Subscribe to Our Youtube Channel
Related Manuals for DeLonghi MW 603


Summary of Contents for DeLonghi MW 603
-
Page 1: Table Of Contents
INDEX DESCRIPTION ............29 HOW TO OBTAIN THE BEST RESULTS FROM YOUR OVEN . -
Page 2: Description
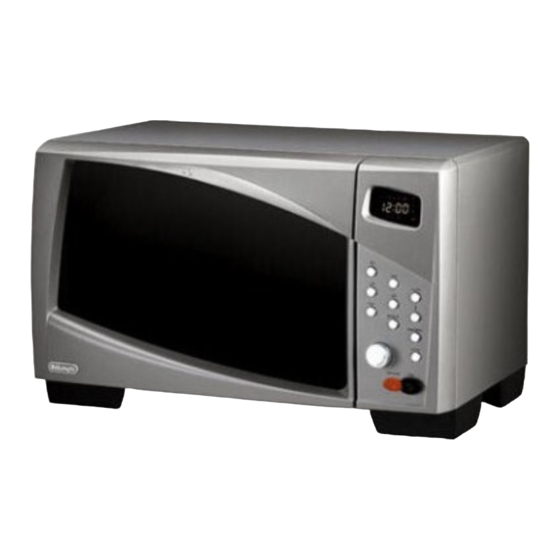
DESCRIPTION A Grill element B Control panel C Microwave outlet cover D Turntable spindle Inside of door Wire rack G Turntable H Turntable support... -
Page 3: How To Obtain The Best Results From Your Oven
HOW TO OBTAIN THE BEST RESULTS FROM YOUR OVEN Quantity/ Which function/power Instructions What do I want to do? time table page level should I choose? page • Keep food warm Microwave only Power (150 W) Defrost • Defrost Microwave only Button •... -
Page 4: Important Safeguards
IMPORTANT SAFEGUARDS Read these instructions carefully and keep for future reference. NB: This oven has been designed to defrost, heat and cook food in the home. It must never be used for other purposes, modified or tampered with in any way. 1) WARNING: If the door or door seals are damaged, do not use the appliance until it has been repaired by a qualified service engineer (trained by the manufac- turer or by the dealer's Customer Service). -
Page 5: Technical Specification
ve oven use (see the section on "Ovenware") . 14) The appliance becomes hot when in operation. Never touch the grill elements inside the oven. 15) When heating liquids (water, coffee, milk, etc.), a delayed action may cause the contents to boil over unexpectedly with a risk of scalds. -
Page 6: Installation
INSTALLATION 1) Unpack the oven and remove the protective packaging containing the turntable (G) and its support (H). Check that the turntable spindle (D) is fitted correctly into the recess in the centre of the turntable. 2) Clean the inside of the oven with a soft, damp cloth. 3) Make sure the oven has not been damaged during transport and above all that the door opens and closes perfectly. -
Page 7: Description And Use Of The Controls
DESCRIPTION AND USE OF THE CONTROLS 1. Display 6 - 7 - 12: Automatic function but- The display shows a 24- tons: hour clock, the cooking Press one of these buttons times set, the functions to prepare hot drinks, selected (top) and the ready meals, frozen pre- microwave power level cooked pizza or ready... -
Page 8: Ovenware
OVENWARE In microwave only and combi with microwave When using large rectangular containers functions, any glass (preferably Pyrex), ceramic, which are not able to turn inside the cavity, china or terracotta ovenware may be used block rotation of the turntable (G) by provided it has no metal decorations or parts extracting the spindle (D) from its housing. -
Page 9: Tips For Using Microwaves
TIPS FOR USING MICROWAVES Microwaves are a form of electromagnetic the dish. You can therefore use very little fat radiation. They occur in nature in the form of and in some cases no fat at all. light waves (eg. sunlight). In the oven, these As it is low in fat, microwave cooking is consi- waves penetrate food from all directions to heat dered to be healthy. -
Page 10: Using The Controls And Programming
USING THE CONTROLS AND PROGRAMMING SETTING THE CLOCK • When the appliance is connected to the household electricity supply for the first time or after it has been without power for some time, the figures 12:00 will flash on the display. To set the time, proceed as follows: 1. -
Page 11: Microwave Only Function
MICROWAVE ONLY FUNCTION This function can be used to: • Defrost ..... • Heat up ....page page •... - Page 12 Defrosting times Standing time Type Quantity Time set (minutes) Notes (minutes) MEAT • Roasts (pork, beef, veal, etc.) 1 kg 21 - 23 • Steaks, chops, slices 200 gr 5 - 7 • Casserole, goulash 500 gr 12 - 14 •...
- Page 13 HOW TO SET THE OVEN TO KEEP FOOD WARM, HEAT AND COOK 1. Press the button (5). (0.00 flashes on the display and the second microwave function indicator at the top left and first microwave power level indicator at the bottom right come on).
- Page 14 USING THE MICROWAVE ONLY FUNCTION TO KEEP FOOD WARM This function is recommended for all types of food. It enables cooked or heated food to be kept warm without becoming dry or sticking to the cooking container. Set the microwave power level at 1 and cover the food with a plate or clear film to keep it warm until served.
- Page 15 Heating times NB: Certain dishes can also be easily heated using the automatic functions (see page 30 or page 51). Cooking time Power Type Quantity Function Notes (minutes) level SOFTENING 100 gr 4 - 5 • Chocolate/icing Put on a plate. 50 -70 gr 0.5-0.10 Mix the icing once...
- Page 16 USING THE MICROWAVE ONLY FUNCTION TO COOK SOUPS AND RICE Soups and minestrones in general can be made with less water because very little water is lost through evaporation in microwave ovens. Add salt at the end of cooking or during standing time because salt has a dehydrating effect. Note that the time required to cook rice (or pasta) in a microwave oven is more or less the same as required to cook it traditionally on the stove.
- Page 17 Cooking times Standing time Type Quantity Power level Time set (minutes) Notes (minutes) FISH • Fillets 300 gr Cover with film 5 - 7 • Slices 300 gr “ Cover with film 7 - 9 • Whole 500 gr “ Cover with film 8 - 10 •...
- Page 18 CAKES, DESSERTS AND FRUIT At low power, cakes rise much more than with traditional cooking. As they do not form a crust, the surface should preferably be garnished with cream or icing (choco- late for example). Keep covered after cooking as they tend to become dry faster than those cooked in a traditional oven.
-
Page 19: Combi Microwave + Grill Function
COMBI MICROWAVE + GRILL FUNCTION This function can be used to: • Cook all types of roast meat, poultry, kebabs and potatoes rapidly ..page 47 • Brown dishes (eg. lasagne, au gratin vegetables, macaroni cheese)..page 47 PROGRAMMING THE COMBI MICROWAVE + GRILL FUNCTION 1. - Page 20 USING THE COMBI MICROWAVE + GRILL FUNCTION TO COOK This function is ideal for all dishes requiring browning. You should, however, bear the following in mind: • Never add condiments in general (add just half a glass of water to keep meat moist). •...
-
Page 21: Grill Only Function
GRILL ONLY FUNCTION This function can be used for: • All types of traditional grilling, for example: hamburgers, chops, frankfurters, toast, etc. page 49 PROGRAMMING COOKING WITH THE GRILL ONLY FUNCTION 1. Press the button (3). (0 0 : : 0 0 0 0 flashes on the display and the indicator light at the top corresponding to the grill function comes on). - Page 22 USING THE GRILL ONLY FUNCTION TO GRILL This function can be used to prepare all types of tasty grilled food. Turn all dishes over halfway through cooking time as the grill element radiates heat from the top part of the oven only. Do not preheat the grill.
-
Page 23: Programming A Sequence Of Operations
PROGRAMMING A SEQUENCE OF OPERATIONS • The following sequences can be set: - defrosting + cooking - cooking 1 + cooking 2 - defrosting + cooking 1 + cooking 2 Example: setting a defrosting + cooking sequence 1. Press the button (11). -
Page 24: Using The "Automatic Function" Buttons
USING THE "AUTOMATIC FUNCTION" BUTTONS automatic function buttons correspond to three different programmes with preset cooking time and power level to guarantee optimum results with the dishes described in the table below. Button What you can do Tips (7) BEVERAGES •... -
Page 25: Quick Heat" Programme
TO SET MEMORISED COOKING CYCLES, PROCEED AS FOLLOWS: 1. Press the required automatic function button. (The set time flashes on the display and the second indicator light at the top left corresponding to the microwave function and the indicator at the bottom corresponding to the set microwave power level come on). -
Page 26: Cleaning And Maintenance
CLEANING AND MAINTENANCE Before cleaning or maintenance, always unplug the appliance from the mains socket and wait for the oven to cool down. Cleaning To keep your appliance in optimum conditions, clean the door and the inside and outside of the oven regularly with a damp cloth and neutral soap or liquid detergent.
Need help?
Do you have a question about the MW 603 and is the answer not in the manual?
Questions and answers