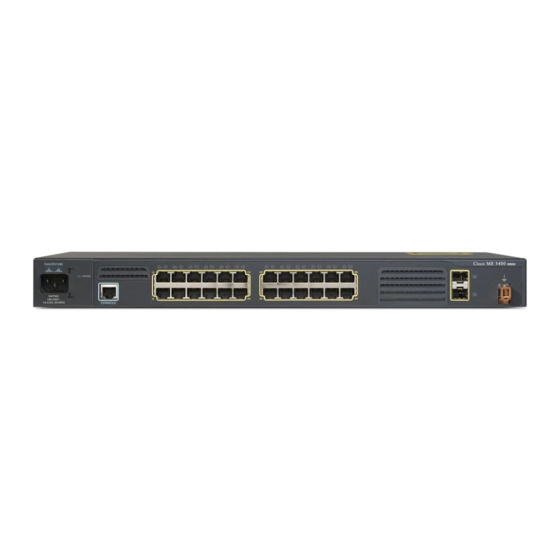
Cisco ME 3400 Getting Started Manual

Cisco ME 3400 Getting Started Manual

Ethernet access switches

Advertisement

Cisco ME 3400 and Cisco ME 2400 Ethernet Access
Switches Getting Started Guide
INCLUDING LICENSE AND WARRANTY
1
About this Guide
2
Taking Out What You Need
3
Initial Setup
4
Managing the Switch through the CLI
5
Rack-Mounting and Switch Port Connections
6
In Case of Difficulty
7
Obtaining Documentation
8
Documentation Feedback
9
Cisco Product Security Overview
10
Product Alerts and Field Notices
11
Obtaining Technical Assistance
12
Obtaining Additional Publications and Information
13
Cisco 90-Day Limited Hardware Warranty Terms
Getting Started Guide

Advertisement

Table of Contents
loading

Summary of Contents for Cisco ME 3400

  • Page 1 Getting Started Guide Cisco ME 3400 and Cisco ME 2400 Ethernet Access Switches Getting Started Guide INCLUDING LICENSE AND WARRANTY About this Guide Taking Out What You Need Initial Setup Managing the Switch through the CLI Rack-Mounting and Switch Port Connections...
  • Page 2: About This Guide

    Look on the switch rear panel to locate the software version. You can order printed copies of the manuals from the Cisco.com sites and from the telephone numbers listed in the “Obtaining Documentation” section on page 23.
  • Page 3: In The Box

    Shipping Box Contents The items that ship with the Cisco ME 3400 and ME 2400 switches depend on the type of switch that you order and the options that you choose. Some items shown in the illustration are optional. These items ship with all but the Cisco ME 3400G-2CS switch.
  • Page 4: Initial Setup

    These items ship with the Cisco ME 3400G-2CS switch: SYS T C is co M E 34 00 CO NS OL SE RIE Cisco ME switch Cable guide Documentation Four number-10 Phillips truss-head screws AC power cord Four number-12 Phillips truss-head screws...
  • Page 5 Follow these steps to set up your switch before you run the initial configuration. Your switch might look different from the illustrations in these steps, but the instructions apply to all the Cisco ME switches. Instructions for connecting the power source depend on whether the switch is powered through AC or DC power.
  • Page 6 It might take several minutes for the switch to Step 7 POST. complete POST. Verify that POST has completed by POST errors are usually fatal. Call Cisco Systems Step 8 confirming that the System LED immediately if your switch fails POST. rapidly blinks green. If the switch fails POST, the System LED turns amber.
  • Page 7: Completing The Initial Configuration

    Completing the Initial Configuration Follow these steps to complete the setup program and to create the initial configuration for the switch. Step 1 After you press Enter or Return at the prompt to start the initial configuration setup program, enter Yes at these three prompts: Would you like to terminate autoinstall? [yes/no]: yes Would you like to enter the initial configuration dialog? [yes/no]: yes At any point you may enter a question mark '?' for help.
  • Page 8 (Optional) Configure Simple Network Management Protocol (SNMP) by responding to Step 6 the prompts. You can also configure SNMP later through the CLI. To configure SNMP later, enter no. Configure SNMP Network Management? [no]: no Enter the interface name (physical interface or VLAN name) of the interface that connects Step 7 to the management network, and press Return.
  • Page 9 This switch enable secret 5 will be a standalone switch. The $1$Ulq8$DlA/OiaEbl90WcBPd9cOn1 Cisco ME switches do not support enable password enable_password clustering. line vty 0 15 password terminal-password Would you like to enable as a...
  • Page 10: Managing The Switch Through The Cli

    Managing the Switch through the CLI After initially setting up and installing the switch in your network, you can enter Cisco IOS commands and parameters through the CLI. Access the CLI either by connecting your PC directly to the switch console port or through a Telnet session from a remote PC or workstation.
  • Page 11: Before You Begin

    This section includes the basic installation warning statements. Translations of these warning statements and a complete list of warnings that are applicable to this switch appear in the Regulatory Compliance and Safety Information for the Cisco ME 3400 and Cisco ME 2400 Ethernet Access Switches document that shipped with your switch.
  • Page 12 This warning applies to all switches except the Cisco ME 3400G-2CS switch: Warning Before performing any of the following procedures, ensure that power is removed from the DC circuit. Statement 1003 Warning To prevent bodily injury when mounting or servicing this unit in a rack, you must take special precautions to ensure that the system remains stable.
  • Page 13 Warning For connections outside the building where the equipment is installed, the following ports must be connected through an approved network termination unit with integral circuit protection: 10/100/1000 Ethernet. Statement 1044 Warning This product requires short-circuit (overcurrent) protection, to be provided as part of the building installation.
  • Page 14: Attaching The Brackets

    Attaching the Brackets Use four Phillips flat-head screws to attach the long side of the brackets to the switches in one of three mounting positions (for all but the Cisco ME 3400G-2CS switch): SY ST EM R AT IN 10 0- 24 0V ~ 1A -0 .5...
  • Page 15: Rack-Mount The Switch

    SE RI ES Rack-Mount the Switch This figure shows how to rack-mount all but the Cisco ME 3400G-2CS switch. Use the black Phillips machine screw to attach the cable guide to the left or right bracket. Use the four number-12 Phillips machine screws to attach the brackets to the rack.
  • Page 16 SYS TEM RA TI NG 10 0- 24 0V ~ 1A -0 .5 A, 50 -6 0 HZ C O N S O Ci sc o M E 34 00 SER IES SYS TEM RA TI NG 10 0- 24 0V ~ 1A -0 .5 A, 50 -6...
  • Page 17: Connect To The Switch Ports

    This figure shows how to rack-mount the Cisco ME 3400G-2CS switch: SY ST C is co M E 3 4 0 0 CO NS O SE RI ES Black Phillips machine screw Number-10 Phillips truss-head screws Cable guide Connect to the Switch Ports This section describes how to connect to the fixed switch ports and to the SFP module ports.
  • Page 18: Install The Sfp Modules And Connect To The Ports

    The automatic medium-dependent interface crossover (auto-MDIX) feature is enabled by Note default on switches running Cisco IOS Release 12.2(18)SE or later. When the auto-MDIX feature is enabled, the switch detects the required cable type for copper Ethernet connections and configures the interfaces accordingly. Therefore, you can use either a crossover or a straight-through cable for connections to a copper 10/100, 10/100/1000, or 1000BASE-T SFP module port on the switch, regardless of the type of device on the other end of the connection.
  • Page 19: Troubleshooting Initial Configuration Setup

    For a list of supported modules, see the release notes on Cisco.com. For detailed instructions on installing, removing, and connecting to SFP modules, see the SFP module documentation. Removing and installing an SFP module can shorten its useful life. Do not remove and Caution insert SFP modules more often than is absolutely necessary.
  • Page 20: Resetting The Switch

    • Did you wait 30 seconds after connecting the If not, wait 30 seconds, re-enter 10.0.0.1 in the switch and the PC before entering the IP browser, and press Enter. address in your browser? • Did you lock yourself out and forget your See the “Recovering from a Lost or Forgotten password? Password”...
  • Page 21: Accessing Help Online

    First look for a solution to your problem in the troubleshooting sections of the hardware installation guide or the software configuration guide for your switch on Cisco.com. You can also access the Cisco Technical Support and Documentation website for a list of known hardware problems and extensive troubleshooting documentation, including: •...
  • Page 22 Cisco.com ). This reference provides detailed descriptions of the Cisco IOS commands specifically created or modified for the switch. • Cisco ME 3400 and ME 2400 Ethernet Access Switch System Message Guide ( not orderable but available on Cisco.com ). This guide provides descriptions of the system messages specifically created or modified for the switch.
  • Page 23: Obtaining Documentation

    The DVD enables you to access installation, configuration, and command guides for Cisco hardware and software products. With the DVD, you have access to the HTML documentation and some of the PDF files found on the Cisco website at this URL: http://www.cisco.com/univercd/home/home.htm...
  • Page 24: Documentation Feedback

    • Report security vulnerabilities in Cisco products • Obtain assistance with security incidents that involve Cisco products • Register to receive security information from Cisco A current list of security advisories, security notices, and security responses for Cisco products is available at this URL: http://www.cisco.com/go/psirt...
  • Page 25: Product Alerts And Field Notices

    Product Alert Tool on Cisco.com. This tool enables you to create a profile and choose those products for which you want to receive information. To access the Product Alert Tool, you must be a registered Cisco.com user. (To register as a Cisco.com user, go to this URL: http://tools.cisco.com/RPF/register/register.do) Registered users can access the tool at this URL: http://tools.cisco.com/Support/PAT/do/ViewMyProfiles.do?local=en...
  • Page 26: Cisco Technical Support & Documentation Website

    24 hours a day at this URL: http://www.cisco.com/techsupport Access to all tools on the Cisco Technical Support & Documentation website requires a Cisco.com user ID and password. If you have a valid service contract but do not have a user ID or password, you can register at this URL: http://tools.cisco.com/RPF/register/register.do...
  • Page 27: Submitting A Service Request

    Cisco engineer. The TAC Service Request Tool is located at this URL: http://www.cisco.com/techsupport/servicerequest For S1 or S2 service requests, or if you do not have Internet access, contact the Cisco TAC by telephone. (S1 or S2 service requests are those in which your production network is down or severely degraded.) Cisco engineers are assigned immediately to S1 and S2 service requests to help keep your...
  • Page 28: Obtaining Additional Publications And Information

    Information about Cisco products, technologies, and network solutions is available from various online and printed sources. • The Cisco Online Subscription Center is the website where you can sign up for a variety of Cisco e-mail newsletters and other communications. Create a profile and then select the subscriptions that you would like to receive.
  • Page 29: Cisco 90-Day Limited Hardware Warranty Terms

    Your formal Warranty Statement, including the warranties and license agreements applicable to Cisco software, is available on Cisco.com. Follow these steps to access and download the Cisco Information Packet and your warranty and license agreements from Cisco.com.
  • Page 30 Ninety (90) days. Replacement, Repair, or Refund Policy for Hardware Cisco or its service center will use commercially reasonable efforts to ship a replacement part within ten (10) working days after receipt of a Return Materials Authorization (RMA) request. Actual delivery times can vary, depending on the customer location.
  • Page 32 Slovakia • Slovenia • South Africa • Spain • Sweden • Switzerland • Taiwan • Thailand • Turkey • Ukraine • United Kingdom • United States • Venezuela • Vietnam • Zimbabwe CCVP, the Cisco logo, and Welcome to the Human Network are trademarks of Cisco Systems, Inc.; Changing the Way We Work, Live, Play, and Learn is a service mark of Cisco Systems, Inc.;...

This manual is also suitable for:

Me 2400

Table of Contents