Advertisement
Quick Links
Advertisement

Subscribe to Our Youtube Channel
Related Manuals for Wet Sounds REV 410


Summary of Contents for Wet Sounds REV 410
- Page 1 REV 410 Owner’s Manual & “Limited” Warranty...
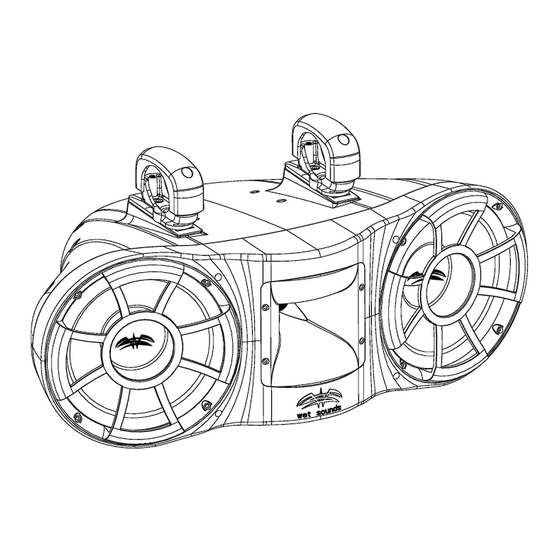
- Page 2 Technology Specifications: Thank You for purchasing this Wet Sounds product. Wet Sounds marine audio products represent the ultimate in high performance standards. The Revolution Series is specifically engineered to withstand the rigorous marine environment. Utilizing the state of the art acoustic engineering and three dimensional computer aided design, our “Revolution Technology”...
- Page 3 The driver compliment in each REV 410 combines Dual 10 inch Kevlar reinforced EFG™ drivers and one center mounted HLCD (Horn Loaded Compression Driver) which provide stellar output and a higher performance for the marine environment, Wet Sounds™...
- Page 4 Installation: REV 410 FC TC3-F Fixed Clamp Pipe Version Installation (pipe tower)
- Page 5 NOTE: ALLEN BOLTS TO ATTACH CLAMPS WILL BE INCLUDED IN THE MAIN REV 410 PACKAGING, NOT INSIDE THE CLAMP BOX. THERE WILL BE EXTRA BOLTS NOT USED. Step 4: Find the mounting location for the speaker and clamp and then mark the location on the bottom side of the pipe for the speaker wire.
- Page 6 Installation: REV 410 SC “Patent Pending” TC3-S Swivel Clamp Version Installation...
- Page 7 Blue Loctite on these bolts. NOTE: ALLEN BOLTS TO ATTACH CLAMPS WILL BE INCLUDED IN THE MAIN REV 410 PACKAGING, NOT INSIDE THE CLAMP BOX. THERE WILL BE EXTRA BOLTS NOT USED. Step 4: Clamp Bottom (3) and Detachment Plate (5) are already connected together.
- Page 8 Step 8: Make sure the clamp is tightened all the way so there is no movement Step 9: The swivel clamp allows you to rotate the clamp slightly on the dual clamp set up of the REV 410 to work on towers with slight curves. Then tighten the bolt to lock it in place.
- Page 9 Cast Mount Tower Version using the TC3-S clamp for quick disconnect and swivel function. Step 1: Attach Male Connector (10) from clamp base to Female Connector (11) Step 2: Push connector into center hole of speaker as you place clamp base onto the speaker housing.
- Page 10 The warranty is void if Wet Sounds deems the product was installed or used improperly. Wet Sounds shall not be responsible for any incidental or consequential damages, except to the<...
- Page 11 What Wet Sounds™, Inc. Will Do Wet Sounds, Inc will repair any part of your product that proves to be defective in materials or workmanship. In the event repair is not possible, Wet Sounds, Inc will replace the product in question. If it is deemed necessary Wet Sounds, Inc.
Need help?
Do you have a question about the REV 410 and is the answer not in the manual?
Questions and answers