Table of Contents
Advertisement
Advertisement
Table of Contents

Related Manuals for Logitech Harmony 610


Summary of Contents for Logitech Harmony 610
- Page 1 User Manual User Manual Version 1.0 Version 1.1...
-
Page 2: Table Of Contents
Adding custom-labeled buttons to an Activity ..............18 Adding additional features to your Harmony 610 ............... 19 Teaching your Harmony 610 new commands using your old remote ........19 Naming a new command your remote learned ..............20 Types of delays or speed settings ..................21 Adjusting the delay between IR commands (speed settings) .......... - Page 3 Troubleshooting problems with your Harmony 610 ..............24 Figuring out which inputs your system uses ................26 Figuring out which type of input control you have ............... 26 Step 1— Turn on all your devices ..................27 Step 2 — Watch the TV ..................... 28 Step 3 —...
-
Page 4: Introduction
The Harmony 610 delivers powerful Activity-based control by using Smart State Technology ® This technology allows the Harmony 610 to keep track of the devices it controls, so it always knows which of your devices are on. Using Smart State Technology ®... -
Page 5: The Buttons On Your Harmony 610
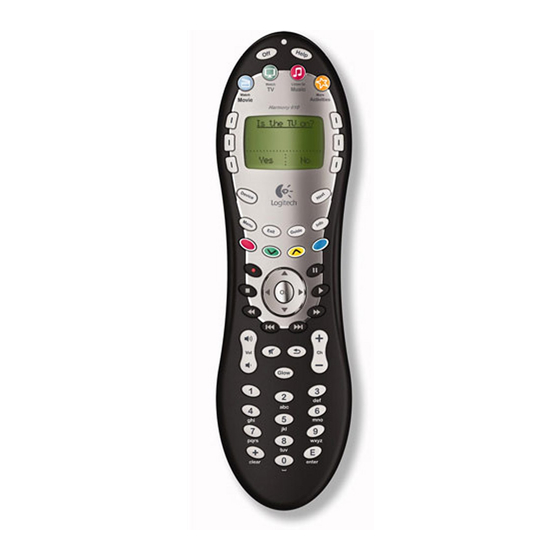
The buttons on your Harmony 610 The system off button turns off all the devices in the current Activity. The arrow keys help you page through items on the screen. The Harmony 610 buttons may have different functions The function buttons are dynamic and select different functions on the or control different remote or the Activity. -
Page 6: What's On The Harmony 610 Screen
The status light will illuminate when the Harmony is sending commands to your devices. Devices When you press the Devices button, the Harmony 610 screen displays a list of your devices. From this screen, you can control individual devices by selecting the device you’d like to control. -
Page 7: Using Your Harmony 610
Switching between Activities To select a new Activity, press the Activities button, and select the Activity you want to enjoy. The Harmony 610 will take care of powering on the needed devices, and powering off the ones not needed. Turning off your devices Press the off button to power off all the devices used in the Activity. -
Page 8: Using The Help Button
Based on your answers, the Harmony 610 re-sends the necessary commands to synchronize with your devices. When you’re done with this process, the Harmony 610 will be “in sync” with your devices. Before using the Help button, be sure you’ve addressed the cause of the... -
Page 9: Controlling Your Devices Individually
Select the device you wish to control by pressing the side LCD button closest to your selection.. After you select a device, the Harmony 610 controls only that device. You have access to all the commands for the device included in your Harmony 610 configuration. -
Page 10: Setting Up Your Harmony 610 For The First Time
Create Account: the setup walks you through creating a user account on the Harmony Remote Software. Check connection: the software ensures your computer and Harmony 610 are communicating with each other. Set up Devices: the software walks you through entering the manufacturer and model numbers of your entertainment system that you collected using the Device Worksheet. -
Page 11: Creating Your User Account
Harmony Remote Software home page is the place to start. 2. Connecting your Harmony 610 to your computer To connect your Harmony 610 to your PC, use the USB cable provided. Connect the smaller end of the cable to the USB port on your remote. -
Page 12: Setting Up The Devices You Want To Control
3. Setting up the devices you want to control The guided online setup asks you to enter your device information. Enter the information for all the entertainment components you want to control with your Harmony 610. You should use the Device Worksheet to gather all your device information before starting the setup process. -
Page 13: Updating The Remote
After you enter your device and Activity information, the software saves your information. It also transfers the information to your Harmony 610. After the software updates your remote, you’re ready to test your setup. For specific details about testing your setup, see the chapter Testing your Setup. -
Page 14: Testing Your Setup
Testing your setup Every time you update your Harmony 610, you should test your remote to ensure it’s working the way you expect. This chapter gives you the information you need to test your remote. It also has some suggestions on what to check while you’re testing your setup. -
Page 15: Adding An Extra Device (Passthrough) To An Activity
Adding an extra device (passthrough) to an Activity A passthrough device is a device that you add to your system that a signal passes through unaltered. For example, if you use your DVD recorder (or VCR) to record shows from your satellite or set top box, you may need to add your DVD recorder as a passthrough device. -
Page 16: Changing How Buttons Work In An Activity
Changing how buttons work in an Activity When you select an Activity, your Harmony 610 turns on all the required entertainment devices, sets up the device inputs correctly, and sets up the remote’s buttons to control the devices in the Activity. For example, when you select the Watch a DVD Activity, the volume buttons on the Harmony 610 changes the volume. -
Page 17: Changing Your Setup
Settings. Select Rename <current Activity name>. Adding and changing your devices To add or change a device in your Harmony 610 set up, use the Harmony Remote Software and select the Devices tab. • To add a device, click Add Device. -
Page 18: Controlling The Remote Assistant
Follow the instructions online. Personalizing your Harmony 610 You can personalize your Harmony 610 to make the screen look and act the way you want. Adding custom-labeled buttons to an Activity If you want a button to do something specific, or there’s a function on your device’s original remote that’s not on the Harmony 610, you can create your own buttons that appear on the... -
Page 19: Adding Additional Features To Your Harmony 610
Teaching your Harmony 610 new commands using your old remote With the Learn IR feature of the Harmony 610 and the Harmony Remote Software, you can use your device’s original remote to “teach” your Harmony 610. You should only need to use this feature when Logitech’s device list doesn’t have your device listed, or there’s a button you want... -
Page 20: Naming A New Command Your Remote Learned
This way, you can refer to the command by name in various locations in the Harmony Remote Software. Logitech recommends you use the default names listed on the Learn IR page. By using the default names, you minimize the chance of a button being assigned incorrectly on the Harmony 610. -
Page 21: Types Of Delays Or Speed Settings
Types of delays or speed settings If your device doesn’t react to a command from the Harmony 610, it may be because the delay setting needs to be adjusted. By default, different devices take different amounts of time to react to a command from a remote control. To accommodate these differences in your devices, the Harmony 610 uses several types of delays, or speed settings, to control your devices. -
Page 22: Adjusting The Delay Between Ir Commands (Speed Settings)
If you find the delay between IR commands is too long, especially when changing channels on your TV, you can change the delay time for a device that is reacting too slowly. The Harmony 610 uses several different delays to control your devices. For more information on which delay you need to adjust, see Types of delays or speed settings. -
Page 23: Maintaining Your Harmony 610
After you finish making any changes to your Harmony 610 configuration, you should test the new set up to ensure everything is working the way you expect. This testing process is the same as the one you did when you set up your Harmony 610 for the first time. For more detailed information, see Testing your setup. -
Page 24: Troubleshooting Problems With Your Harmony 610
Activity is set up to use the correct input your TV needs to be set on to get a picture. Next, check that the inputs are in the correct order for the Harmony 610 to know how to cycle through each input. If you’re still experiencing trouble, try raising the Inter-Device and Input Delays your TV. - Page 25 Watch TV Activity. • You can map the command to any unused button on the Harmony 610 or on the remote’s screen. The command is likely in our database, but wasn’t mapped to the Activity. If we’re missing the command, the Harmony 610 can learn it from your original remote.
-
Page 26: Figuring Out Which Inputs Your System Uses
Figuring out which inputs your system uses One of the most important parts to creating your Activities for your Harmony 610 is determining which inputs your system uses for each device. This chapter gives you some suggestions on how to figure out which inputs your entertainment system uses if you’re not sure. -
Page 27: Step 1- Turn On All Your Devices
(Option 1). Step 1— Turn on all your devices To determine which devices are using which inputs, Logitech recommends you start by turning on all the devices in your entertainment system. If possible, you should even start something playing in your DVD player, CD player, VCR, etc. -
Page 28: Step 2 - Watch The Tv
Step 2 — Watch the TV In this step, you must use your TV’s original remote control to switch between inputs. Using your TV’s original remote, select each input one-at-a-time. For each input, note which device appears to be connected to that input. For example, if you switch to VIDEO 1 and see your DVD playing, you know your DVD player is connected to VIDEO 1. -
Page 29: Getting Help With Your Harmony 610
Getting help with your Harmony 610 Contacting Customer Support If you’re experiencing problems and can’t find the solution, our courteous and expert professionals can assist! Log on to the Harmony Remote Software, click the More Help button located in the Tip Center and then select the Contact Us tab. -
Page 30: Using The On-Remote Help
Harmony One to re-synchronize it with your entertainment system. See Using the Help button. Logitech’s Harmony Remote user forums You can also access the user forums to see what other users like you’re discussing. Simply go to http://forums.logitech.com/. -
Page 31: Appendix A - Device Information
• NOT serial number (SN) which is usually much longer number. • examples: RC-QN3BK, CT-36XF36C, Explorer 3100, L32 HDTV 10A, etc. Once you have gathered all of your information, take this worksheet to your computer and continue with the Setup software. © Copyright 2006 Logitech or its licensors. All rights reserved. -
Page 32: Appendix B - Glossary
Appendix B - Glossary Amplifier A stereo component that outputs to speakers, and increases the gain or level of an audio signal. An amplifier doesn’t typically include a radio. Anamorphic Also referred to as Enhanced for Widescreen, or Enhanced for 16:9. The views process that horizontally shrinks a 16:9 image into a 4:3 space to convert images between widescreen and typical television image aspect ratio. - Page 33 NTSC (National The standard video broadcast format used in North America. Television System(s) Committee) A device that produces the sound or picture, for example, a TV or Output Device speakers. A video format that is used in the UK, and parts of Europe and Asia. (Phase Alternating Line) Passthrough...
- Page 34 SACD (Super A read-only optical audio disc aimed at providing much higher quality of digital Audio CD) audio reproduction than the compact disc. Satellite Radio A service in the United States that provides digital programming directly from satellites. Currently the 2 main providers for service are XM and Sirrus. SDTV Standard One mode of operation of digital television where the broadcaster transmits Definition pictures with detail similar to, or slightly better than, today’s analog television.
-
Page 35: Appendix C - Product Specification
Appendix C - Product Specification LCD Size 1.5" Diagonal LCD Resolution 96 x 64 LCD Screen Monochrome Power Source 4 x AAA batteries Power Type Alkaline Brands Supported 5,000+ Devices Supported 225,000+ Maximum number of devices per account Backlit keypad Backlight Color Green IR Learning... - Page 36 © 2008 Logitech Inc. All rights reserved. Logitech's trademarks are either registered trademarks or trademarks of Logitech in the US and other countries. All other trademarks are the property of their respective owners.
Need help?
Do you have a question about the Harmony 610 and is the answer not in the manual?
Questions and answers