Table of Contents
Advertisement
TABLE OF CONTENTS
1
HITACHI
Instruction Manual
8mm Video Camera/Recorder
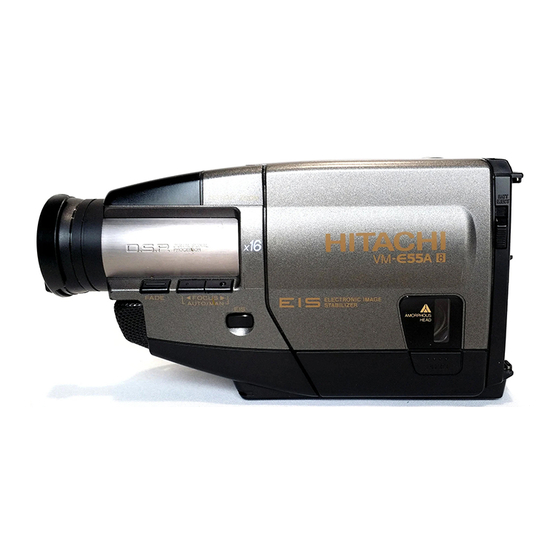
VM-E53A/VM-E55A
Hitachi Home Electronics (America), Inc.
3890 Steve Reynolds Blvd., Norcross, GA 30093
Pointe Claire,
Tel. 404-279-5600
HITACHI SALES CORPORATION OF
HAWAII, INC.
3219 Koapaka Street, Honolulu, Hawaii 96819
Tel. 808-836-3621
P4708922 © Hitachi, Ltd. 1993
HITACHI (HSC) CANADA INC.
3300 Trans Canada Highway,
Quebec, H9R 1B1, CANADA
Tel. 514-697-9150
Printed in Japan KM-R(N)
E145554/E72118
1
Advertisement
Table of Contents

Related Manuals for Hitachi VM-E53A


Summary of Contents for Hitachi VM-E53A
- Page 1 TABLE OF CONTENTS HITACHI Instruction Manual 8mm Video Camera/Recorder VM-E53A/VM-E55A Hitachi Home Electronics (America), Inc. 3890 Steve Reynolds Blvd., Norcross, GA 30093 Pointe Claire, Tel. 404-279-5600 HITACHI SALES CORPORATION OF HAWAII, INC. 3219 Koapaka Street, Honolulu, Hawaii 96819 Tel. 808-836-3621 P4708922 ©...
-
Page 2: Table Of Contents
TABLE OF CONTENTS TABLE OF CONTENTS TABLE OF CONTENTS ... 2 For Your Safety... 4 Read This First... 7 Before You Begin ... 8 IMPORTANT SAFEGUARDS... 8 IMPORTANT SAFETY INSTRUCTIONS FOR AC ADAPTER/CHARGER ... 13 Features ... 14 Components and Accessories... 15 Getting Started... - Page 3 TABLE OF CONTENTS Connecting to a Television with Audio In and Video In Jacks... 37 Connecting to a Television without Audio In and Video In Jacks ... 38 Simple Playback (Using the Electronic Viewfinder) ... 38 Using Still ... 38 Using Forward and Reverse Search ...
-
Page 4: For Your Safety
For Your Safety For Your Safety The CAMERA/OFF/VIDEO switch turns the camera/recorder on and off, leaving the date/time feature unaffected. If the unit is to be left unattended for a long period of time, turn the camera/recorder off and attach the lens cap. Illustrated below is the label on the bottom of your unit. - Page 5 For Your Safety Caution to the user: Changes or modifications not expressly approved by the party responsible for compliance could void the user's authority to operate the equipment. WARNING: TO PREVENT FIRE OR SHOCK HAZARD, DO NOT EXPOSE THIS UNIT TO RAIN OR MOISTURE.
- Page 6 For Your Safety MOISTURE When the camera/recorder is exposed to rapid temperature changes from cold to warm, drops of moisture can form inside the mechanism. A flashing "DEW" indication in the viewfinder indicates that moisture has condensed on the recorder mechanism, which could result in tape damage.
-
Page 7: Read This First
• "Advanced Techniques" to help you with some of the exciting, sophisticated features of the Hitachi VM-E53A/E55A. We hope you will take the time to learn about these functions since they have been designed for you. You can use the video camera/recorder without reading this section. -
Page 8: Before You Begin
Before You Begin Before You Begin Any problems that occur as a result of any of the following conditions will not be covered by our warranty. Be careful that no water, dust or sand enters the camera/recorder. When you shoot at a scene which contains an extremely bright object such as the sun or a light source, a bright vertical bar may appear in the picture. - Page 9 IMPORTANT SAFEGUARDS line plug (a plug having one blade wider than the other). This plug will fit into the power outlet only one way. This is a safety feature. If you are unable to insert the plug fully into the outlet, try reversing the plug. If the plug should still fail to fit, contact your electrician to replace your obsolete outlet.
-
Page 10: Example Of Antenna Grounding
IMPORTANT SAFEGUARDS Caution: Maintain electrical safety. Powerline operated equipment or accessories connected to this unit should bear the UL listing mark or CSA certification mark on the accessory itself and should not have been modified so as to defeat the safety features. This will help avoid any potential hazard from electric shock or fire. - Page 11 IMPORTANT SAFEGUARDS could result in a fire or electric shock. Never spill liquid of any kind on the video product. 16 Lightning -- For added protection for this video product during a lightning storm, or when it its left unattended and unused for long periods of time, unplug it from the wall outlet and disconnect the antenna or cable-system.
- Page 12 IMPORTANT SAFEGUARDS adjustment of other controls may result in damage and will often require extensive work by a qualified technician to restore the video product to its normal operation. e. If the video product has been dropped or the cabinet has been damaged. f.
-
Page 13: Important Safety Instructions For Ac Adapter/Charger
IMPORTANT SAFETY INSTRUCTIONS FOR AC ADAPTER/CHARGER IMPORTANT SAFETY INSTRUCTIONS FOR AC ADAPTER/CHARGER 1. Save these instructions -- This page contains important safety and operating instructions for AC Adapter/Charger Model VM-AC82A(R). 2. Before using AC Adapter/Charger, read all instructions and cautionary markings on (1) AC Adapter/Charger, (2) battery and (3) product using battery. -
Page 14: Features
• It cannot record and play back in the LP mode (7.2 mm/sec.). Features • Easy to use • 16x zoom ratio • Instant zoom • Multi-function TV/Cam remote control • Image stabilization (only for VM-E55A) • Difference between Models VM-E53A/E55A Electronic Image Stabilizer Feature Manual Focus Feature Fade Feature VM-E53A VM-E55A... -
Page 15: Components And Accessories
IMPORTANT SAFETY INSTRUCTIONS FOR AC ADAPTER/CHARGER Components and Accessories Check that you have the following components and accessories before preceding. 1. AV output cord 2. Battery pack 3. AC adapter/charger 4. Remote control battery 5. Shoulder Strap 6. External power adapter 7. -
Page 16: Getting Started
Set aside some time, relax, and familiarize yourself with this quality instrument. Enjoy getting to know all about your Hitachi 8mm camera/recorder. The more comfortable and familiar you are with the machine and its features, the more you can make it do for you. -
Page 17: Additional Information
Getting Started After charging set the mark switch to red so that you may quickly identify whether the battery is charged or uncharged. Note: The marker switch is not concerned with the battery's performance. Additional Information To use a battery in optimum condition: •... - Page 18 Getting Started ATTENTION: The product that you have purchased contains a rechargeable battery. The battery is recyclable. At the end of its useful life, under various state and local laws, it may be illegal to dispose of this battery into the municipal waste stream. Check with your local solid waste officials for details in your area for recycling options or proper disposal.
-
Page 19: Adjusting The Electronic Viewfinder
Getting Started Adjusting the Electronic Viewfinder The electronic viewfinder adjusts simply by pivoting it to a position where it is comfortable and easy to see through. Place the viewfinder back in its original position before storing the camera/recorder in its case or carrying the camera recorder around to avoid damaging the viewfinder or camera/recorder. -
Page 20: Attaching The Optional Wide Or Tele Converter Lens
Getting Started Attaching the Optional Wide or Tele Converter Lens 1. To remove the lens hood, turn it counterclockwise. 2. Remove both caps of the converter lens. 3. Screw the lens into the threads on the camera/recorder lens assembly. Loading Batteries Install the remote control battery now to prevent misplacing it. -
Page 21: Camera/Recorder Battery
Getting Started IF SWALLOWED CONSULT A PHYSICIAN IMMEDIATELY FOR EMERGENCY Note: Replace remote control battery with 3V micro lithium cells such as Maxell CR2025 or its equivalent. Note: Dispose of battery safely in accordance with local laws. Do not dispose of in fire. Camera/Recorder Battery Before you install the battery for the first time it must be fully charged. - Page 22 Getting Started This symbol indicates a fully charged battery. This symbol indicates a partially charged battery. This flashing symbol indicates a battery nearly out of power. Use an alternate power source or charge the battery before continuing to use the camera/recorder.
-
Page 23: Using Alternative Power Sources
Note: The AC adapter/charger can be used around the world. An AC plug adapter is required in some foreign countries. If you need one purchase it at your Hitachi distributor. Note: The battery level indicator sometimes displays partial charge symbol when using the AC adaptor/charger. -
Page 24: Using A Car Battery
Using a Car Battery The camera/recorder can be powered with a car battery by using an optional car battery cord (Hitachi VM-CC80A) to plug the camera/recorder into the car's cigarette lighter socket. Please ensure that the CAMERA/OFF/VIDEO switch is in the OFF position whenever attaching or detaching any power supply (ie. -
Page 25: Inserting And Removing Cassettes
Getting Started Inserting and Removing Cassettes A power source must be connected before inserting or removing cassettes. Once connected cassettes can be inserted or removed whether the CAMERA/OFF/VIDEO switch is on or off. Inserting a Cassette 1. Slide the EJECT switch in the direction of the arrow. The cassette door opens automatically. -
Page 26: Protecting Recorded Material
Getting Started Protecting Recorded Material Protect 8mm cassettes from accidental erasure by sliding the tab on the side of the cassette towards the opposite side until the tab is completely visible. Slide the tab in the opposite direction, until the tab disappears, to record on the cassette again. Attaching the Optional DC Camera Light You can use the DC camera light to light subjects in darkened areas or correct unflattering shadows. -
Page 27: Removing The Dc Camera Light
Getting Started vibrations. • If the DC camera light is turned on and off during recording, there could be noise in the picture. Watch the battery charge indicator especially when using a battery as the power source. • When the DC camera light is used, the operation time of the camera/recorder when a fully-charged battery pack is attached is halved. -
Page 28: Using Memory
Getting Started Note: Only replace the camera light bulb with VM-CP4L (optional) to reduce the risk of fire. Using Memory The linear time counter memory stops a rewinding tape at approximately 0:00:00M. This feature helps in locating a specific point in the tape to which you wish to return. An example might be that you have recorded some tape that you have already watched, you continue recording but do not care to watch the tape you recorded earlier. - Page 29 Getting Started 1. Load the battery ("Loading the Batteries: Camera/Recorder battery" p 14). Press the red button on the CAMERA/OFF/VIDEO switch as you slid it to CAMERA. 2. Press the DATE button and look into the viewfinder. The date and time should appear in the lower right with the "1"...
-
Page 30: Correcting The Date And Time
Getting Started Correcting the Date and Time 1. Press the DATE button while pressing the stop button. The flashing cursor appears at the month. 2. Move to where you need to make the correction with the STOP button and use the F.FWD and REW/REVIEW to correct. -
Page 31: Remaining Tape
Getting Started Remaining Tape The tape remaining display shows the remaining tape that can be used for recording and playback, using seven dashes. This feature is handy when recording since it lets you know how long you can record on the loaded tape. Insert a cassette into the camera/recorder and start recording or playback;... -
Page 32: Getting Started - Identifying Controls
Getting Started - Identifying Controls Getting Started - Identifying Controls Left side / Front Controls Illustration 1. Lens F1.4 (6~46mm) 8:1 power zoom lens with auto focus and auto iris functions. 2. Record Indicator This indicator lights when the camera/recorder is recording. 3. - Page 33 Getting Started - Identifying Controls 11. EIS (Electronic Image Stabilizer) Button (Only for VM-E55A) EIS corrects slight shaking of an image ("Using the Electronic Image Stabilizer," p. 32). 12. FOCUS Control (AUTO/MAN) Buttons (Only for VM-E55A) Press these buttons simultaneously to select manual or automatic focus. For manual focusing ("Using Manual Focus,"...
- Page 34 Used for controlling the TV. • POWER: Turns the TV on and off. • AVX: Used for recording picture and sound from an auxiliary input (only wity Hitachi TVs) • VOLUME: Increase ( ) or decrease ( ) the volume.
- Page 35 Getting Started - Identifying Controls Use this button to create and record titles for your tapes ("Creating and Recording Titles," p 35). 33. DISPLAY Button (only on the remote control) Use this button to select the viewfinder and TV display ("Using the Display Button," p 19).
-
Page 36: Basic Techniques
Let's get started! Making a Basic Recording The Hitachi VM-E53A/55A uses PROGRAM AE auto exposure that automatically selects the optimum shutter speed (either 1/60, 1/100, 1/120, 1/180, 1/250, 1/350, 1/500, 1/750, 1/1000, 1/1500, 1/2000, or 1/4000 of a second). The iris adjusts automatically in response to shutter speed. -
Page 37: Playing Back Your Recording
Basic Techniques 6. To stop recording press the Start/Stop button and REC disappears from the viewfinder replaced by Note: TAPE END flashes in the viewfinder when about 3 minutes or less remain of the tape cassette. Note: If the camera/recorder is left in record/pause mode for more than 5 minutes, the camera/recorder turns off automatically. -
Page 38: Connecting To A Television Without Audio In And Video In Jacks
Basic Techniques 3. Turn on your television. 4. Insert the previously recorded cassette into the camera/recorder. 5. Hold down the red button on the CAMERA/OFF/VIDEO switch while sliding the switch to VIDEO. 6. Press the PLAY button to begin playback. 7. -
Page 39: Using Forward And Reverse Search
This is normal during search mode. Advanced Techniques The Hitachi VM-E53A/E55A offers a diverse group of features that add interest and excitement to your videos. Adding fades to smooth transitions creates videos with a professional look (only for the VM-E55A). -
Page 40: Using The Power Zoom
Advanced Techniques Using the Power Zoom The power zoom W control widens the picture, moving the subject farther away, while the power zoom T control brings the subject closer, narrowing the picture. If appears at the left of the viewfinder, the digital zoom function shown below has been engaged. -
Page 41: Using The Digital Zoom
Advanced Techniques Using the Digital Zoom The digital zoom increases the magnification of the power zoom by 2 times. You must place the subject you wish to magnify at the center of the viewfinder. Note: When the digital zoom is used, the more the image is magnified, the rougher the picture becomes. -
Page 42: Using Auto Focus
Advanced Techniques Using Auto Focus The camera/recorder focuses the subject in the center of the viewfinder automatically unless the manual focus is engaged. With the VM-E55A, if appears in the viewfinder, manual focus is engaged. Press the FOCUS control (AUTO/MAN) buttons simultaneously to return to auto focus. -
Page 43: Using Manual Focus (Only For Vm-E55A)
Advanced Techniques Objects with little difference in light reflection such as a white wall Rapidly moving objects Dark objects Note: With the T zoom control you can use the auto focus with subjects that are 3.6 feet away from the lens and further away to infinity. With the W zoom control you can use the auto focus with subjects 1.2 inches away from the lens and further away to infinity. -
Page 44: Using Fade (Only For Vm-E55A)
Advanced Techniques The electronic image stabilizer (EIS) corrects slight shaking of the image being recorded and is effective in the following situations. • While you zoom to a distant subject. • While you approach a small subject. • While you walk around. •... -
Page 45: Fading In
Advanced Techniques • Wipe fade: The picture opens gradually from the center of a black screen or closes into the center to a black screen. • Zoom fade: Fades in while zooming from a white screen or fades out while zooming to a white screen. -
Page 46: Using Instant Review
Advanced Techniques Using Instant Review Use this feature to view the last few seconds of the tape you shot. 1. Set the camera/recorder to record/pause mode and tap the REW/REVIEW button. The last few seconds of tape play back in reverse and then in normal playback mode. 2. -
Page 47: Creating And Recording Titles
Advanced Techniques Creating and Recording Titles Create titles easily and personalize your recordings while keeping a permanent visual record of what is contained on a tape. The camera/recorder can store 2 different titles in its memory. A title stored in memory can be displayed and recorded at any time. A title contains two lines of up to 16 characters per line. -
Page 48: Correcting Errors
Advanced Techniques 7. Complete the title by repeating steps 5 and 6. 8. When you complete your title, press PLAY to create a second title as required, or press the TITLE ON/OFF button on the remote control to store the title in memory and remove the title graphics from the viewfinder. -
Page 49: Using The Wireless Remote Control
Note: The remote control code of this camera/recorder is Hitachi code VCR2. If you have a VCR with the same code you Hitachi VCR may malfunction when you use the camera/recorder's wireless remote control. -
Page 50: Using Synchro Edit
VCR. This requires an optional synchro edit cord. The Hitachi VM-E53A/E55A uses a flying erase head to eliminate glitches or rainbow noise that sometimes occurs between edits. Your VCR must have the EDIT IN jack to use the synchro edit. - Page 51 Advanced Techniques 0:00:00M. Rewind to the point where you wish to start recording and start copying. When the linear time counter reaches 0:00:00 the recording stops automatically, pausing the VCR in the record mode. Note: If the tape counter reads "0:00:00M" you cannot start recording.
-
Page 52: Controlling Your Tv With The Camera/Recorder
If the TV channel still doesn't change after going through all the button combinations listed, it is likely that you will not be able to program this remote control for your TV. TV Brands Press CH ( ) and This Button Hitachi Zenith VOL ( ) -
Page 53: Controlling The Tv
Be aware that not all of your TV's functions may work even though the remote control is correctly programmed. Note: The AVX Button can only be used with Hitachi TVs. Note: It may not be possible to control all TVs listed in this Table. -
Page 54: Using Audio/Video Dubbing
Advanced Techniques Using Audio/Video Dubbing Use audio/video dubbing to record audio and video from the camera/recorder's built-in microphone and camera onto a previously recorded tape in the camera/recorder. Audio/Video Dubbing Diagram 1. Hold down the red button on the CAMERA/OFF/VIDEO switch while sliding the switch to VIDEO. -
Page 55: Recording Television Programs
General Maintenance Recording Television Programs If your television or VCR has AUDIO OUT and VIDEO OUT jacks you can record television programs with your camera/recorder. Recording TV Diagram 1. Connect the camera/recorder to a power source. 2. Insert a cassette in the camera/recorder. 3. - Page 56 General Maintenance If after cleaning the heads the picture does not clear up consult your nearest dealer or VCR service center for professional head cleaning.
-
Page 57: Cleaning The Lens And Picture Tube Of The Electronic Viewfinder
5. Turn the eye cup clockwise until it stops, the push it in all the way. Periodic Maintenance A precision electromechanical device, the Hitachi VM-E53A/E55A requires maintenance after a period of normal use. We expect that no other maintenance other than head cleaning will be required during the period of warranty unless the camera/recorder is used either heavily or seldom. -
Page 58: Troubleshooting
General Maintenance Troubleshooting Quality is very important at Hitachi. We inspect and check every camera/recorder carefully at the factory under the most rigid quality control and inspection systems. If problems develop please check the following possible solutions before inquiring about professional service. -
Page 59: Battery Condition
General Maintenance PLAYBACK OF PRE-RECORDED CASSETTE PLAYBACK OF PRE-RECORDED CASSETTE Symptom “PLAY” button cannot be engaged. No picture appears on television screen when “PLAY” button is pressed. Interference on playback picture. Picture bends at the top of the TV screen. Color of your TV screen is too bright, too faint or change. - Page 60 General Maintenance EJECT OR TROUBLE DISPLAY Symptom EJECT or TROUBLE appears in the viewfinder. Check Point & Correction Remove the cassette and then try to reinsert, remove it several times. If the indication is still shown in the viewfinder, use a cleaning tape to clean the heads and replace the cassette.
-
Page 61: Specifications
VM-E53A: 5.0W (when recording) VM-E55A: 5.3W (when recording) 3-9/16" W x 4-9/16" H x 8-1/16" D (91mm x 116mm x VM-E53A: 1.6 lbs (710g) without battery pack, lens lens cap or cassette VM-E55A: 1.6 lbs (720g) without battery pack, lens hood, lens cap or cassette 32°F ~ 104°F... -
Page 62: Accessories Add Excitement
Accessories Add Excitement Hitachi Home Electronics (America), Inc. Hitachi has made every effort to assure you hours of trouble free operation from your unit. However, should you require service, a network of Hitachi Authorized Service Facilities has been established in all 50 states and Puerto Rico. Each facility will provide you with convenient and expedient assistance. - Page 63 Complete the order form on page 53. Detach it and send it to the following address with your credit card information, money order, or check (in U.S. currency and payable to Hitachi Home Electronics (America), Inc.) Hitachi Home Electronics (America), Inc.
Need help?
Do you have a question about the VM-E53A and is the answer not in the manual?
Questions and answers
My VM-e55a has power to the cassette door and light , but nothing else works is there a fuse somewhere?