
Related Manuals for Doss DHF52PC

Summary of Contents for Doss DHF52PC
-
Page 1: Installation And Operation
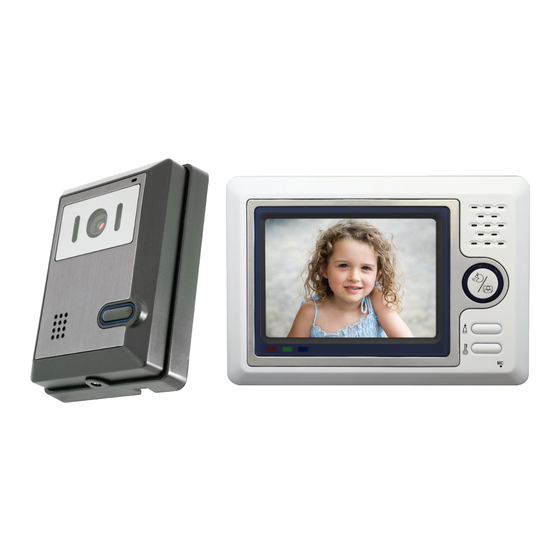
Installation and Operation Manual Camera UP TO DOOR MONITOR www.doss.com.au... - Page 2 Now you can communicate with whoever is at the door without having to open it! The DHF52PC has a 5” TFT-LCD colour monitor with a simple one button control. Visitors press the doorbell on the camera and the monitor will ring to let you know someone is at the door.
-
Page 3: Table Of Contents
Contents Features System Outline Installation instructions Preparing for installation Warnings Monitor & Camera Installation One-to-One Installation One-to-Two Installation Two-to-One Installation Two-to-Two Installation Basic Operations Answering Calls Monitoring Outdoors Adjusting Volume and Brightness Panic and Door Lock Buttons One-to-One Operating Instructions Two-to-One Operating Instructions Two-to-Two Operating Instructions Specifications... -
Page 4: Features
Features Video Door phone Kit ■ Easy installation and operation ■ Ideal solution for home video security ■ See who’s at the door before opening it! ■ CCD Camera ■ Large 5” colour screen ■ IR illumination on camera ■ Video and two way intercom ■... -
Page 5: System Outline
System Outline Monitor Loudspeaker 5” TFT-LCD display Handsfree/ Monitor button Panic button Unlock door button Microphone ■ Use the supplied AV lead to be able to connect your camera to any TV or external display. On your monitor, connect the 3.5mm jack to the output labelled “AV Out”. Using the two RCA leads, connect the yellow lead for video, white for audio. -
Page 6: Installation Instructions
Installation Instructions Preparing for installation Before you being the installation of your system, please ensure you have the following parts on hand. Monitor Camera Cable Support for Power supply Screws wall mount Warnings Do not place the monitor near strong Turn off power if monitor is not going to magnetic fields, such as near TVs, video be used for a long period of time. -
Page 7: Monitor & Camera Installation
Monitor Installation Instructions Follow the diagram below to install your monitor. The optimum height for the monitor installation is between 145 cm and 160 cm based on the centre of Using 2 screws fix the wall plate to the wall and attach the LCD screen. -
Page 8: One-To-One Installation
One to One Connection Instructions Follow the diagram below to setup your intercom. WARNING ■ Make sure power is disconnected to the unit before you connect the monitor to the camera! One to Two Connection Instructions Follow the diagram below to setup your intercom. -
Page 9: Two-To-One Installation
Two to One Connection Instructions Follow the diagram below to setup your intercom. -
Page 10: Two-To-Two Installation
Two to Two Connection Instructions Follow the diagram below to setup your intercom. -
Page 11: Basic Operations
Basic Operation Answering calls Visitor presses The picture of your visitor Press the “Handsfree” button the “Call” button is displayed on the monitor on your monitor to initiate your on the camera screen conversation. Next press the “Unlock” button to have the door automatically open. -
Page 12: One-To-One Operating Instructions
One to One Operation Instructions... -
Page 13: Two-To-One Operating Instructions
Two to One Operation Instructions... -
Page 14: Two-To-Two Operating Instructions
Two to Two Operation Instructions... -
Page 15: Specifications
Specifications Monitor DC 13.5 V 1.5Amp Camera... - Page 17 www.doss.com.au...
Need help?
Do you have a question about the DHF52PC and is the answer not in the manual?
Questions and answers
How do you make the call bell louder
To increase the volume of the Doss DHF52PC call bell, adjust the volume level using the control located on the bottom of the monitor.
This answer is automatically generated