Table of Contents
Advertisement
Quick Links
TABLE OF CONTENTS
Operation and maintenance manual
Before using the machine, please read the attached operating instructions.
Carefully read the safety rules
Mode d'emploi
Veuillez lire attentivement le mode d'emploi
(notamment les consignes de sécurité) avant d'utiliser l'appareil.
FOR HOUSEHOLD USE ONLY
USAGE DOMESTIQUE SEULEMENT
Espresso Italia PTY LTD
www.espressoitalia.com.au
Freecall 1300 660 976
Advertisement
Table of Contents

Related Manuals for Saeco PRIMEA TOUCH CAPPUCCINO


Summary of Contents for Saeco PRIMEA TOUCH CAPPUCCINO
- Page 1 TABLE OF CONTENTS Operation and maintenance manual Before using the machine, please read the attached operating instructions. Carefully read the safety rules Mode d'emploi Veuillez lire attentivement le mode d'emploi (notamment les consignes de sécurité) avant d'utiliser l'appareil. FOR HOUSEHOLD USE ONLY USAGE DOMESTIQUE SEULEMENT Espresso Italia PTY LTD www.espressoitalia.com.au...
-
Page 2: Important Safeguards
IMPORTANT SAFEGUARDS When using electrical appliances, basic safety precautions should always be followed to reduce the risk of fire, electric shock, and/or injury to persons, including the following: 1 Read all instructions and information in this instruction book and any other literature included in this carton referring to this product before operating or using this appliance. - Page 3 CAUTION This appliance is for household use only. Any servicing, other than cleaning and user maintenance, should be performed by an authorized service centre. Do not immerse machine in water. To reduce the risk of fire or electric shock, do not disassemble the machine. There are no parts inside the machine serviceable by the user.
-
Page 4: Table Of Contents
TABLE OF CONTENTS GENERAL INFORMATION..........................3 MACHINE ................................4 ..................................4 ACCESSORIES INSTALLATION..............................5 ................................5 STARTING THE MACHINE ............................6 MANUAL PRIMING OF THE WATER CIRCUIT ............................6 SETTING THE LANGUAGE AND THE CLOCK " " ................................7 AQUA PRIMA FILTER DISPLAY .................................8 ................................8 CHOOSE COFFEE AROMA ADJUSTMENTS...............................9 ................................9 COFFEE INTENSITIY... -
Page 5: General Information
GENERAL INFORMATION The coffee machine is intended for preparing espresso by using either coffee beans or ground coffee. It includes an automatic device for preparing milk beverage and a hot water dispenser. The machine is elegantly designed for domestic use and is not suitable for continuous heavy duty or professional use. -
Page 6: Machine
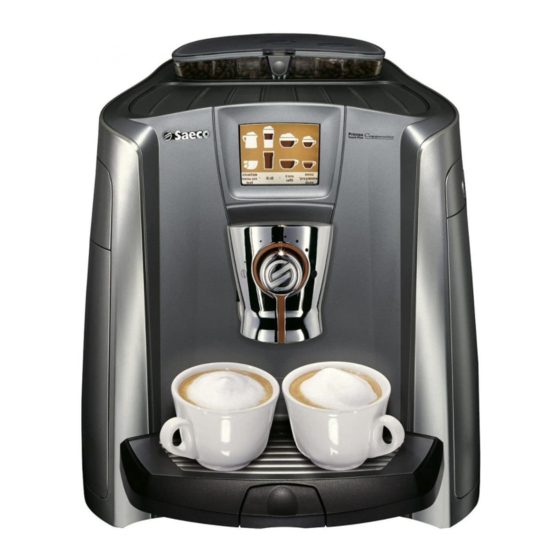
MACHINE Coffee bean hopper Open coffee bean hopper button Coffee bean hopper cover Cup warming plate Compartment for pre- ground coffee TOUCH SCREEN Display Main switch Service door Dispensing head Coffee grounds drawer Drip tray + grill and fl oat Compartment for milk container Button for raising/lowering... -
Page 7: Installation
INSTALLATION STARTING THE MACHINE Make sure that the main power button is not switched to the “ON” position. Press the button on the coffee Close the cover pushing it down Remove the water tank. hopper to open the cover. Fill the completely. -
Page 8: Manual Priming Of The Water Circuit
INSTALLATION MANUAL PRIMING OF THE WATER CIRCUIT Manually prime the water circuit only when the following display appears. priming the machine avvio Note: fi rst make sure that the water tank is full. priming the machine start Position a container under the hot Press the display once and the When the prime circuit cycle is water spout (it is possible that... -
Page 9: Aqua Prima " Filter
«AQUA PRIMA» FILTER To improve the quality of the water used, install the "Aqua Prima" fi lter. After installation, go to the fi lter activation program (see programming). In this mode the machine advises the user when the fi lter must be replaced. Remove the "Aqua Prima"... -
Page 10: Display
DISPLAY It is possible to change the type of display and choose between " icon format" and "text format" ICON FORMAT TEXT FORMAT latte espresso cappuccino milk macchiato macchiato medium medium strong long coffee espresso water coffee medium medium strong program- program- show icon... -
Page 11: Adjustments
The SBS system has been carefully designed to give your coffee the intense taste you desire. Simply turn the dial and you will notice that the coffee goes from mild intensity to strong intensity. SBS – SAECO BREWING SYSTEM MEDIUM... -
Page 12: Beverage Dispensing
BEVERAGE DISPENSING DISPENSING COFFEE, HOT WATER AND MILK CAN BE INTERRUPTED AT ANY TIME BY SELECTING THE "STOP ... DISPENSING" BUTTON. THE DISPENSED MILK CAN REACH HIGH TEMPERATURES: THERE IS A DANGER OF SCALDING. DO NOT TOUCH IT WITH BARE HANDS. THE MILK USED MUST HAVE BEEN PROPERLY PRESERVED. -
Page 13: Dispensing Beverages With Ground Coffee
DISPENSING BEVERAGES WITH GROUND COFFEE Pre-ground coffee must be poured into the appropriate compartment positioned next to the coffee bean hopper. Pour in only coffee ground for espresso machines and never coffee beans or instant coffee. (see the "Beverage programming" chapter on page 15). WARNING: PUT PRE-GROUND COFFEE IN THE COMPARTMENT ONLY WHEN YOU WISH TO DISPENSE THIS TYPE OF BEVERAGE. -
Page 14: Hot Water Dispensing
BEVERAGE DISPENSING HOT WATER DISPENSING WHEN THE HOT WATER BEGINS TO DISPENSE, SHORT SPURTS OF HOT WATER MAY BE DISPENSED WHICH POSE A RISK OF SCALDING. THE HOT WATER SPOUT CAN REACH HIGH TEMPERATURES: AVOID TOUCHING IT WITH BARE HANDS. To dispense another cup of water hot water, repeat this... -
Page 15: Dispensing Hot Milk
If the user wishes to continue preparing other drinks the machine will keep the “milk rinsing” signal active. program- milk show icon my custom ming After 20 minutes of inactivity, the machine requires the user to explanation cleaning coffee menu perform a rinsing cycle as described in Step 7. -
Page 16: Espresso Macchiato
BEVERAGE DISPENSING ESPRESSO MACCHIATO Fill the milk container espresso macchiato stop stop milk coffee dispensing dispensing program- show icon my custom ming explanation coffee menu Espresso macchiato begins Press the icon once for 1 cup and The machine begins grinding the twice for 2 cups. -
Page 17: Beverage Programming
BEVERAGE PROGRAMMING BEVERAGE PROGRAMMING MENU Each beverage can be programmed according to your individual taste. Customization is shown on the display with the addition of an asterisk. program- show icon my custom ming explanation coffee menu Once a beverage has been customized it will only dispense that type of beverage. -
Page 18: Programming Milk Beverages
BEVERAGE PROGRAMMING light custom coffee espresso After pressing the start! espresso amount start! button, the brew cycle will medium start. preground stop strong coffee dispensing restore save settings back settings Pressing start! allows the The machine automatically starts and finishes brewing the coffee, according to machine to brew coffee. - Page 19 custom light my latte custom my latte coffee milk amount macchiato macchiato After pressing the start! amount start! button, the brew cycle will medium start. stop preground stop strong coffee milk dispensing dispensing restore save settings back settings Pressing start! allows the The machine automatically starts and finishes dispensing the milk, machine to start the brewing...
-
Page 20: Machine Settings
PROGRAMMING THE MACHINE Some of the machine’s functions can be programmed to customize operations according to your own requirements. program- show icon my custom ming explanation coffee menu Press the "programming menu" button. The programming menu will access: In depth beverage programming Programming the machine machine beverage... -
Page 21: Language Menu
“LANGUAGE” MENU This function was described at the For changing the language of the display. beginning of the manual. This setting is of fundamental importance for correctly adjusting language deutsch Italiano (i) the parameters of the machine according to the country where the language english français... -
Page 22: Water Hardness Menu
PROGRAMMING THE MACHINE “WATER HARDNESS” MENU To adjust the level of water hardness, shown on a scale of 1 to 4. The machine is preset at a hardness value of 3. Immerse the water hardness strip included in Check the value. the welcome pack for one second in water. -
Page 23: Cup Warming Plate Menu
“CUP WARMING PLATE” MENU To activate the cup warming plate on the upper part of the machine. In this menu you can: keep the cup warming plate always warmer always on. warmer keep the cup warming plate off in keep the cup warming plate standby off when the machine is in always off. -
Page 24: Beverage Settings
PROGRAMMING THE MACHINE BEVERAGE SETTINGS To adjust the general brew parameters of the various beverages containing coffee, press the “beverage settings” button on the main menu. espresso espresso macchiato beverage latte coffee macchiato settings long cappuccino coffee back to go back menu For every single beverage, you can adjust: temperature... -
Page 25: Aroma Adjustment For Coffee Brewing
“AROMA” ADJUSTMENT FOR COFFEE BREWING To set the “Aroma” function, that is to say the quantity of coffee to be ground, and to set the use of pre-ground coffee. You can have your beverage with the quantity of coffee you desire or you can choose to prepare it with decaffeinated coffee by using the “preground”... -
Page 26: Additional Functions
PROGRAMMING THE MACHINE ADDITIONAL FUNCTIONS There are some additional functions of the machine. Pressing the “extras” button allows you to access the menu and the following message will appear on the display. In this menu you can: access the menu where some of coffee activate the “demo”... - Page 27 If, for example, you want to taste a typical American coffee, you must press the “American coffee” button. In this case, the following message appears in the display. american coffee the position of the SBS knob is shown with the best cup size to use Pressing the button starts the brewing process.
-
Page 28: Demo Mode
PROGRAMMING THE MACHINE “DEMO” MODE This function shows the machine’s potential. Note: When this function is activated, the machine is in stand-by and all the functions are disabled. The “demo” mode is saved even when the machine is turned off by the main switch. -
Page 29: Maintenance
MAINTENANCE To clean/maintain all of the machine’s internal circuits, press the “maintenance” button on the main menu. In this menu you can: lock the Touch Screen (to begin the wash cycle of the brew coffee lock preform cleaning of the display). cleaning group. -
Page 30: Milk Circuit Wash Cycle
PROGRAMMING THE MACHINE MILK CIRCUIT WASH CYCLE To rinse the machine’s internal circuits used for preparing milk. This cycle is proposed after 14 days from the fi rst dispensing of a milk-based beverage. After 14 days, the “milk cleaning” message starts fl ashing (see page 13). Perform the wash cycle as described in this section. program- milk show icon... - Page 31 Fill the milk container with Insert the container into the Position an adequately sized fresh water up to the «max» drawer and close the drawer. container under the milk spout. level. The second milk container may be used as well. milk cleaning cycle milk cleaning cycle milk cleaning cycle...
- Page 32 PROGRAMMING THE MACHINE milk cleaning cycle milk cleaning cycle rinse the milk container rinsing... Wait… When the rinse cycle has fi nished Remove the milk container. the above message will appear. milk cleaning cycle Perform another rinse cycle as shown previously. fill milk container with cold water When fi...
-
Page 33: Coffee Circuit Cleaning Cycle (Brew Group Wash Cycle)
It is advisable to perform this wash cycle after 500 coffee brewing cycles, or monthly. Packages of Saeco detergent tablets may be purchased at your local dealer or by Authorized Service Centres. Note: before performing this function make sure that: 1. -
Page 34: Descaling
WARNING! NEVER USE VINEGAR AS A DESCALER. Saeco descaler is recommended, however you can use a non-toxic and/or non-harmful descaling product for coffee machines, commonly available online or in coffeeshops. The solution used must be disposed of according to the manufacturer’s instructions and/or according to the regulations enforced in the country of use. - Page 35 In order to run a descaling cycle before the machine indicates the necessity to do so, press the button "descaling cycle" and then "start descaling" to start the descaling cycle. descaling cycle descaling start please wait descaling cycle descaling... pause descaling The machine begins to dispense the descaling solution through the hot water spout.
-
Page 36: Clock Settings
PROGRAMMING THE MACHINE CLOCK SETTINGS To adjust the current date and time, the timer for stand-by (energy savings) and the times for automatically turning on and turning off the machine. Press the "clock settings" button on the main menu. In this menu you can: time - the current time settings... -
Page 37: Automatic Timer Settings
Time format To set the time view mode. This setting adjusts all clock functions to either “am/pm” or “24 hour” formats. To set the time view mode, press the “time format” button. The modificatino is immediately applied and in small writing appears ‘am/pm”... - Page 38 PROGRAMMING THE MACHINE Setting an interval for turning on the machine In order to program an interval for turning on the machine, press the button for the interval that you wish to set. setting 2 Adjust the hour to turn on by 08h (am) on 12:00 pm pressing + or -...
-
Page 39: Energy Saving Settings
ENERGY SAVING SETTINGS To set after what duration of time, from the last dispensed beverage, the machine will go into stand-by mode. The default setting is "after 3 hours". energy after after saving 30 min 15 min setting standby Select the desired time to setting activate stand-by. -
Page 40: Special
PROGRAMMING THE MACHINE SPECIAL This menu allows you to access special functions present on the machine. Press the "specials" button on the main menu. factory settings specials back to go back menu FACTORY SETTINGS The function for restoring all the factory settings is contained in this menu. This function is particularly important for restoring the original settings. -
Page 41: Cleaning And Maintenance
CLEANING AND MAINTENANCE GENERAL MACHINE CLEANING The cleaning described below must be performed once a week. Note: Always use fresh water. If water is in the machine for several days, empty tank and refi ll it. WARNING! Do not immerse the machine in water. Refer to the instructions for maintenance and cleaning of the cappuccinatore on pages 40-41. -
Page 42: Milk Container Maintenance And Cleaning
CLEANING AND MAINTENANCE MILK CONTAINER MAINTENANCE AND CLEANING The milk container and the cappuccinatore have been designed to optimize the milk. Their constant cleaning and maintenance will allow savouring excellent milk-based beverages. The cappuccinatore has to be completely cleaned at least once a week. QUICK MAINTENANCE OF THE CAPPUCCINATORE Milk may not be frothed optimally. - Page 43 THOROUGH MAINTENANCE OF THE CAPPUCCINATORE Thoroughly wash the cappuccinatore at least once a week. The components may be washed with household detergents. Remove the cappuccinatore. Separate the upper part of the Remove the cover. cappuccinatore from the lower part. Remove the cap from the lower Wash all components.
-
Page 44: Cleaning The Brew Group
CLEANING AND MAINTENANCE CLEANING THE BREW GROUP The Brew Group must be cleaned at least once a week. Lubricate the Brew Group after approximately 500 brewing cycles. The grease for the lubrication of the Brew Group may be purchased by Authorized Service Centres. Wash the brew group with warm water. -
Page 45: Grinder Maintenance
Apply the grease evenly. Insert the washed and dried Brew Insert the coffee grounds drawer. Group. DO NOT PRESS THE Close the service door. “PUSH” BUTTON. GRINDER MAINTENANCE After approximately 2000 grinding cycles, the grinder needs a slight adjustment to ensure it is running in peak condition. -
Page 46: Error Codes
ERROR CODES GUIDE MESSAGE THAT APPEARS HOW TO REMOVE THE MESSAGE restart the machine Turn off and after 30 minutes turn the machine on again to restore normal operation. call assistance Problem that requires the intervention of the customer service center. insert drip tray Insert drip tray under the brew group. -
Page 47: Www.espressoitalia.com.au
ERROR CODES / TECHNICAL DATA GUIDE MESSAGE THAT APPEARS HOW TO REMOVE THE MESSAGE change acqua prima filter The Aqua Prima filter must be replaced in the following cases: 1. 60 liters of water has been dispensed; 2. 90 days have passed since its installation; 3. -
Page 48: Safety Rules
SAFETY RULES IN CASE OF EMERGENCY Immediately unplug the cord from the outlet. ONLY USE THE APPLIANCE • Indoors. • For preparing coffee, hot water and for foaming milk. • For domestic use. • By adults in non altered psycho-physical conditions. PRECAUTIONS FOR THE USE OF THE MACHINE •... -
Page 49: Replacement Parts
• Do not insert objects through the appliance’s openings. (Danger! Electrical Current!). • Do not pull out the plug by yanking on the power cord or touching it with wet hands. • Warning. Danger of burning when in contact with hot water, steam and the hot water spout. FAILURES •...