
Related Manuals for Saeco IDEA


Summary of Contents for Saeco IDEA
- Page 1 Automatic espresso coffee machine Model IDEA Type: CAP002/A/B Espresso Italia PTY LTD www.espressoitalia.com.au Freecall 1300 660 976...
-
Page 2: Table Of Contents
• For any particular need contact the Distributor or your Country Importer (if any) or the Constructor. • All the rights of this brochure are reserved to SAECO Internatioal Group. Any copy or even partial divulgation, not expressively authorized in writing, are strongly forbidden. -
Page 3: Machine Composition
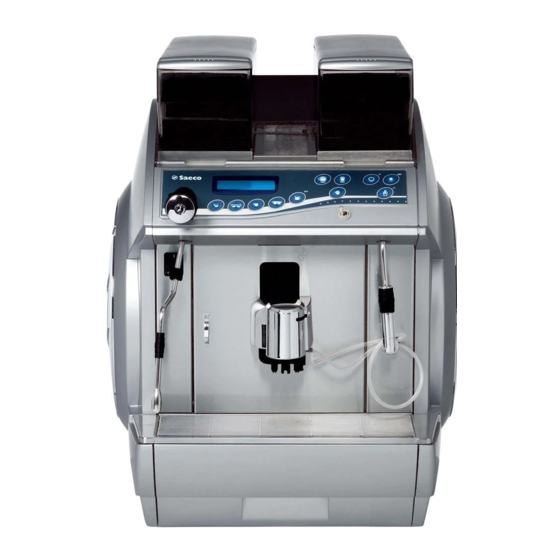
English 1 - MACHINE COMPOSITION NOTE - If not differently indicated by the text, the position numbers of the parts of the machine always refer to this figure. F. 1 CE label Dump box Left hand side panel Steam spout (except COFFEE set-up) Glass Main switch Back panel... -
Page 4: Reference Notes
English - Brewing parameters adjustment. 2 - REFERENCE NOTES - Grounds and liquids tray draining. - External cleaning of the machine. The use of this machine is strictly forbidden to Abbreviations children, teenagers and non self-sufficient persons. Figure Page P r . = Paragraph Table 4 - MAINTENANCE... -
Page 5: General Precautionary Measures
English • The routine maintenance has to be carried out only by 8 - INFORMATION ABOUT competent or adequately trained personnel, having the necessary psychophysical requirements, in the whole THE MACHINE respect of the instructions mentioned below and according to the current Safety and Health Regulations. Identification data •... -
Page 6: Brew Group (F. 2)
English Brew group 9 - SAFETY DEVICES The position of this group (22) can be adjusted according to the height of the container used . It is possible to position the brew group on the top or on the bottom. Many brewing heights can be thus obtained. -
Page 7: Location Notes
English 10.3 Water connection 10 - INSTALLATION Warning! Water hardness should not be less than 8°F. We recommend that the machine be supplied with water treated 10.1 Location notes by a descaling device, particularly for water with high content of calcium and magnesium (hard water). -
Page 8: Electric Connection
English 10.4 Electric connection • Check if the electric cables of the system are proportioned to the machine power consumption. NOTE - In case of plants with a 400 V two-phase current, use The connection point (electric plug or all-pole switch) must the two phases to supply the machine with 230 V single be located in an easily reachable place, in order to phase current (F. -
Page 9: First Switching-On
English 12.1 Machine statuses 11 - FIRST SWITCHING-ON With regard to the power supply, the machine can have the following statuses: Off and electrically insulated Fill the hopper (6) with the selected coffee beans blend. Main switch (18) and all-pole switch on the ”0“ position Be sure the coffee does not contain foreign bodies which (or plug disconnected). -
Page 10: Control Panel
English 12.5 Control panel MILK MILK CAPP CAPP The brewing buttons have to be pressed for less than 1 second. It switches the machine tem- porarily on (“STANDBY”) F. 11 and confirms the buttons (H - G) selection. COFFEE Brewing obtained from instantly-ground coffee 1 strong coffee •... -
Page 11: Brewing Buttons Programming
English STEAM (Except COFFEE set-up) • Immerse the spout (17) in the beverage to be heated. • Turn the knob counterclockwise (12). When the required temperature is reached, close the knob (clockwise). After every operation, clean the steam spout with a (damp and clean) cloth/sponge from the residues of the previously heated beverage. - Page 12 English COFFEE -Hold- 1 strong coffee Brewing START STOP to program the other coffees follow the above instructions via the following buttons: 2 strong coffees 1 weak coffee and 2 weak coffees COFFEE WITH A DASH OF MILK (7 sec) Hold Hold Brewing...
-
Page 13: Menu Programmable Functions
English 12.7 Menu programmable functions 5 sec. NOTE - The machine allows some adjustments and setting-ups PROGRAMMING through the menu programming, in order to meet all customer requirements. LANGUAGE During the programming the following buttons take on a ITALIANO DEUTSCH different function from the one they usually have during FRANCAIS the use of the machine... - Page 14 English 12.7.1 Description of functions PROGRAMMING LANGUAGE Language can be selected through the “LANGUAGE” menu ITALIANO LANGUAGE DEUTSCH CUP WARMING PLATE FRANCAIS By selecting “ON”, the cup warming plate is switched on together with the machine. ECC. By selecting “OFF”, the cup warming plate remains off. CUP WARMING PLATE GROUND DOSE The quantity of ground coffee, programmed during the installation,...
- Page 15 English NOTE - If the function is disabled the programmed figures remain PROGR. HOT WATER unchanged and ready to be used when the function is re-activated. MILK PROGRAMMING PROGRAMMED CLEANING This function enables the brewing of a small hot water quantity (abt 5 cc), in order to avoid any deposits in the brew group.
- Page 16 English CLOCK TIMES ON/OFF This function enables to program the automatic switching-on and off times over a whole week. By selecting “TIMES ON/OFF”, the cursor blinks on the day to be modified. AUTOM. SWITCHING-ON Enter the day, using the button (down), turning the small letter into a capital one.
-
Page 17: Cream Adjustment
English 12.8 Cream adjustment The quality of the cream in the beverages depends on the use of the adjustment lever (24). • By turning the lever clockwise, there will be a greater quantity of cream. • By turning the lever anti-clockwise, there will be a smaller quantity of cream. -
Page 18: Display Messages
English PUMP ERROR: one of the pumps is damaged. Switch the machine 12.11 Display messages off and call the AUTHORIZED CUSTOMER SERVICE CENTER. NOTE - Here follows a list of alarm messages (in addition to those explained before) that can be displayed and the SENSOR ERROR 01: is displayed when a temperature sensor relative machine conditions. -
Page 19: Routine Maintenance
English 13.1.1 Brew group (F. 15) 13 - ROUTINE The following can be removed: MAINTENANCE the upper protection cover (A), of the dispenser by pulling it outwards; the lower protection cover (D) of the dispenser, by unscrewing the bottom knob; the brew group (C-E) by pulling it outwards;... - Page 20 English 13.1.2 Brew group (F. 16) 13.1.8 Cappuccinatore cleaning Never clean the cappuccinatore when the machine is on Cleaning must be carried out with the group empty. “standby”. • Periodically clean the brew group using the special tablets Every time the CAPPUCCINATORE is used, it must be (Pr.
-
Page 21: Unscheduled Maintenance
English • Remove the coffee beans on the grinder’s top with a vacuum 14 - UNSCHEDULED cleaner. MAINTENANCE NOTE- Unscheduled maintenance includes every repairing or part replacing. The Maintenance Technician is the only person authorized to perform these operations. 14.1 Jamming of the coffee grinder unit F. -
Page 22: Out Of Service
English To re-assemble the coffee grinder unit, do as follows: • Open the bulkhead (A). • Screw fully the adjustment ring nut (F), then unscrew it Before re-operating the machine, a new grind by 1/2 turn. adjustment is required. This 1/2 turn untightening of ring nut is necessary to avoid grinders jamming and damage. -
Page 23: Troubles, Causes And Cures
English 16 - TROUBLES, CAUSES AND CURES Here is a list of the possible machine troubles. The symbol in the “cure” box means that the operation must be carried out by the Maintenance Technician only. CURE T R O U B L E CAUSE Check: The machine does not start...
Need help?
Do you have a question about the IDEA and is the answer not in the manual?
Questions and answers